Gamma Correction
This tutorial demonstrates how to capture a 2D image with a configurable gamma correction.
First, we connect to the camera.
Then we get the gamma as command line argument from user.
We then capture the image with no gamma correction (gamma = 1.0) and with given gamma correction (in this case, gamma = 0.6).
The complete implementation of the function to capture a color image is given below.
cv::Mat captureBGRImage(Zivid::Camera &camera, const double gamma)
{
    std::cout << "Configuring settings" << std::endl;
    const auto settings2D = Zivid::Settings2D{ Zivid::Settings2D::Acquisitions{ Zivid::Settings2D::Acquisition{} },
                                               Zivid::Settings2D::Processing::Color::Gamma{ gamma } };

    std::cout << "Capturing 2D frame" << std::endl;
    const auto frame2D = camera.capture(settings2D);
    const auto image = frame2D.imageRGBA();
    auto bgr = imageToBGR(image);

    return bgr;
}
def _capture_bgr_image(camera: zivid.Camera, gamma: float) -> np.ndarray:
    """Capture and extract 2D image, then convert from RGBA and return BGR.

    Args:
        camera: Zivid Camera handle
        gamma: Gamma correction value

    Returns:
        bgr: BGR image (HxWx3 ndarray)

    """
    print("Configuring Settings")
    settings_2d = zivid.Settings2D(
        acquisitions=[zivid.Settings2D.Acquisition()],
    )
    settings_2d.processing.color.gamma = gamma

    print("Capturing 2D frame")
    with camera.capture(settings_2d) as frame_2d:
        image = frame_2d.image_rgba()
        rgba = image.copy_data()
        bgr = cv2.cvtColor(rgba, cv2.COLOR_RGBA2BGR)
        return bgr
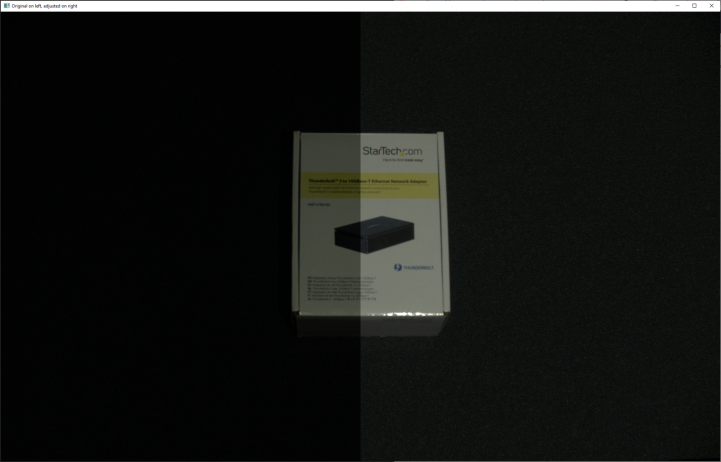
For comparing the images with and without gamma correction, a combined image is created.
cv::Mat combineImages(const cv::Mat &imageOne, const cv::Mat &imageTwo)
{
    cv::Mat combinedImage;
    int height = imageOne.rows;
    int width = imageOne.cols;
    cv::hconcat(
        imageOne(cv::Range(0, height), cv::Range(0, width / 2)),
        imageTwo(cv::Range(0, height), cv::Range(width / 2, width)),
        combinedImage);

    return combinedImage;
}
def _combine_images(image_one: np.ndarray, image_two: np.ndarray) -> np.ndarray:
    """Column-wise concatenate each half of two images together as one.

    Args:
        image_one: Left side of concatenated image
        image_two: Right side of concatenated image

    Returns:
        combined_image: Combined halves of each image

    """
    width = (int)(image_one.shape[1] / 2)
    combined_image = np.hstack([image_one[:, :width], image_two[:, -width:]])

    return combined_image
The images can then be displayed as one image.
The resulting combined image is shown below, with the original half on the left side and the gamma corrected half on the right side.
