Adjusting Filters
Introduction
After exposure values and frames have been found as described in Getting the Right Exposure for Good Point Clouds, it is time to adjust filters. More information about the filters can be found here: Processing Settings.
Reflection filter
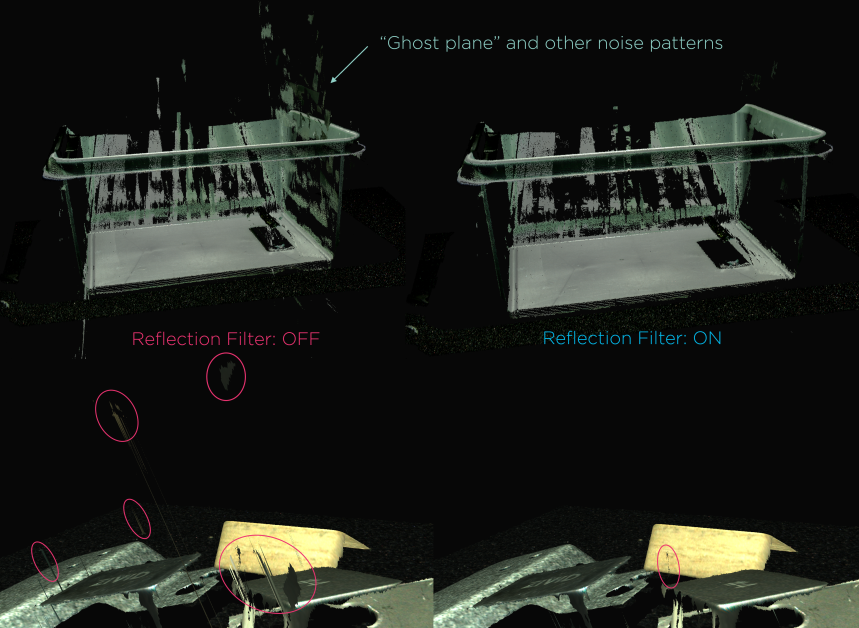
The Reflection filter removes points that Zivid deem as impacted by reflection and thus erroneous. These are typically seen in the point cloud as “ghost planes” - small regions of points floating mid-air that shouldn’t be there.
Note
Enabling the Reflection filter adds certain amount of processing time per acquisition; see below.
The following values should be used:
Value |
Condition |
|
If you know that your scene is not reflective, and you want to optimize acquisition time. |
|
Turn on if you have issues detecting parts that are reflective or are inside a reflective bin. |
Mode |
Pros |
|
|
|
|
|
|
|
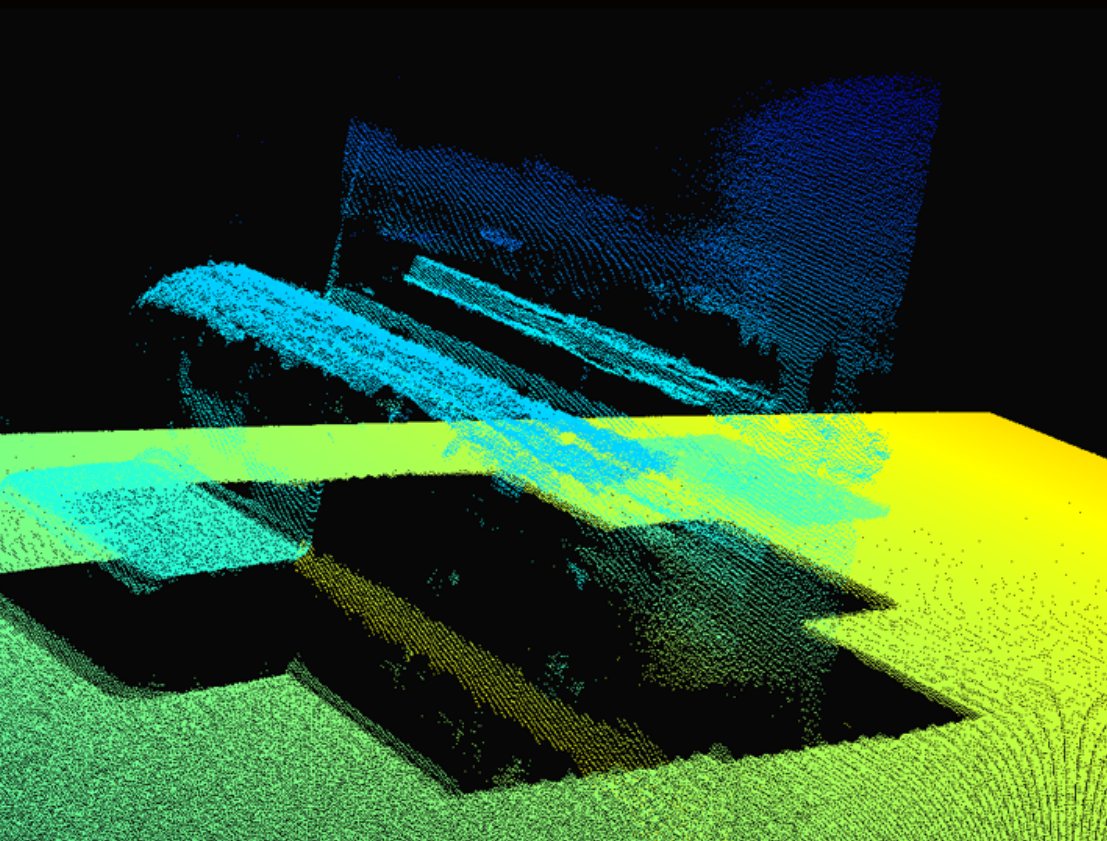
Reflection Filter disabled (ghost plane) |
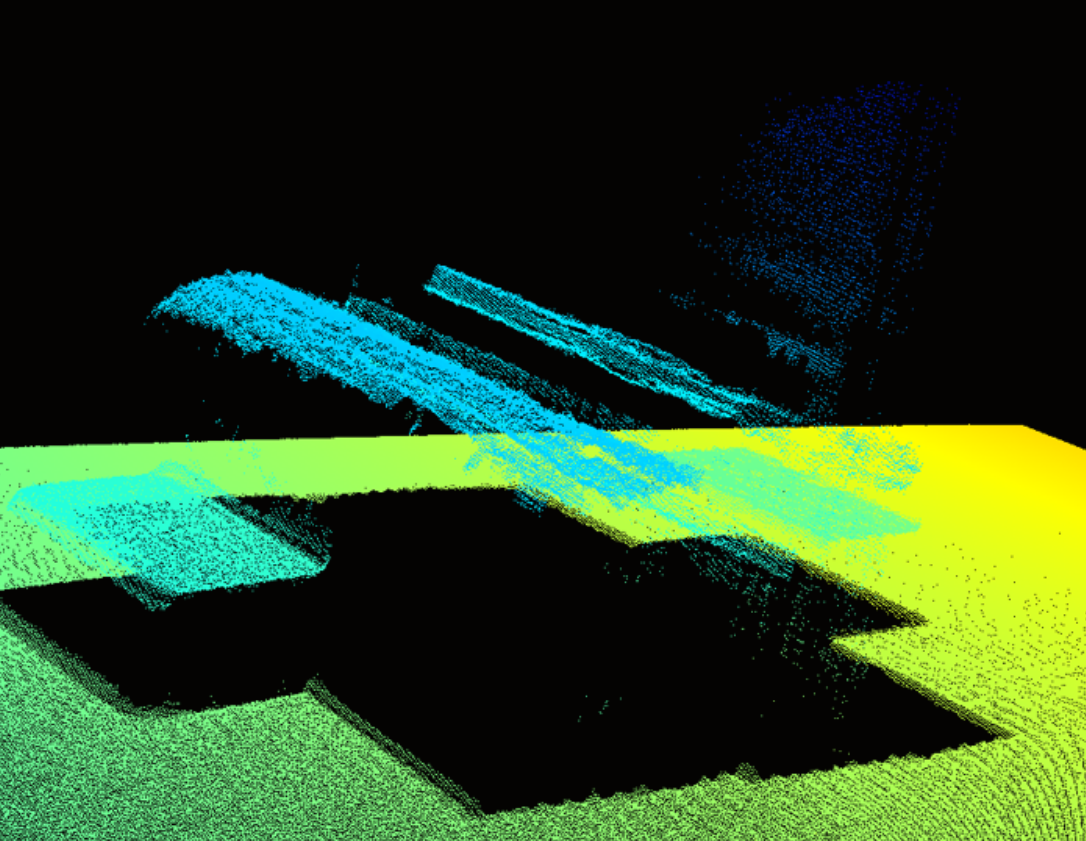
Reflection Filter enabled - Global mode (smaller ghost plane) |
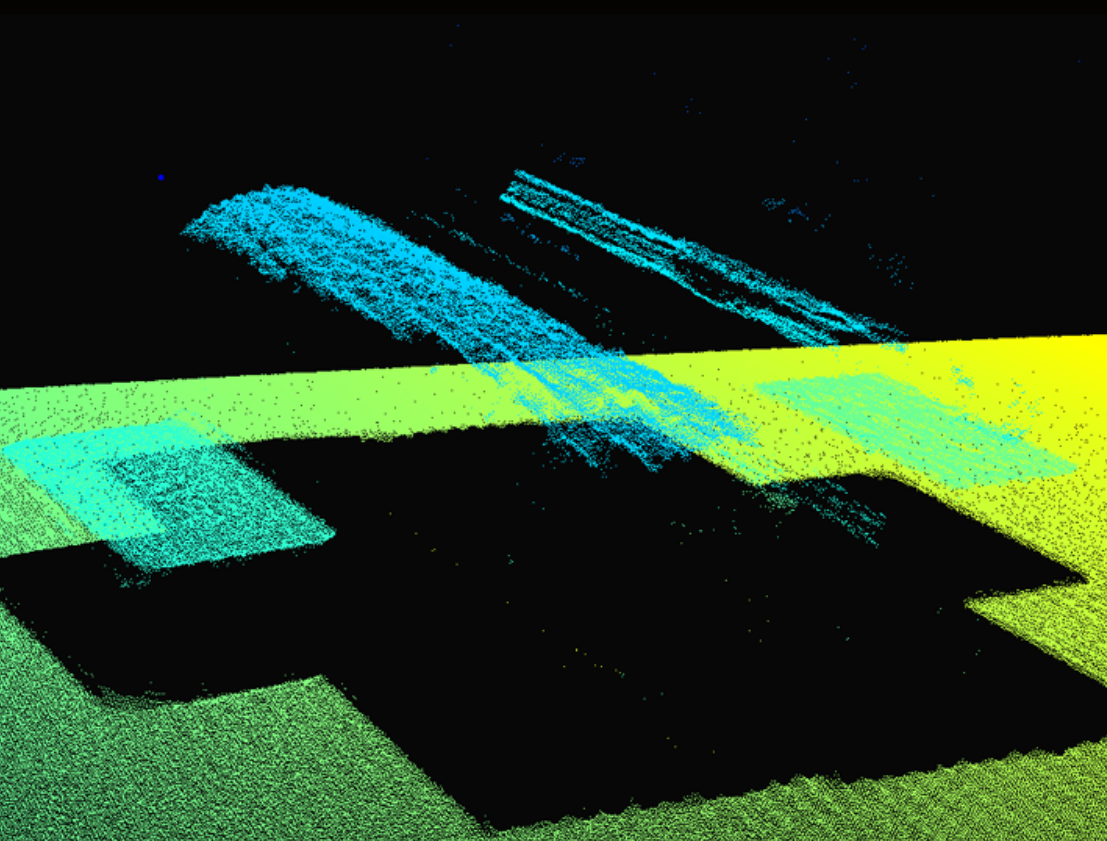
Reflection Filter enabled - Local mode (no ghost plane) |
|
|
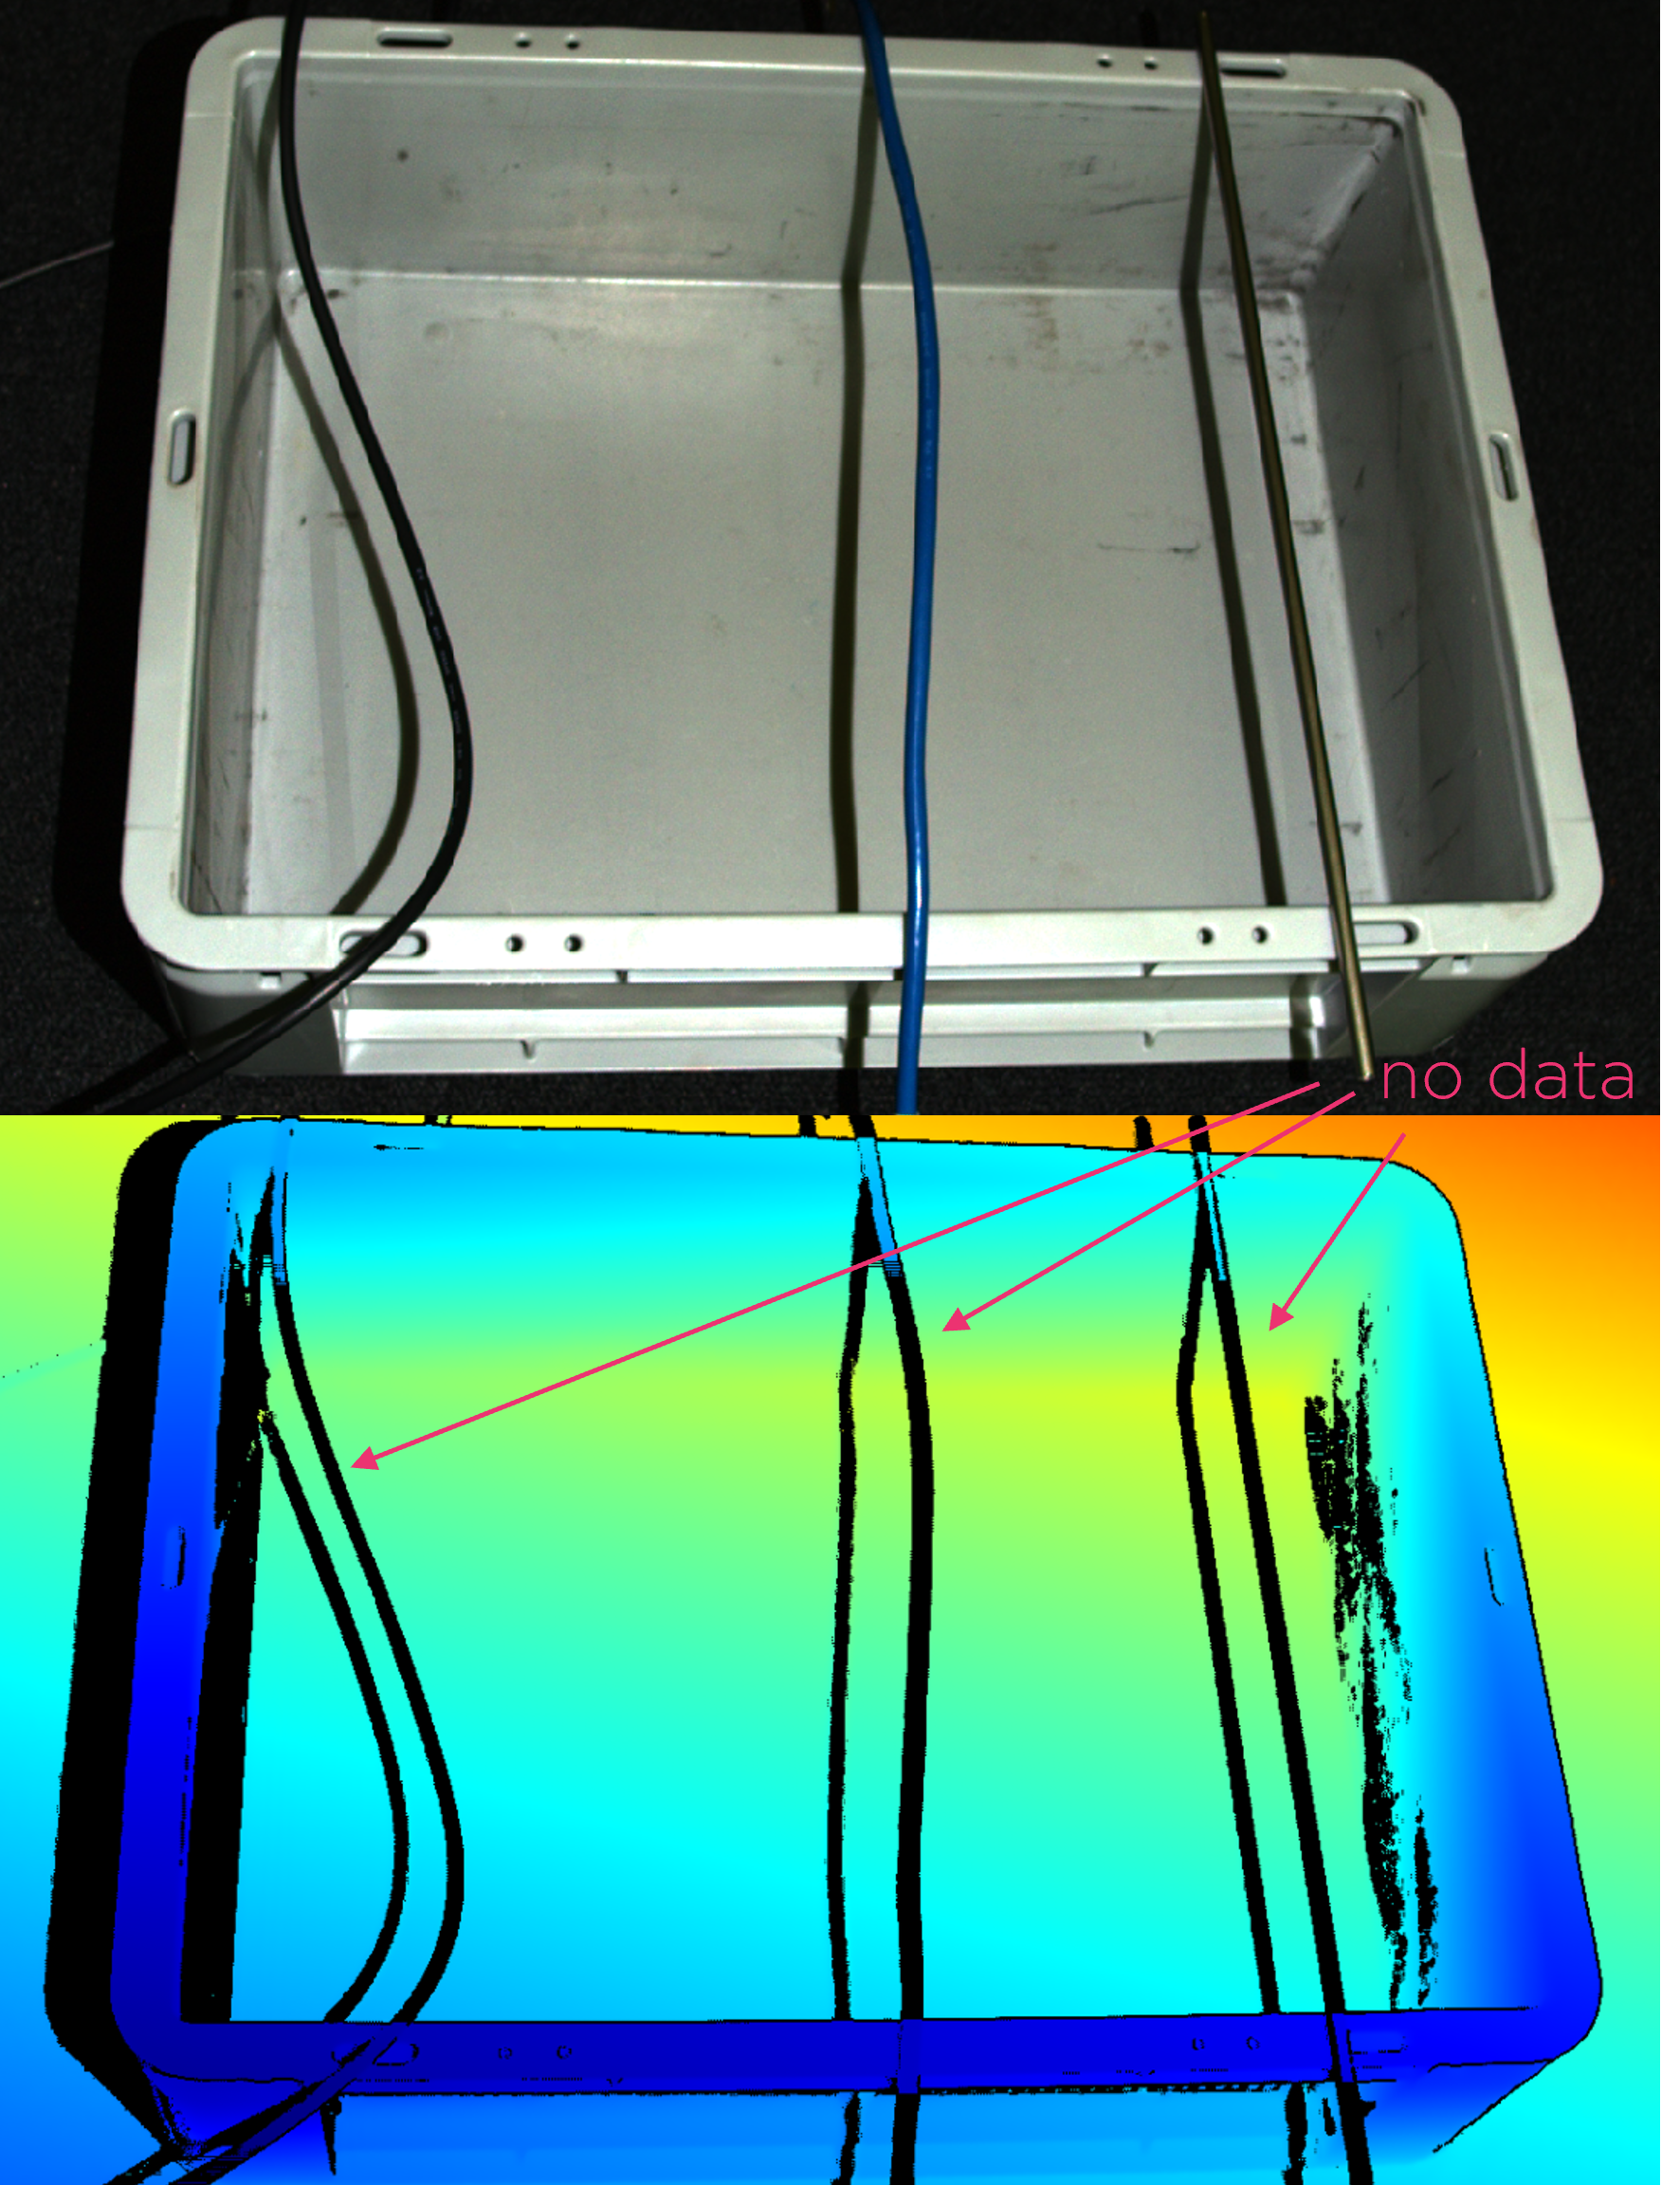
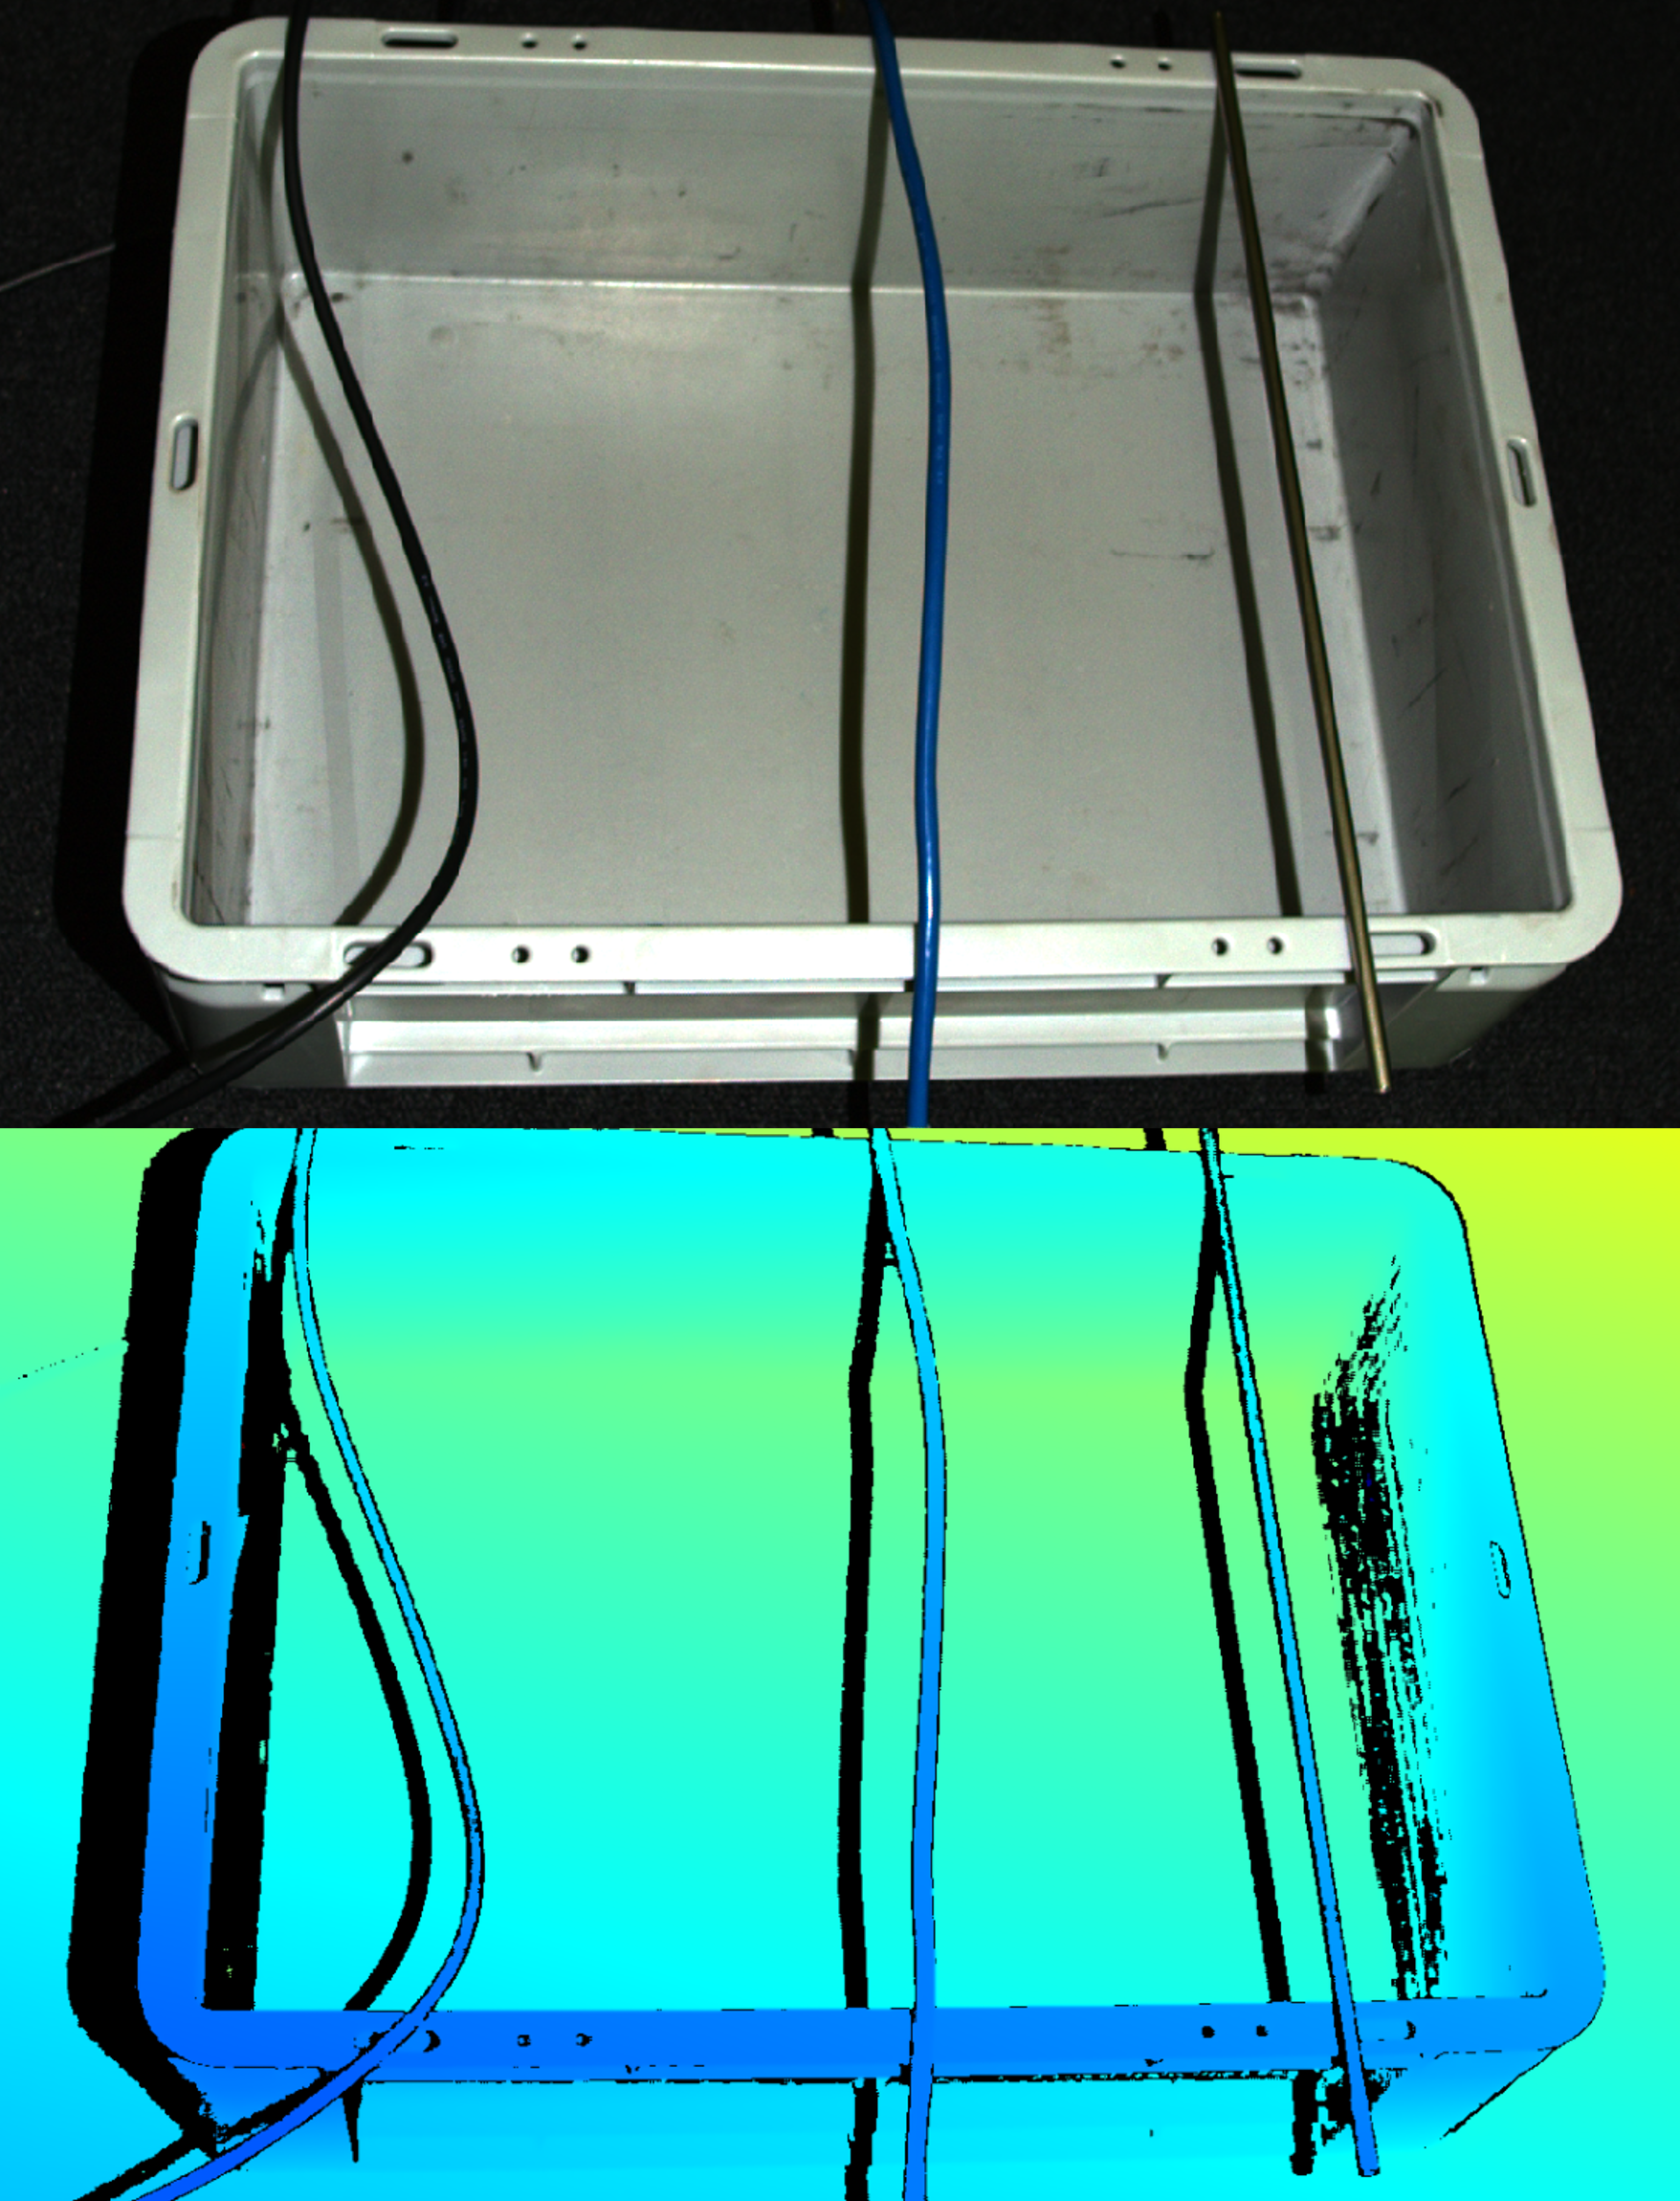
Reflection Filter - Global mode (no data on thin objects) |
Reflection Filter - Local mode (data preserved on thin objects) |
|
|
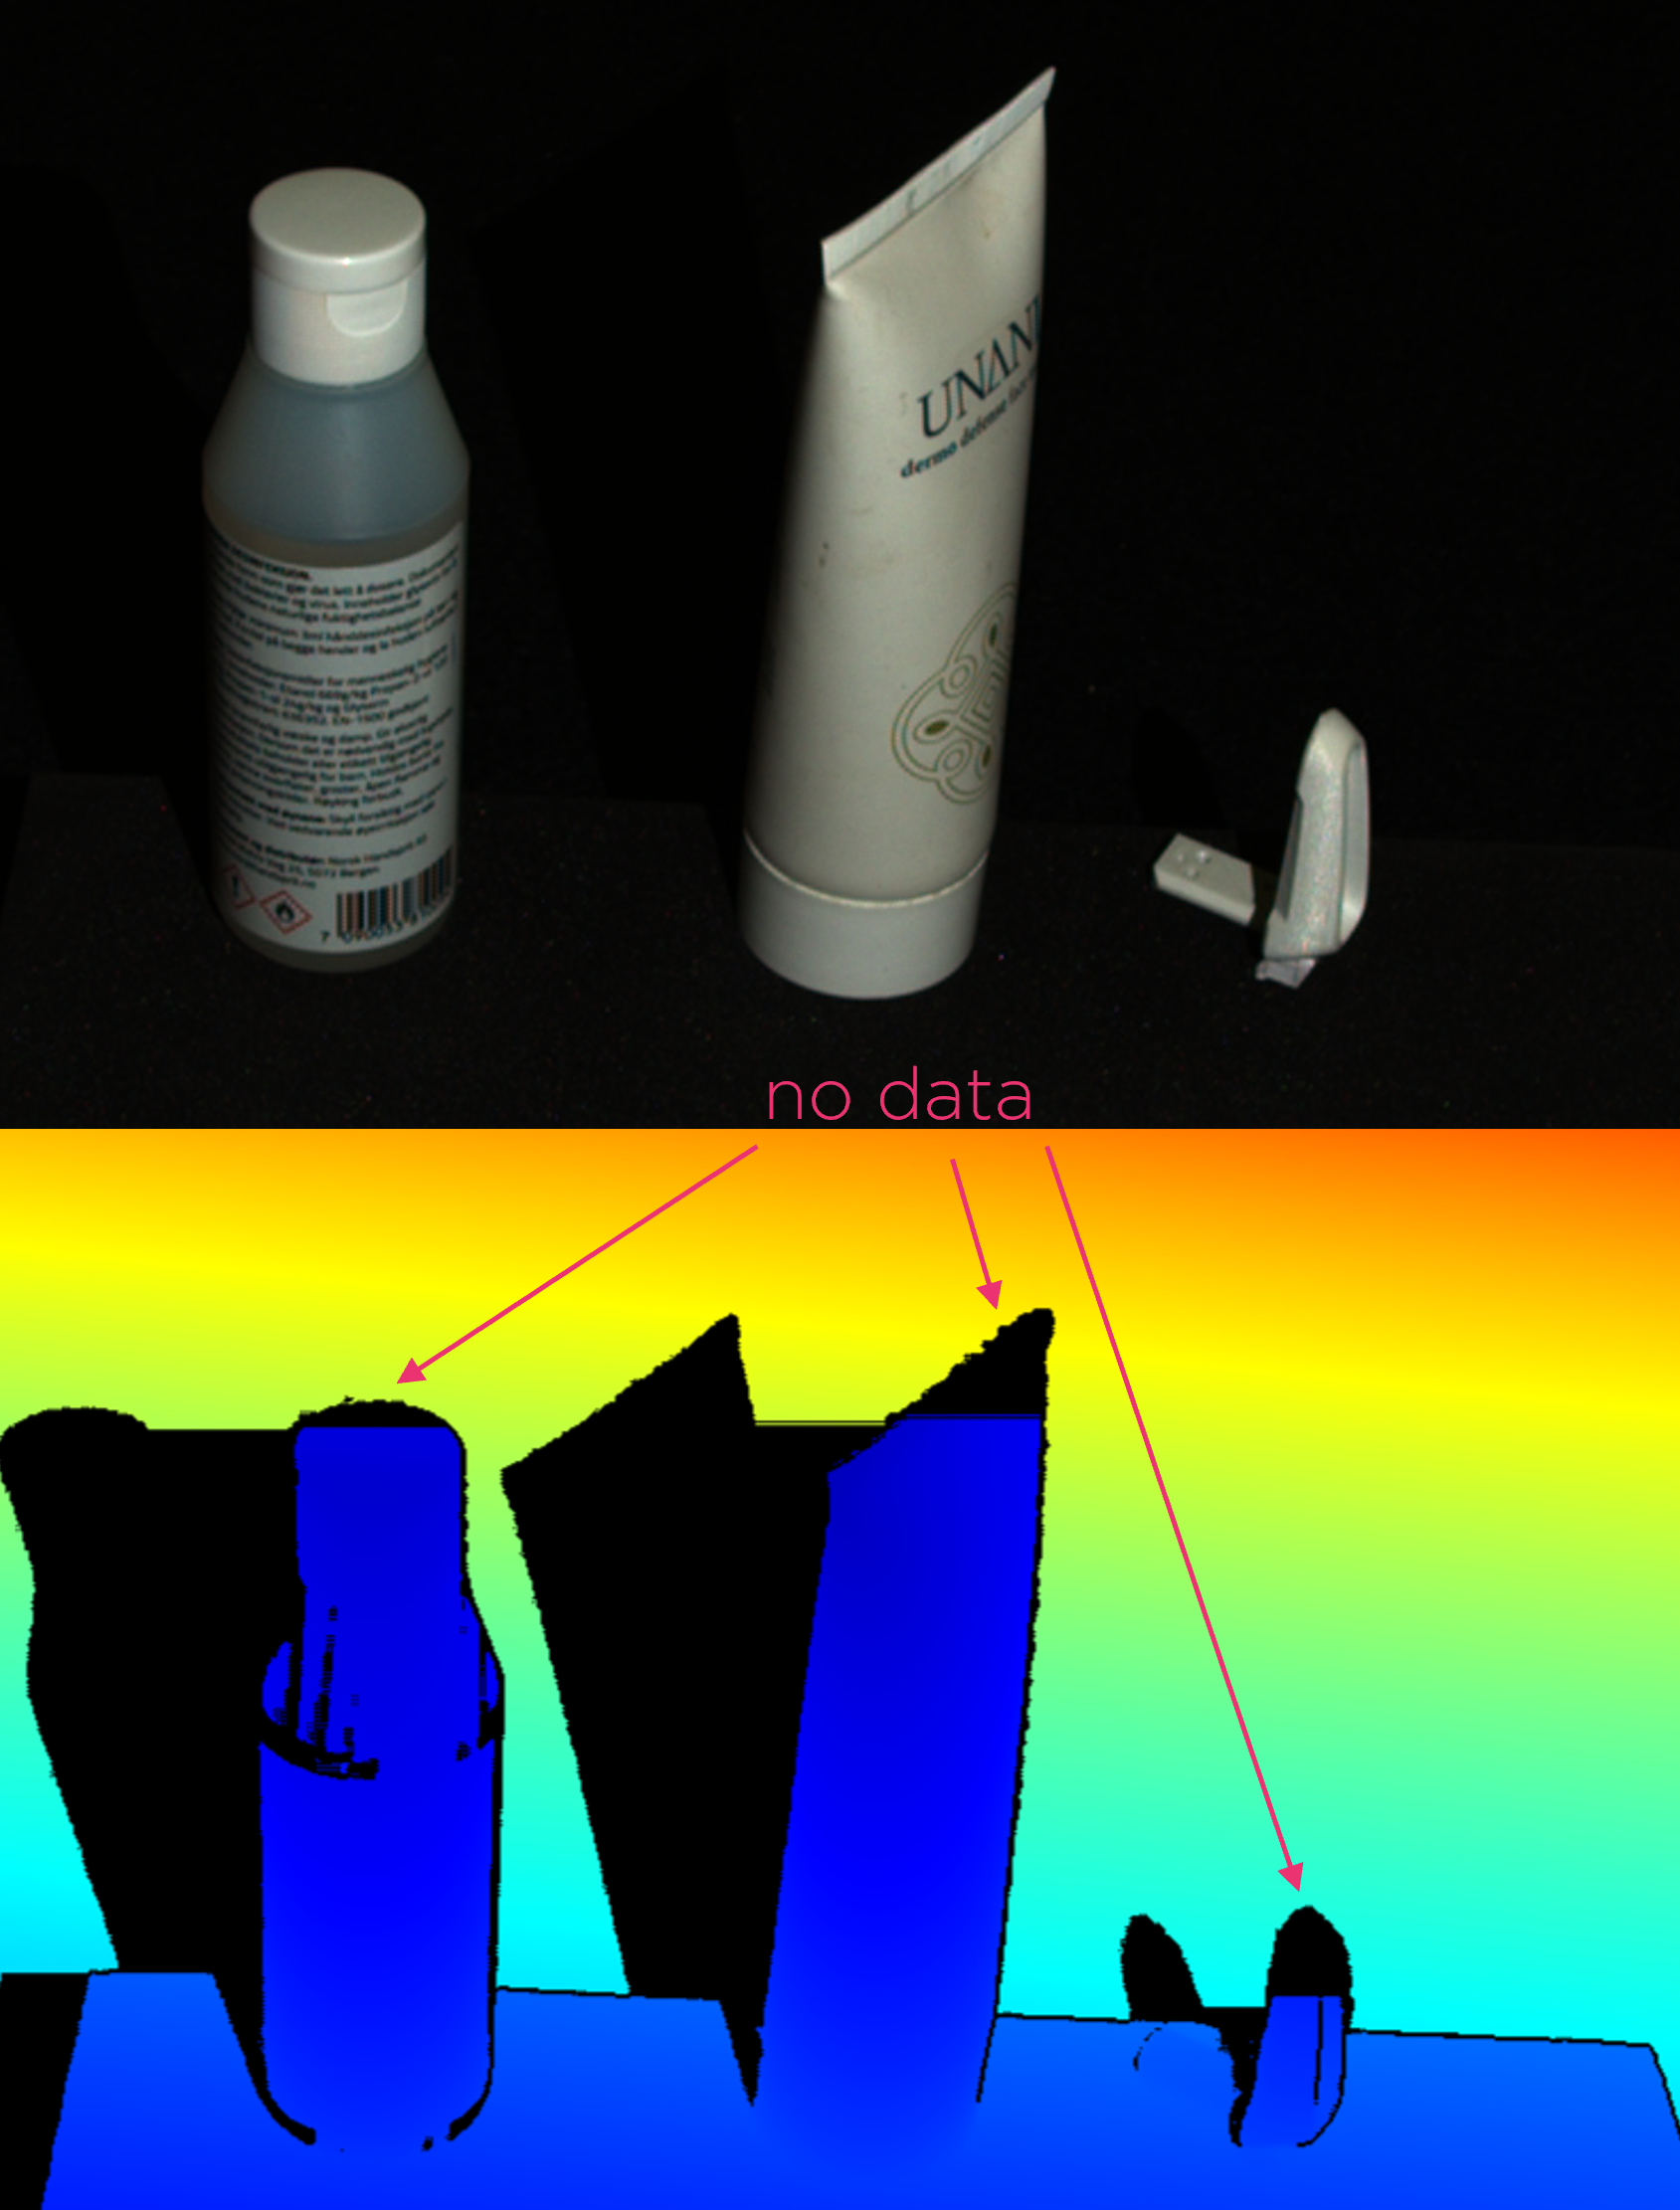
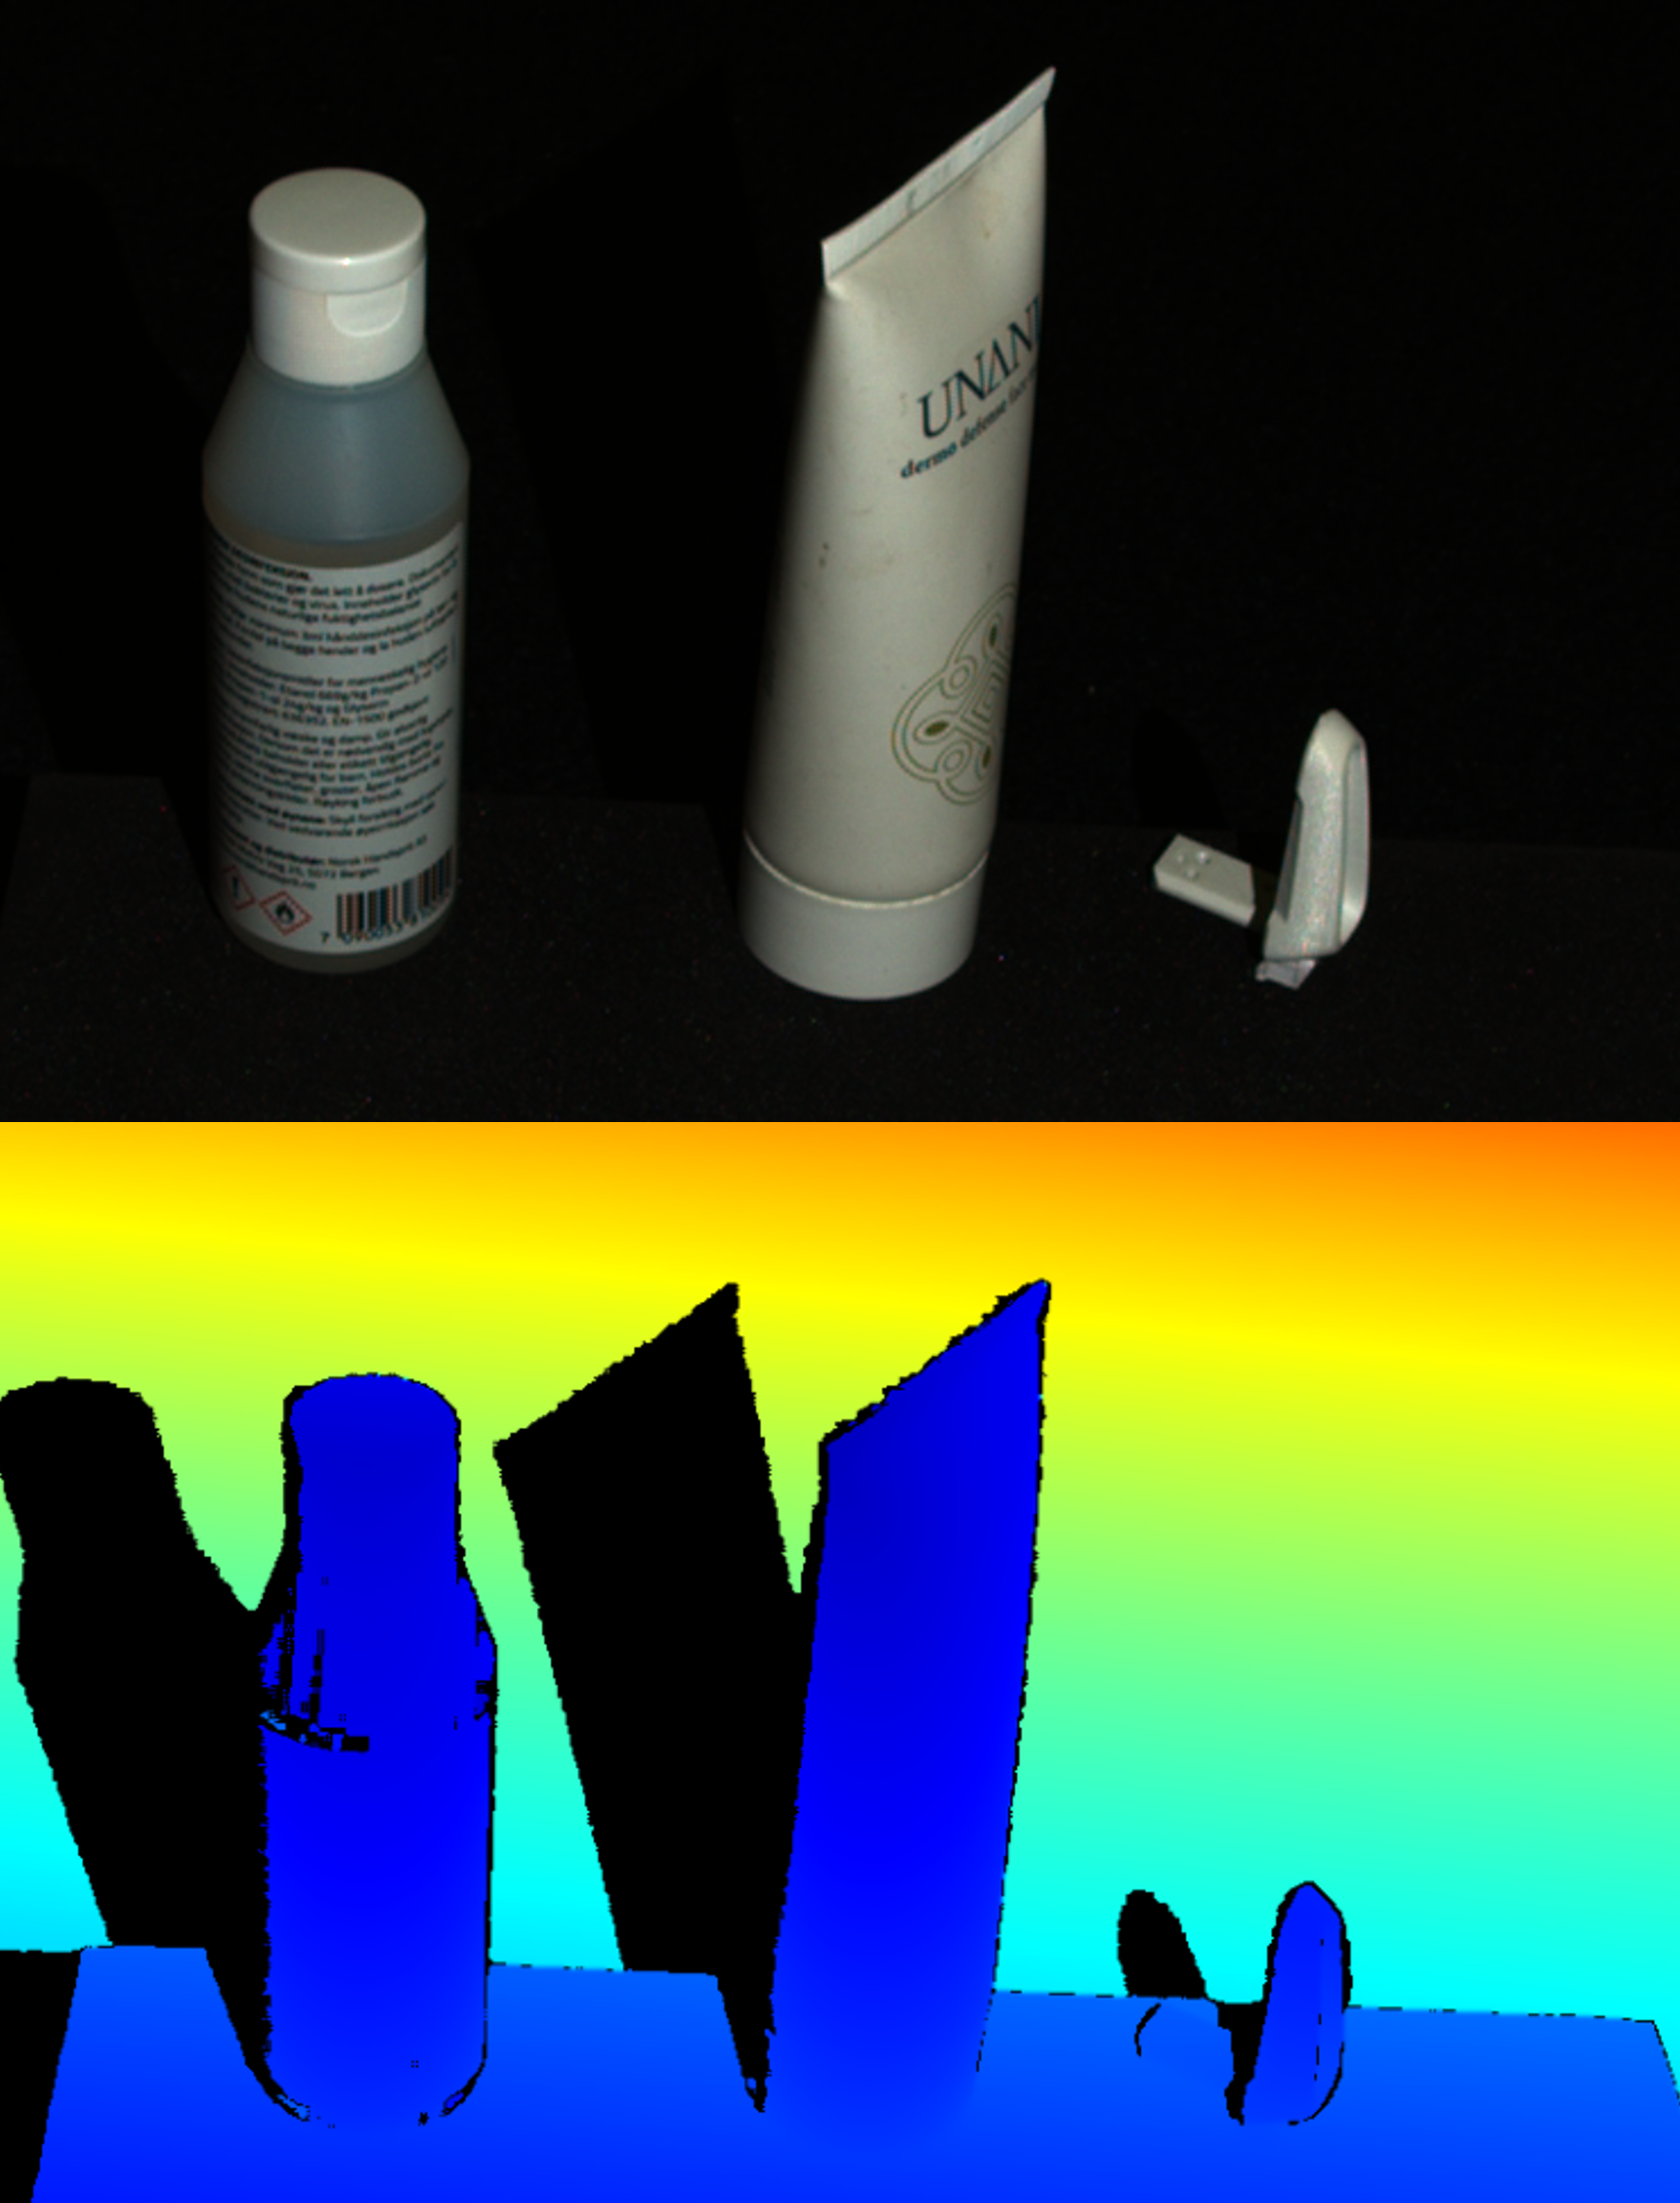
Reflection Filter - Global mode (no data on pointy objects) |
Reflection Filter - Local mode (data preserved on pointy objects) |
|
|
Reflection Filter - Global mode (less outliers) |
Reflection Filter - Local mode (more outliers) |

Note
Reflection filter (Global mode) adds the following processing time per 3D capture:
Filter |
Zivid One+ |
Zivid Two |
||||
|---|---|---|---|---|---|---|
Intel UHD 750 |
Intel UHD G1 |
NVIDIA 3070 |
Intel UHD 750 |
Intel UHD G1 |
NVIDIA 3070 |
|
High-end [1] |
Low-end [2] |
High-end [3] |
High-end [1] |
Low-end [2] |
High-end [3] |
|
Reflection |
25 (±2) ms |
25 (±3) ms |
12 (±0.8) ms |
21 (±1) ms |
29 (±395) ms |
14 (±1) ms |
Noise filter
Noise filter removes pixels that have an SNR value below a certain limit. This can be used to remove noisy points (e.g. due to ambient light).
Value |
Condition |
7 |
“Almost always” |
5-6 |
It may be necessary to keep the Noise filter value low in order to get points in the following scenes:
|
Note
SNR filter adds close to no additional processing time.
Gaussian smoothing
The Gaussian smoothing performs averaging on pixels within a small local region. This can be used to suppress sparse noise and align pixels on grid. The higher the threshold, the more aggressive the filtering. The Gaussian smoothing will also correct outliers and can therefore provide a good noise-to-coverage tradeoff.
Value |
Condition |
<1.0 |
If you want to preserve as many details and features as possible. Preferred with small objects (sub-cm features). |
1.5 |
For most conditions and medium sized objects. |
2.5-5 |
If you care about smoother and larger surfaces such as flatness of a plane. |
Note
Gaussian filter adds the following processing time per 3D capture:
Filter |
Zivid One+ |
Zivid Two |
||||
|---|---|---|---|---|---|---|
Intel UHD 750 |
Intel UHD G1 |
NVIDIA 3070 |
Intel UHD 750 |
Intel UHD G1 |
NVIDIA 3070 |
|
High-end [4] |
Low-end [5] |
High-end [6] |
High-end [4] |
Low-end [5] |
High-end [6] |
|
Smoothing |
31 (±2) ms |
63 (±3) ms |
2 (±0.6) ms |
18 (±1) ms |
34 (±433) ms |
1 (±0.9) ms |
Outlier filter
The Outlier filter removes pixels that it deems as outliers within a small local region of neighboring pixels. The outliers are measured by how far away they are from their closest neighbors. If the distance exceeds the threshold of the Outlier filter, the pixel is identified as an outlier and thus removed from the final point cloud. The unit of the Outlier filter threshold is in millimeters, and the smaller the threshold, the more pixels are removed. It is recommended to start with a relaxed Outlier filter and then tighten the threshold until you are satisfied with the density/noise level.
Value(mm) |
Condition |
2-10 |
Typical for Zivid Two |
1-3 |
Typical for Zivid One+ Small |
3-10 |
Typical for Zivid One+ Medium |
10-30 |
Typical for Zivid One+ Large |
50-100 |
Can be considered if using the camera in one of the following conditions:
|
OFF |
If you have extreme noise, but just want whatever points you can get you may turn the filter off. This could be in an extremely dark scene, very far away (>2m) or outdoors. |
Note
The unit for the Outlier filter is in millimeters
Note
The outlier filter adds close to no additional processing time.
Contrast Distortion filter
The Contrast Distortion filter corrects and/or removes points that are affected by blurring in the camera lens. In the point cloud, this typically occurs in regions with high contrast (strong specular reflection), and in regions with large texture gradients. The artifact is explained in detail in Contrast Distortion Artifact.
The filter parameter strength states how much a point is corrected in 3D space, and threshold indicates the maximum distance before a point is removed (if removal mode is on). As strength and removal depend on camera focus and orientation (to camera baseline) of the object, its recommended to first tune exposure settings before tuning Contrast Distortion Filter parameters.
Warning
If the strength value is very high, it may overcompensate correction.
Value |
Condition |
0.1 - 0.2 |
If you have small contrast distortion effects and no-to-little correction is needed. |
0.3 - 0.5 |
“Almost always”, if your camera has good focus, but contrast distortion is present. Some correction is needed. |
0.6 - 0.7 |
“Common”, if your point cloud is affected by a large contrast distortion. Your camera may be a bit out of focus. |
0.8 - 1.0 |
“Uncommon”, if you have a very high effect of contrast distortion. This often indicates that the camera is out of focus! |
Note
Contrast Distortion filter adds the following processing time per 3D capture:
Filter |
Zivid One+ |
Zivid Two |
||||
|---|---|---|---|---|---|---|
Intel UHD 750 |
Intel UHD G1 |
NVIDIA 3070 |
Intel UHD 750 |
Intel UHD G1 |
NVIDIA 3070 |
|
High-end [7] |
Low-end [8] |
High-end [9] |
High-end [7] |
Low-end [8] |
High-end [9] |
|
Contrast Distortion Correction |
57 (±2) ms |
96 (±2) ms |
7 (±0.6) ms |
58 (±1) ms |
99 (±410) ms |
7 (±0.8) ms |
Contrast Distortion Removal |
40 (±2) ms |
60 (±3) ms |
4 (±0.6) ms |
41 (±1) ms |
61 (±435) ms |
5 (±0.9) ms |
Tip
If Contrast Distortion Correction filter is already enabled, then Contrast Distortion Removal adds negligible processing time.
Tuning Aperture before Contrast Distortion filter
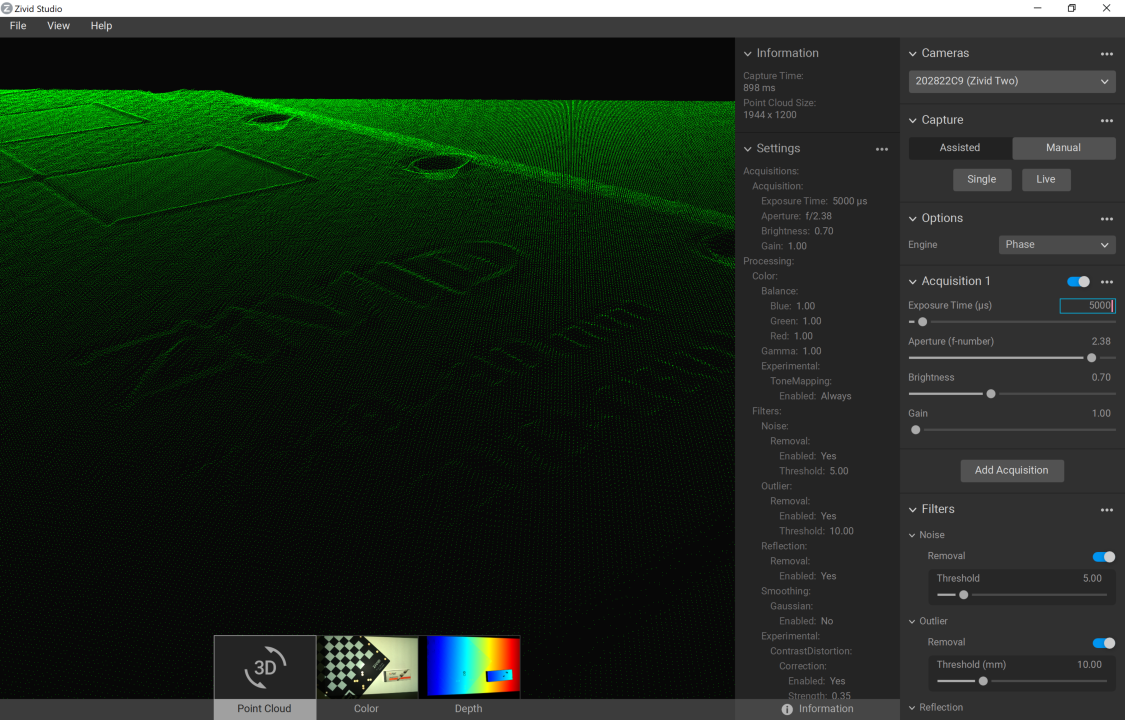
Tuning the Contrast Distortion filter is sometimes not sufficient to remove contrast distortion artifacts. The artifacts get worse with blurry color images. Therefore, it is important to ensure the color image is in focus by tuning the Aperture before tuning the filter.
We will demonstrate the process of removing contrast distortion artifacts by tuning the Aperture with an example.
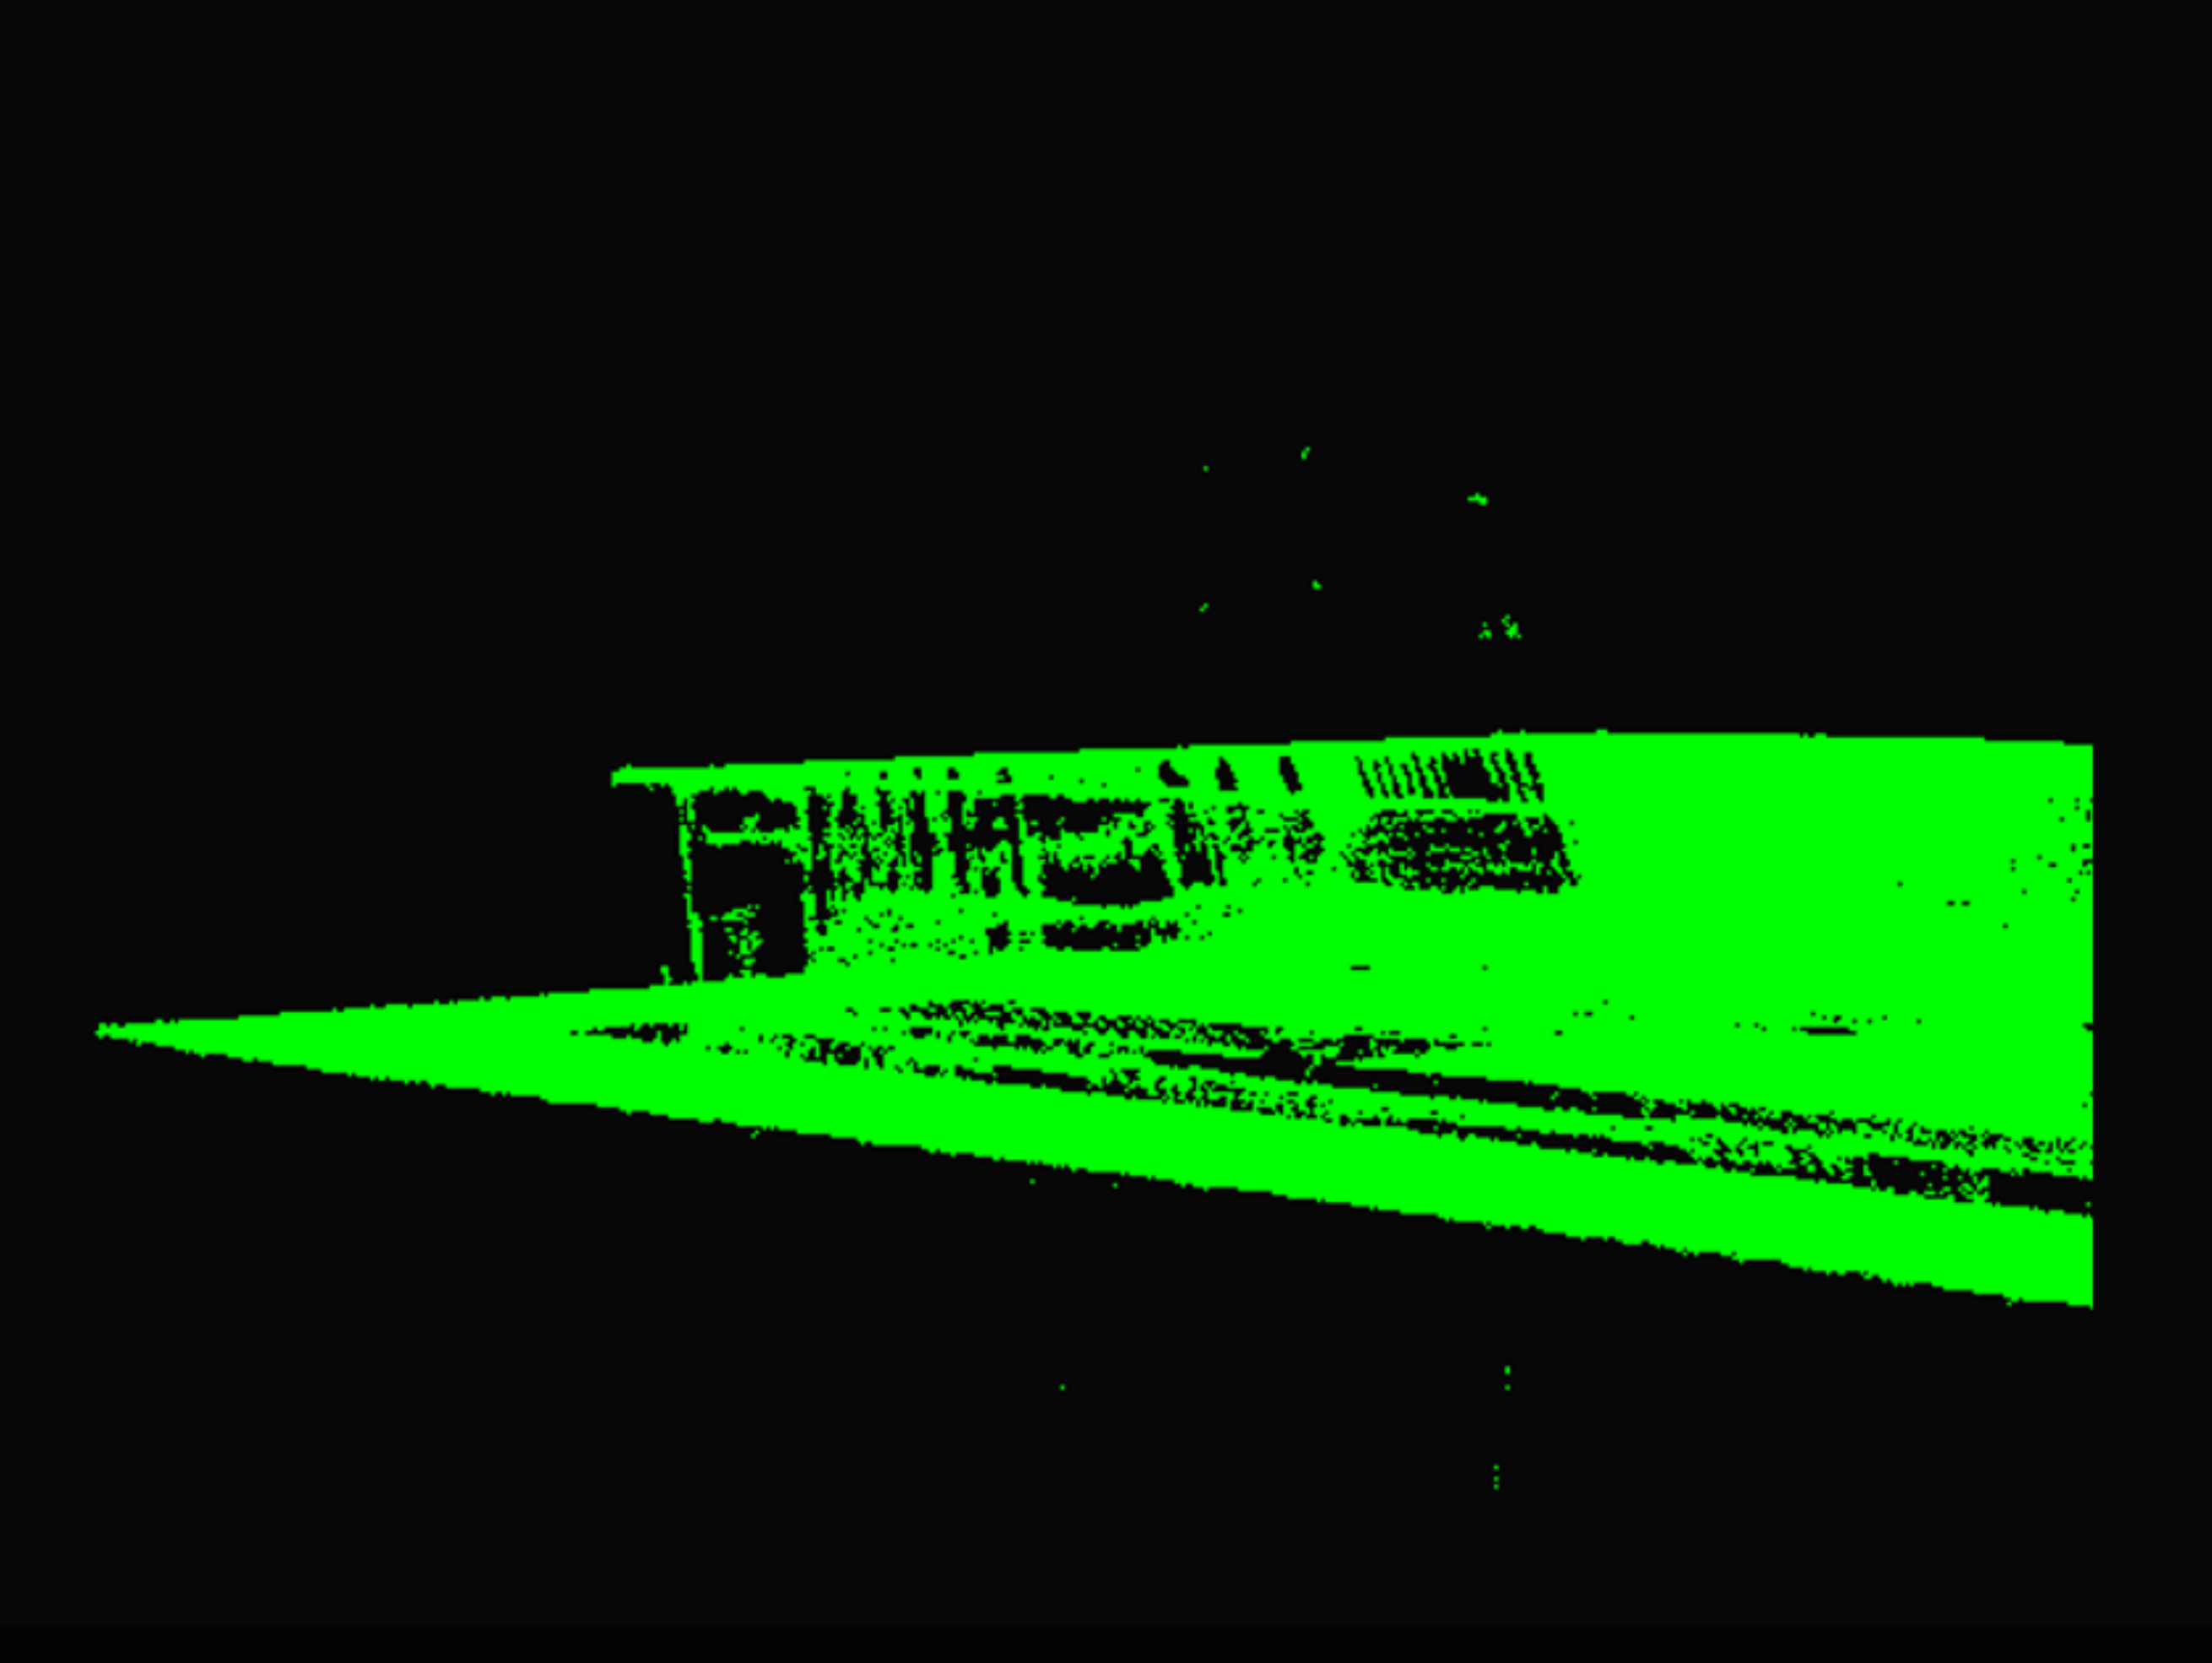
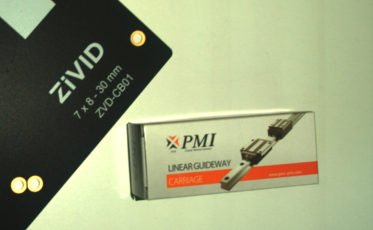
The figure below shows a color image out of focus and a resulting point cloud with visible contrast distortion artifacts. The color image is blurry because a low f-number (2.38) is used for the Aperture. The Contrast Distortion strength used is 0.35.
|
Color image out of focus |
|
Resulting point cloud with contrast distortion |
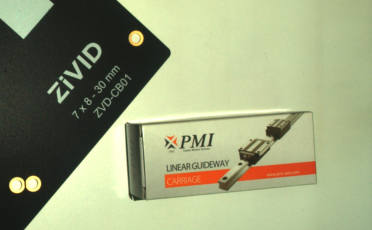
The Aperture is changed from 2.0 to 8.0 to remove the contrast distortion artifact, and this change is compensated with a longer Exposure Time. The result is a color image in focus and a point cloud without any contrast distortion artifacts, which can be seen in the figure below.
|
Color image in focus |
|
Resulting point cloud without contrast distortion |

The point clouds used for this example are available for download for further inspection:
Further reading
Continue to Optimizing Color Image.