ROI box filter via ArUco marker
This tutorial demonstrates how to filter the point cloud transformed to the ArUco marker coordinate system based on a ROI box given relative to the marker. This results in filtering out all the points that are outside of the bin.
Tip
Zivid calibration board contains an ArUco marker.
This tutorial uses the point cloud of a ArUco marker displayed in the image below.
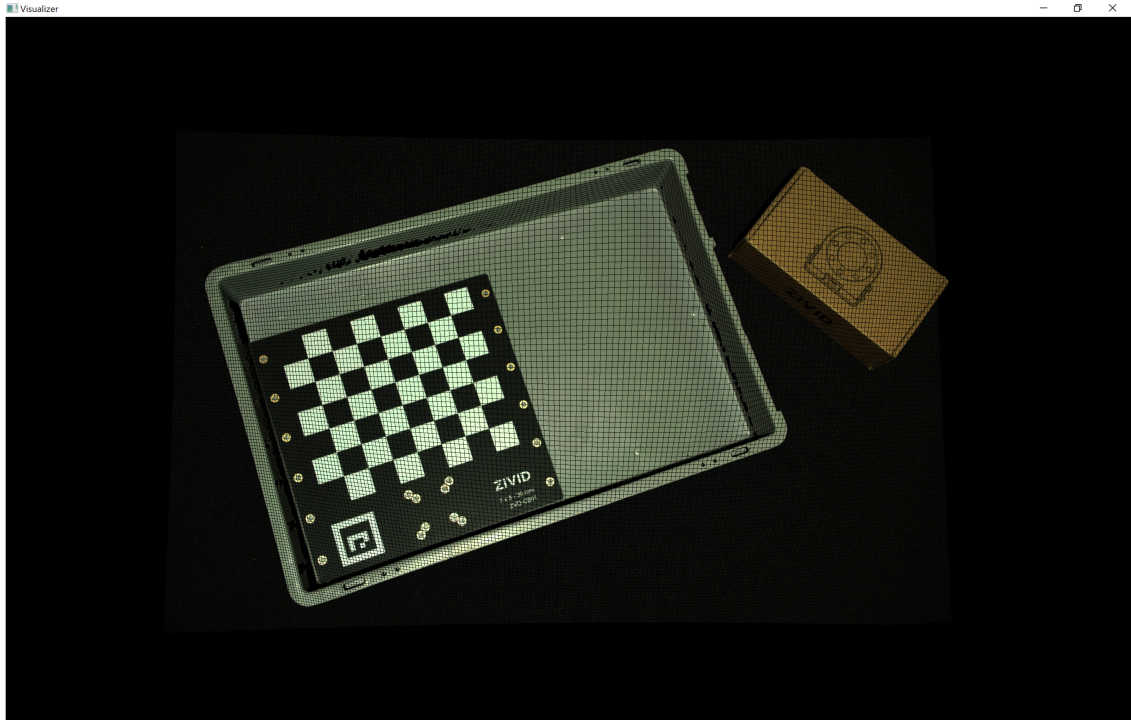
We can open the original point cloud in Zivid Studio and inspect it.
Note
The original point cloud is also in Sample Data.
To skip the part about transforming the point cloud, which is also covered in Transform via ArUco marker, go to Filtering based on ROI box.
Transforming the point cloud
First, we load a point cloud of an ArUco marker.
Since we are using OpenCV, we need to convert the 2D image from the point cloud to OpenCV image format.
Then we configure the ArUco marker.

std::cout << "Configuring ArUco marker" << std::endl;
const auto markerDictionary = cv::aruco::getPredefinedDictionary(cv::aruco::DICT_4X4_100);
std::vector<int> markerIds;
std::vector<std::vector<cv::Point2f>> markerCorners;
cv::Ptr<cv::aruco::DetectorParameters> detectorParameters = cv::aruco::DetectorParameters::create();
detectorParameters->cornerRefinementMethod = cv::aruco::CORNER_REFINE_SUBPIX;
We then detect the ArUco marker in the 2D image.
Then we estimate the pose of the ArUco marker.
We then transform the point cloud to the ArUco marker coordinate system.
Hint
Learn more about Position, Orientation and Coordinate Transformations.
Filtering based on ROI box
Now we define the position of the bottom-left corner of the ROI box relative to the ArUco marker, and the ROI box size.
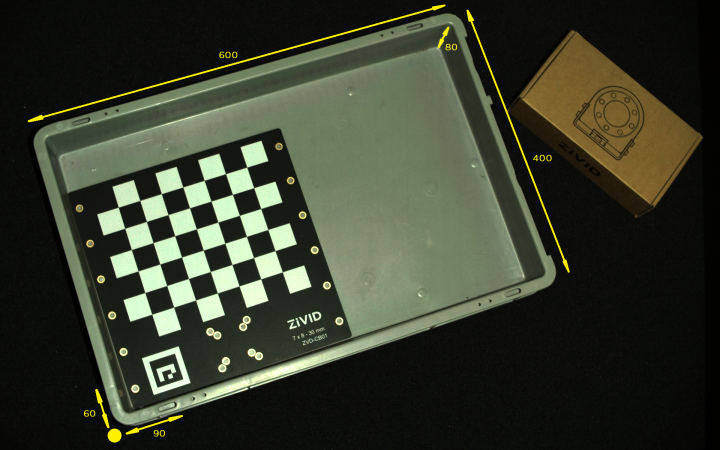
std::cout << "Bottom-Left ROI Box corner:" << std::endl;
const int roiBoxBottomLeftCornerX = 60; // Positive is "South"
const int roiBoxBottomLeftCornerY = 90; // Positive is "West"
const int roiBoxBottomLeftCornerZ = 15; // Positive is "Down"
std::cout << "X: " << roiBoxBottomLeftCornerX << std::endl
          << "Y: " << roiBoxBottomLeftCornerY << std::endl
          << "Z: " << roiBoxBottomLeftCornerZ << std::endl;
std::cout << "ROI Box size:" << std::endl;
const int roiBoxLength = 600;
const int roiBoxWidth = 400;
const int roiBoxHeight = 80;
std::cout << "Length: " << roiBoxLength << std::endl
          << "Width: " << roiBoxWidth << std::endl
          << "Height: " << roiBoxHeight << std::endl;
Now we filter the point cloud based on the size and position of the ROI box. The implementation is done using PCL library.
std::cout << "Filtering the point cloud based on ROI Box" << std::endl;
const boost::shared_ptr<pcl::PointCloud<pcl::PointXYZRGB>> roiPointCloudPCL = roiBoxPointCloud(
    pointCloud,
    roiBoxBottomLeftCornerX,
    roiBoxBottomLeftCornerY,
    roiBoxBottomLeftCornerZ,
    roiBoxLength,
    roiBoxWidth,
    roiBoxHeight);
Finally, we visualize the transformed and filtered point cloud.
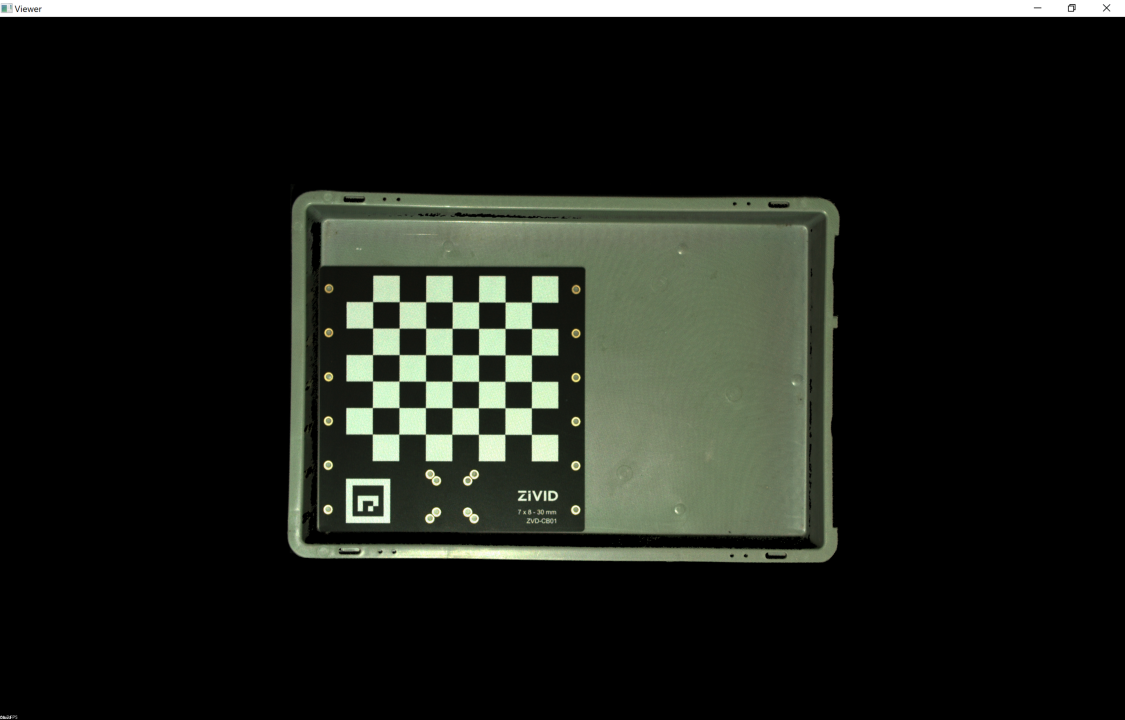
Lastly, we display the depth map of the transformed and filtered point cloud.
