Transform via ArUco marker
This tutorial demonstrates how to estimate the pose of the ArUco marker and transform a point cloud using a 4x4 homogeneous transformation matrix to the ArUco marker coordinate system.
Tip
Zivid calibration board contains an ArUco marker.
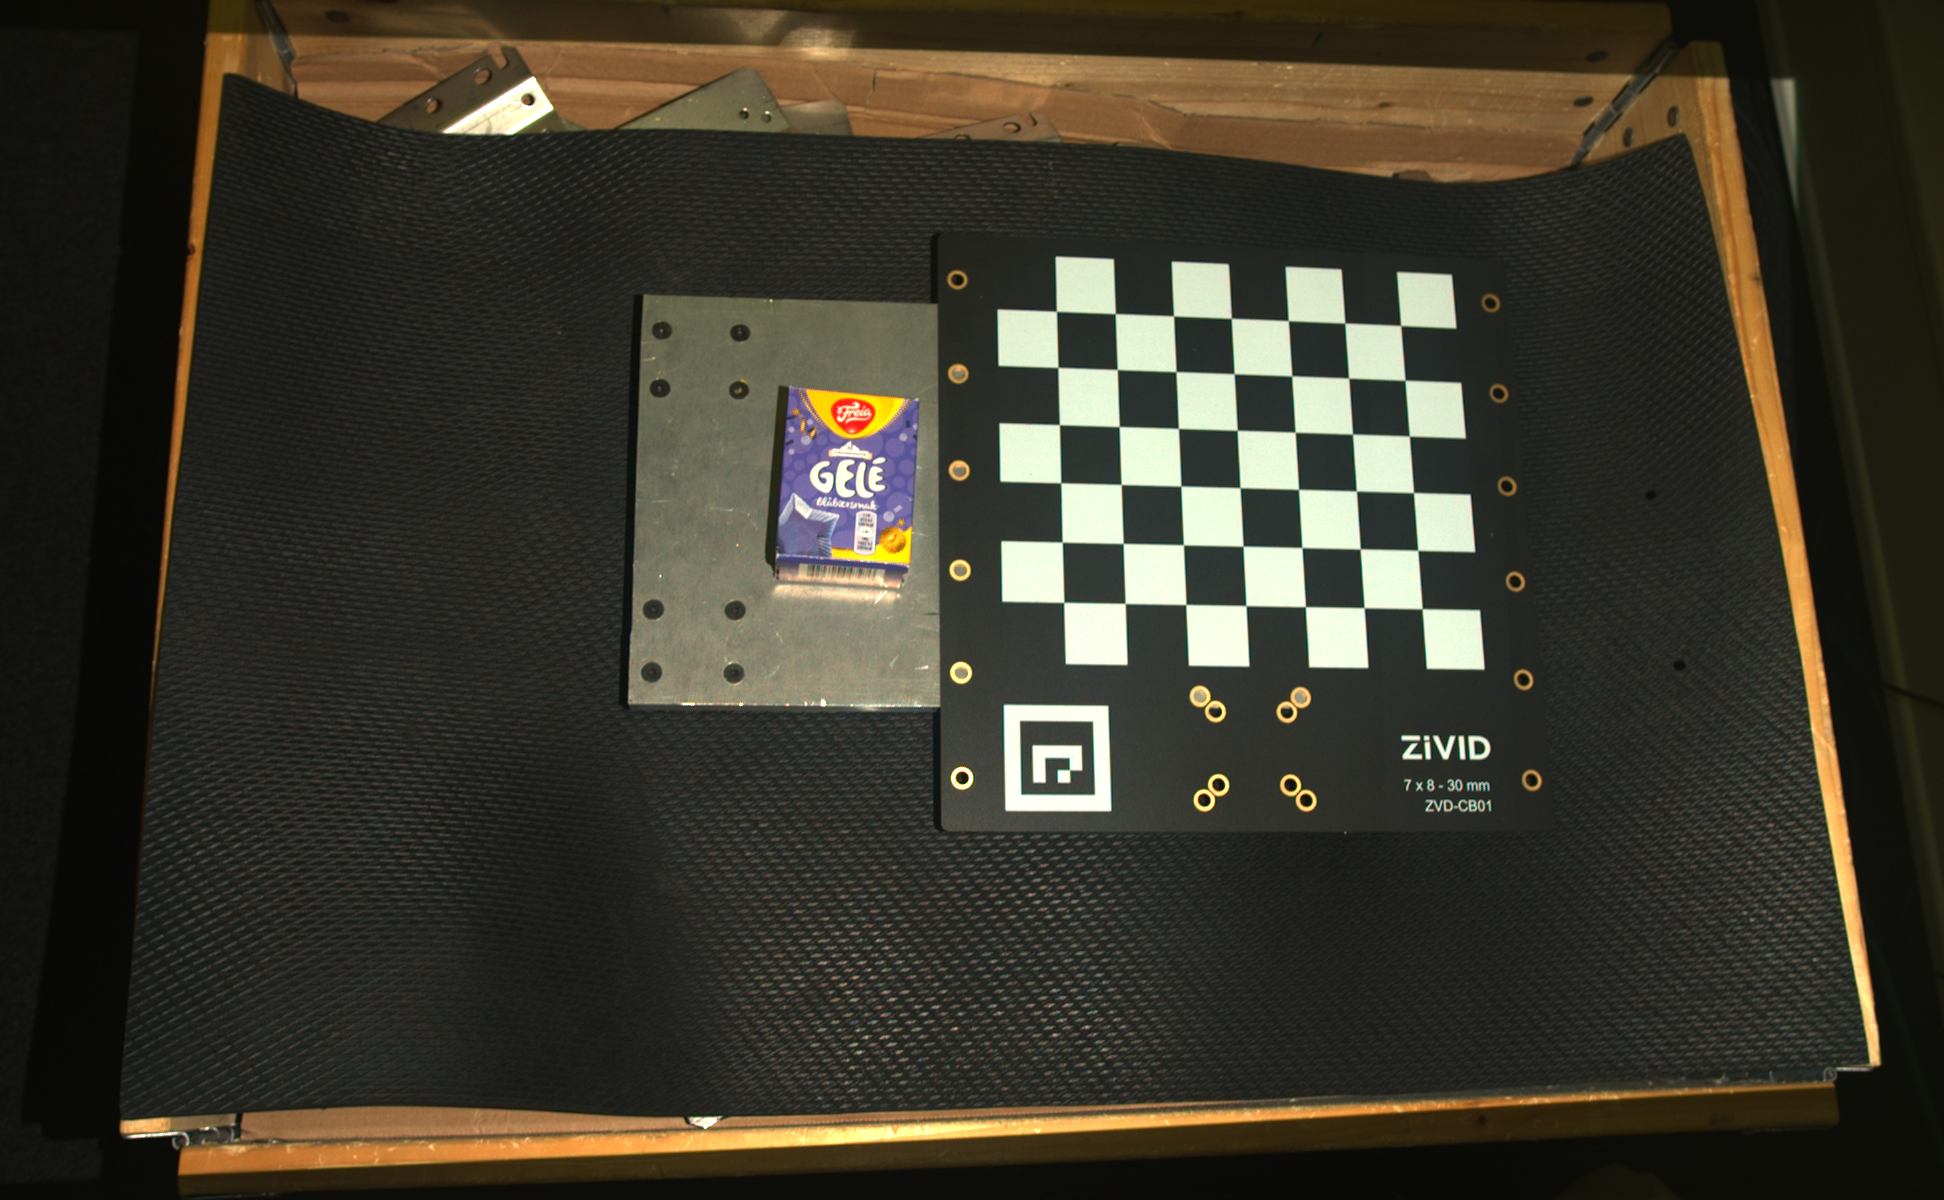
First, we load a point cloud of an ArUco marker.
We can open the original point cloud in Zivid Studio and inspect it.
Note
The original point cloud is also in Sample Data.
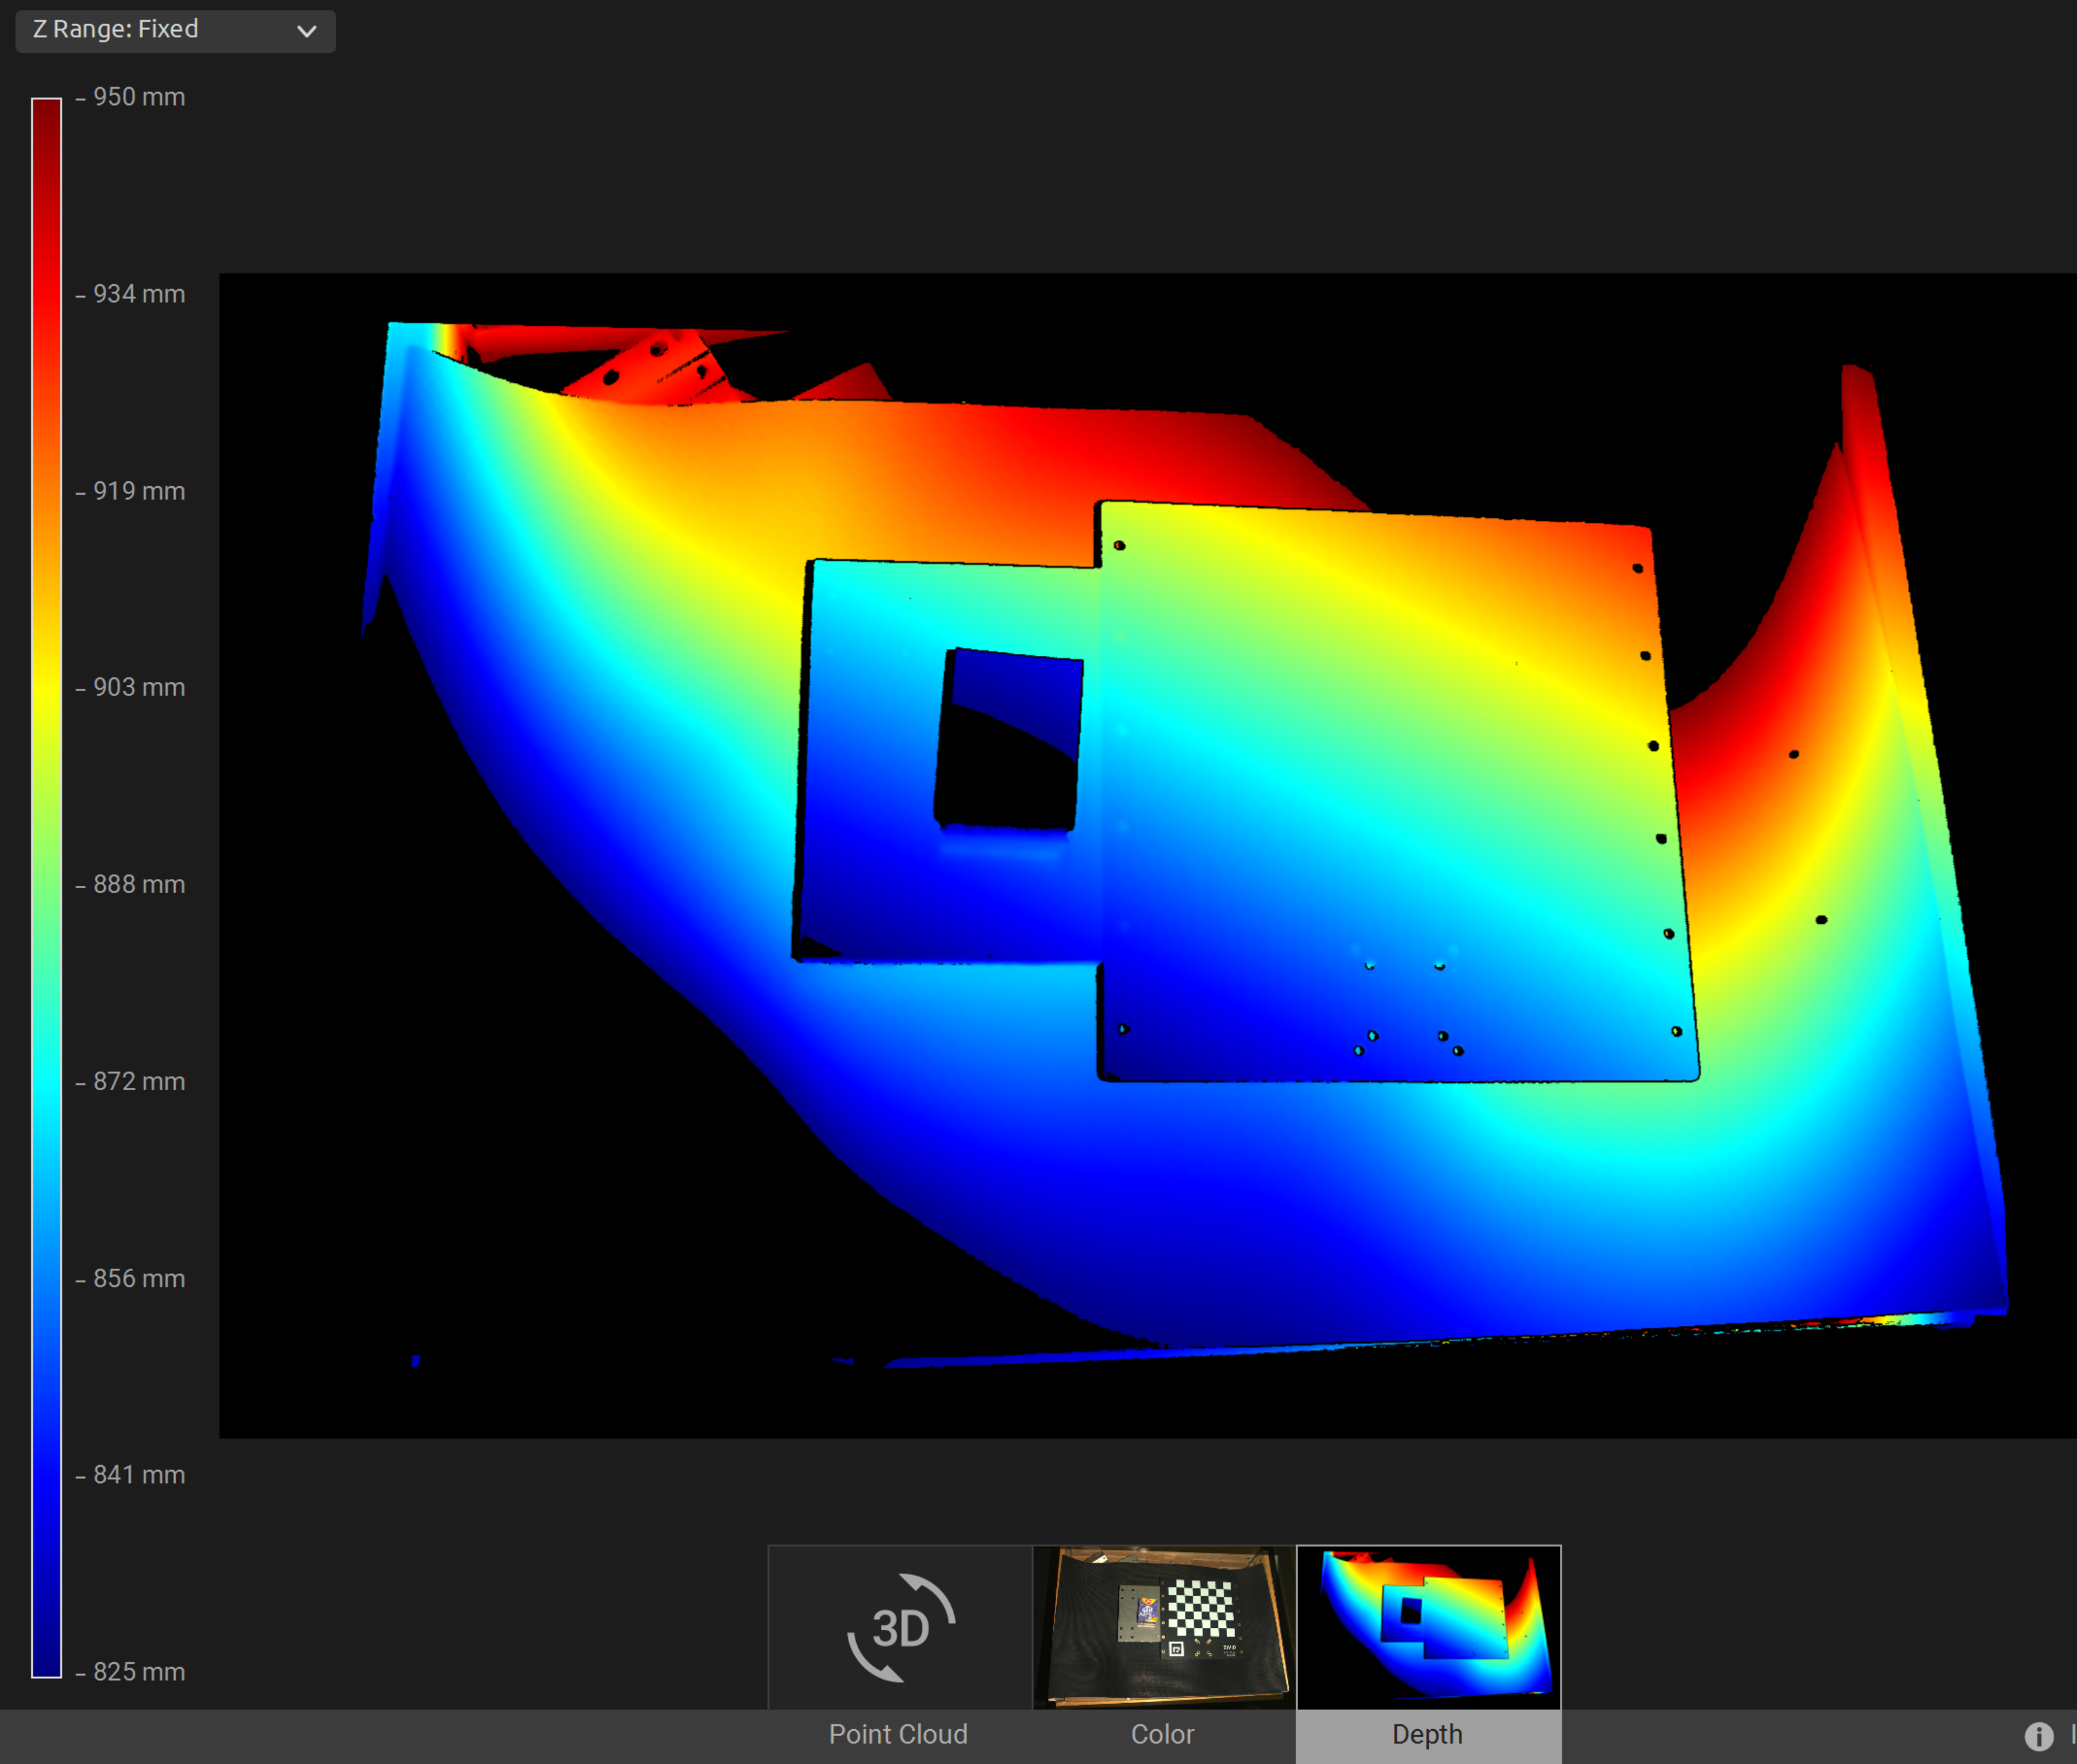
Now, we can manually set the Z Range from 825 mm to 950 mm in the Depth view. This allows us to see that the marker is at approximately 840 mm distance, and that there is an angle between the camera and the marker frame.
Since we are using OpenCV, we need to convert the 2D image to OpenCV image format.
Then we configure the ArUco marker.

std::cout << "Configuring ArUco marker" << std::endl;
const auto markerDictionary = cv::aruco::getPredefinedDictionary(cv::aruco::DICT_4X4_100);
std::vector<int> markerIds;
std::vector<std::vector<cv::Point2f>> markerCorners;
cv::Ptr<cv::aruco::DetectorParameters> detectorParameters = cv::aruco::DetectorParameters::create();
detectorParameters->cornerRefinementMethod = cv::aruco::CORNER_REFINE_SUBPIX;
We then detect the ArUco marker in the 2D image and display it.
std::cout << "Detecting ArUco Marker" << std::endl;
cv::aruco::detectMarkers(grayImage, markerDictionary, markerCorners, markerIds, detectorParameters);

std::cout << "Displaying detected ArUco marker" << std::endl;
cv::aruco::drawDetectedMarkers(bgrImage, markerCorners);
displayBGR(bgrImage, "ArucoMarkerDetected");
Then we estimate the pose of the ArUco marker.
Lastly, we transform the point cloud to the ArUco marker coordinate system and save the transformed point cloud to disk.
Now we can open the transformed point cloud in Zivid Studio and inspect it.
Note
Zoom out in Zivid Studio to find the data because the viewpoint origin is inadequate for transformed point clouds.
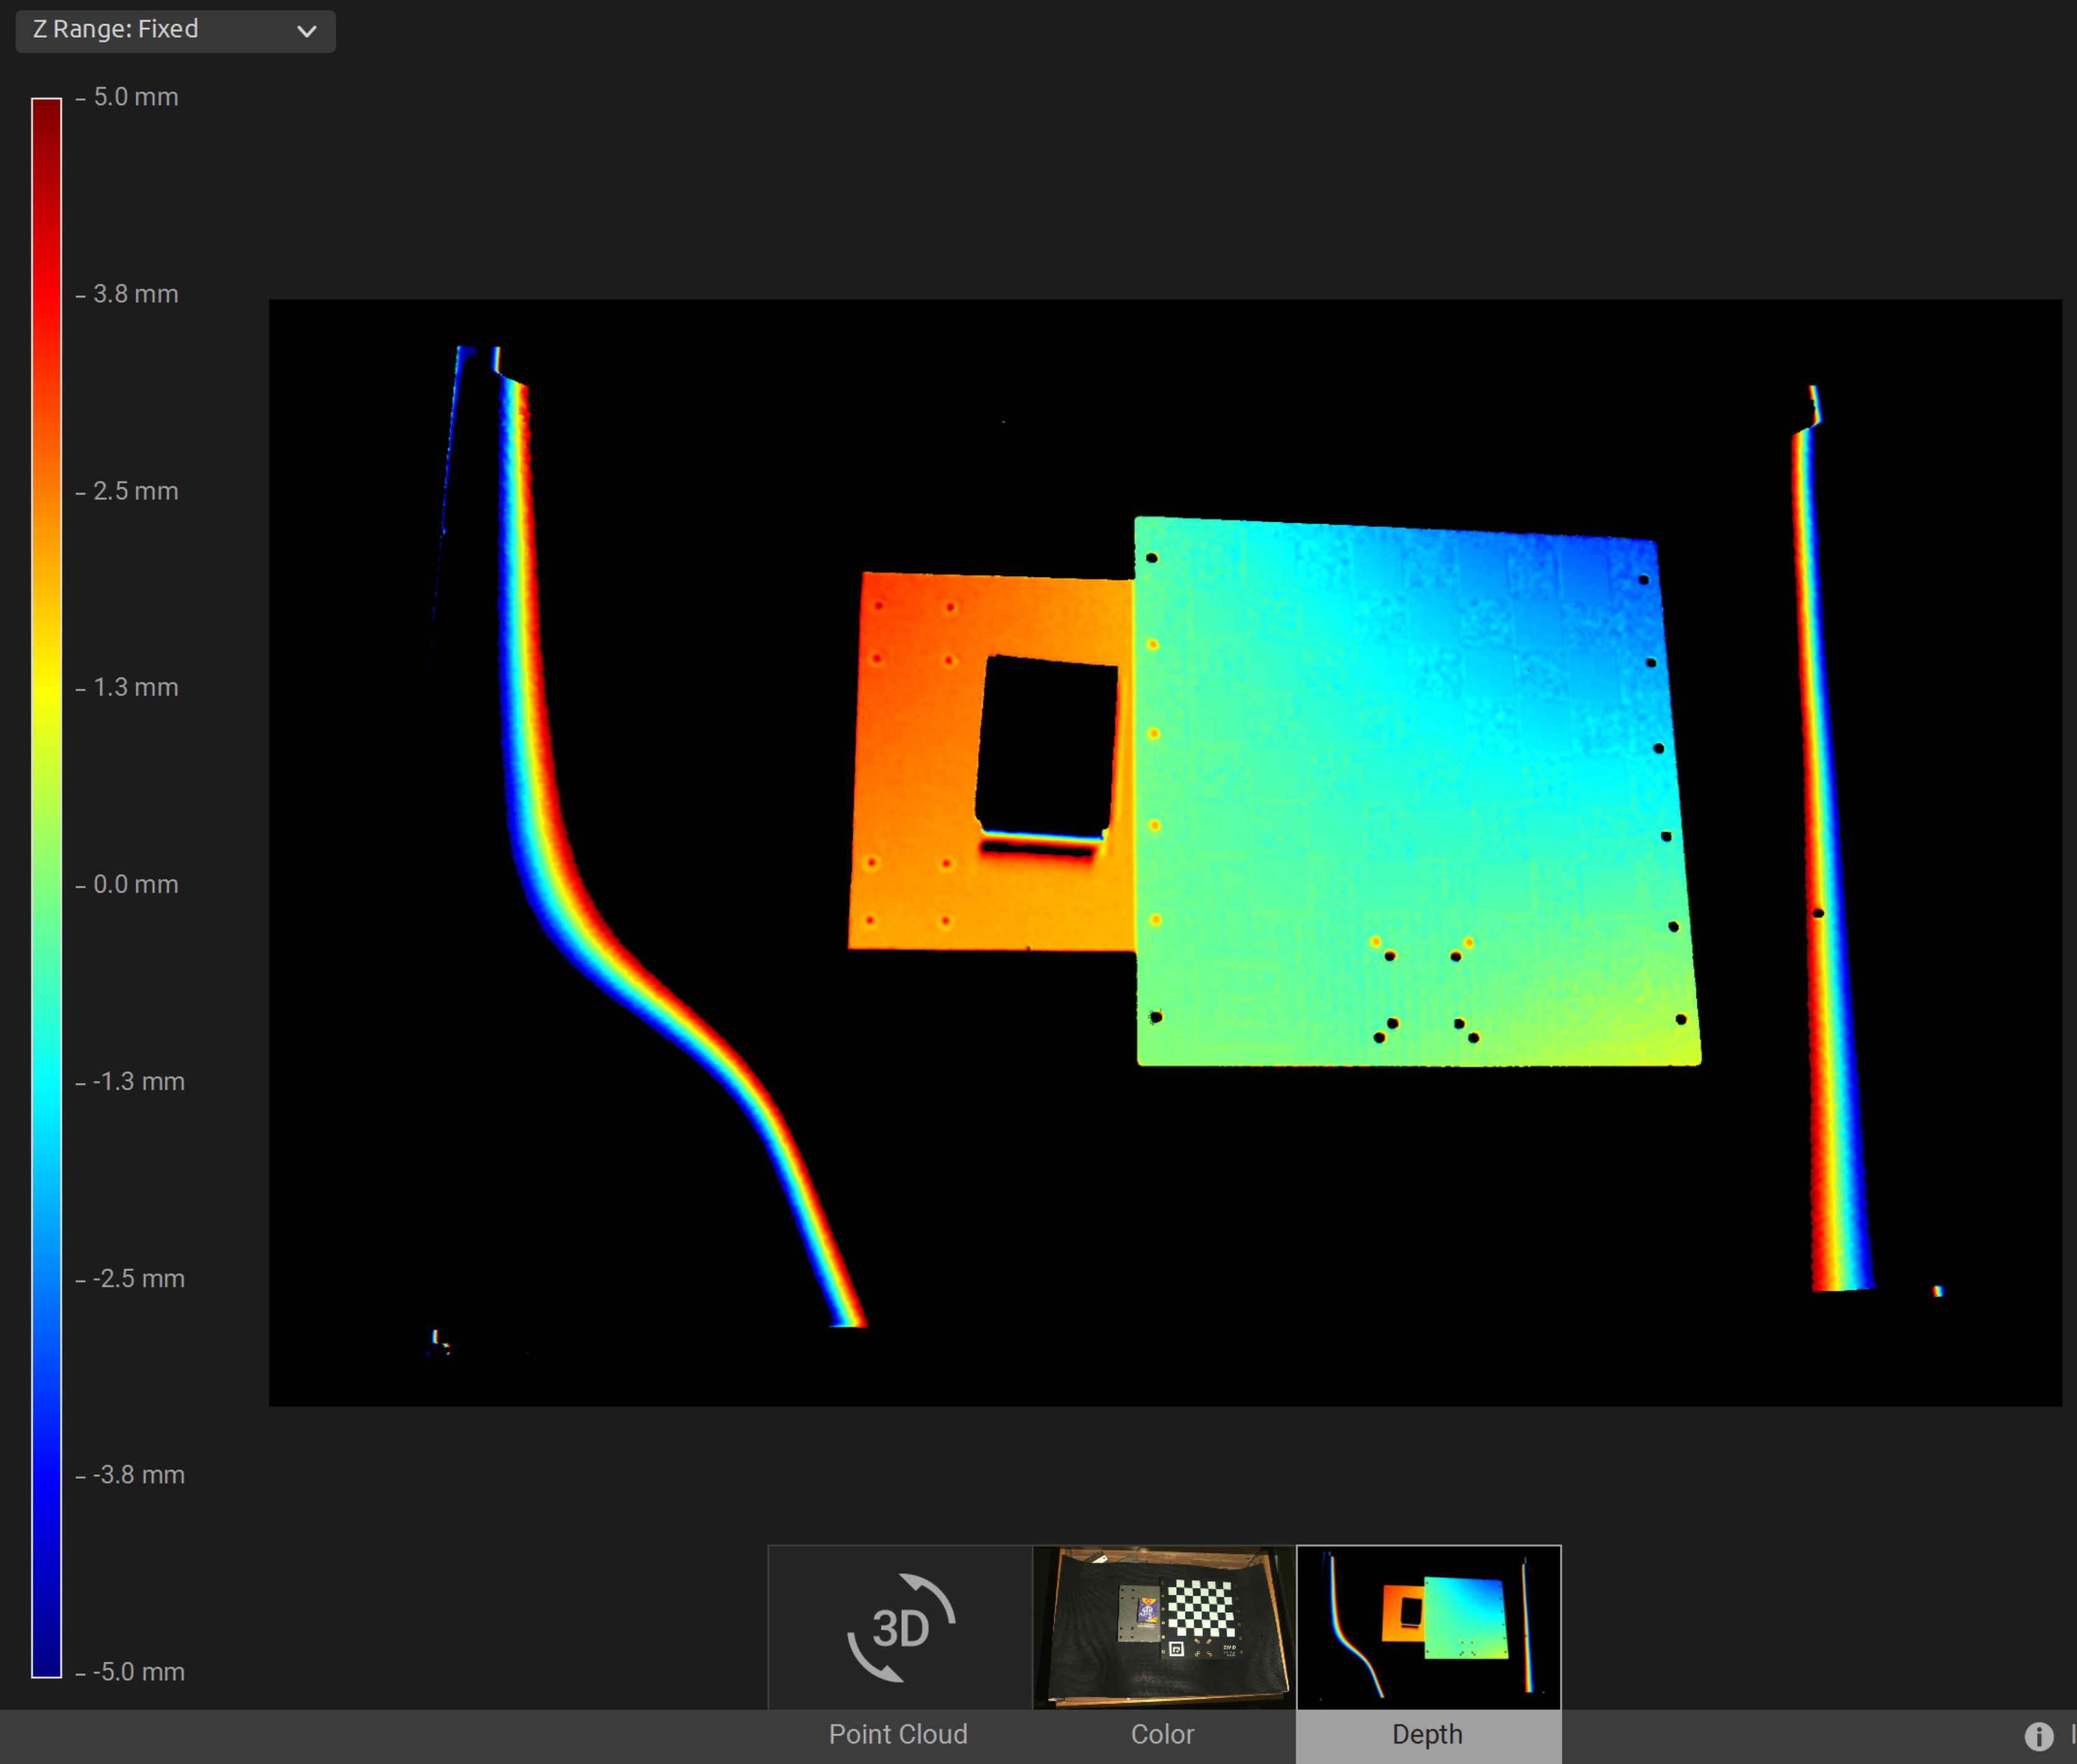
We can now manually set the Z Range from -5 mm to 5 mm in the Depth view to filter out all data except the ArUco marker plate This allows us to see that the point cloud origin is in the marker frame.