Contact Us
You can always reach out to Zivid via customersuccess@zivid.com. If you prefer to perform some local troubleshooting we have a number of troubleshooting guides, as well as a set of FAQ.
If the issue is not listed in our Knowledge Base, or if you still encounter it, please contact us at customersuccess@zivid.com.
Tip
To speed up the support case and to maximize the chance of solving your issue it is recommended to provide a standalone reproducer and steps on how to use it.
To help us determine the cause and find a solution, please provide the following:
Log Files
Launch the Command Prompt (press Win + R keys on the keyboard, then type cmd and press Enter) and navigate to:
%LOCALAPPDATA%\Local\Zivid\API\Log
Send us a couple of log files created just after the issue occurred.
Open a terminal window by pressing Ctrl + Alt + T keys on the keyboard and navigate to:
$XDG_CACHE_HOME/Zivid/API/Log
Caution
If $XDG_CACHE_HOME is not set use $HOME/.cache.
Send us a couple of log files created just after the issue occurred.
System Info
Launch Zivid Studio, then click on the buttons in the following order:
Help → About Zivid Studio → System Info → Copy to Clipboard
Operating System
Ubuntu (16.04, 18.04, 20.04)
Windows 10
Get the exact Windows build version
To get the exact build version open Settings by pressing Win + I keys on the keyboard, and then navigate to System → About. Scroll down a bit and copy Windows Specifications.

ZDF file
If the issue is related to artifacts in the point cloud or color image, providing a .zdf file will go a long way. To maximize the effectiveness of Zivid’s support, enable Diagnostics before capturing, to collect additional data when saving a .zdf file.
There are three ways to capture with diagnostics enabled.
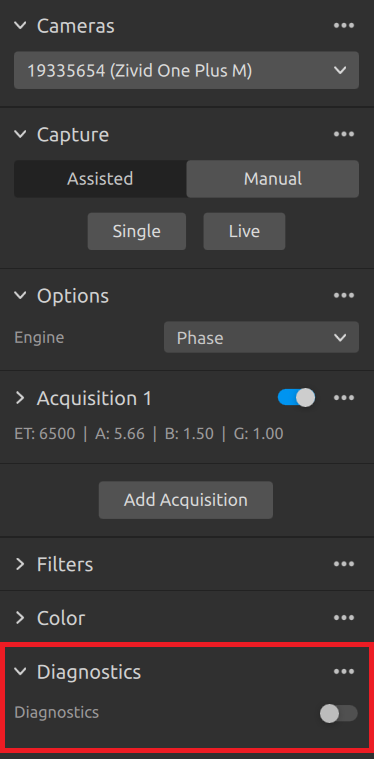
From Zivid Studio:
In Zivid Studio the setting is at the bottom of the control panel.
From the SDK:
Enable the diagnostics setting as any other setting.
Zivid::Settings::Diagnostics
Zivid.NET.Settings.Diagnostics
zivid.Settings.Diagnostics
With a config file:
Using this config file will overwrite the settings to always enable diagnostics. Remember to disable it again in the config file after the debugging session.
Download the
Config.ymlfile.The config file contains the following information:
__version__:
    serializer: 1
    data: 13
Configuration:
    Capture:
        Diagnostics:
            Enabled: Always
Place the config file in the following directory:
mkdir %LOCALAPPDATA%\Zivid\API
move %HOMEPATH%\Downloads\Config.yml %LOCALAPPDATA%\Zivid\API\
mkdir --parents $XDG_CONFIG_HOME/Zivid/API
mv ~/Downloads/Config.yml $XDG_CONFIG_HOME/Zivid/API/
Caution
If
$XDG_CONFIG_HOMEis not set use$HOME/.config.
Caution
Zivid configuration files must use .yml file extension ( not .yaml).