Positioning Correctly
Mounting the camera straight above the scene is most common and recommend.
It is especially beneficial for imaging transparent objects and large surfaces that are extremely specular, and in particular, also dark. Here you will benefit from mounting the camera perpendicular to the object to maximize the signal back to the camera.
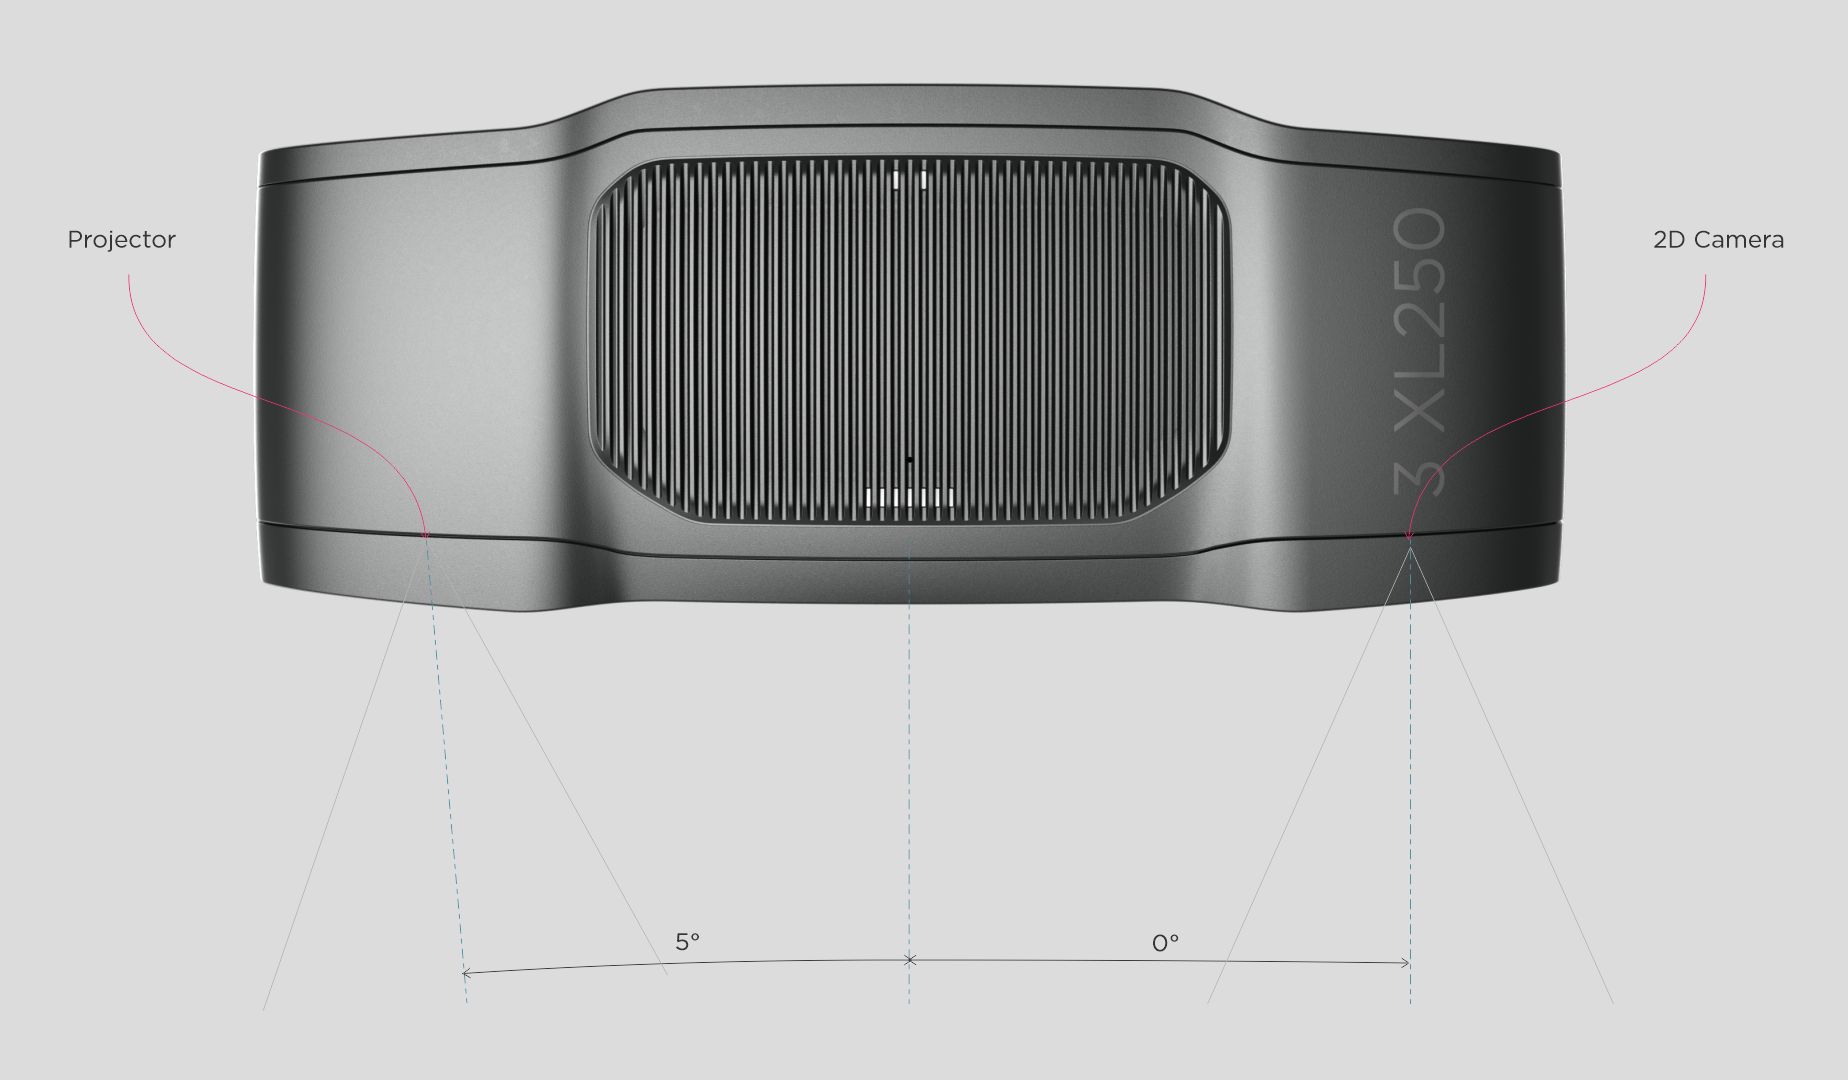
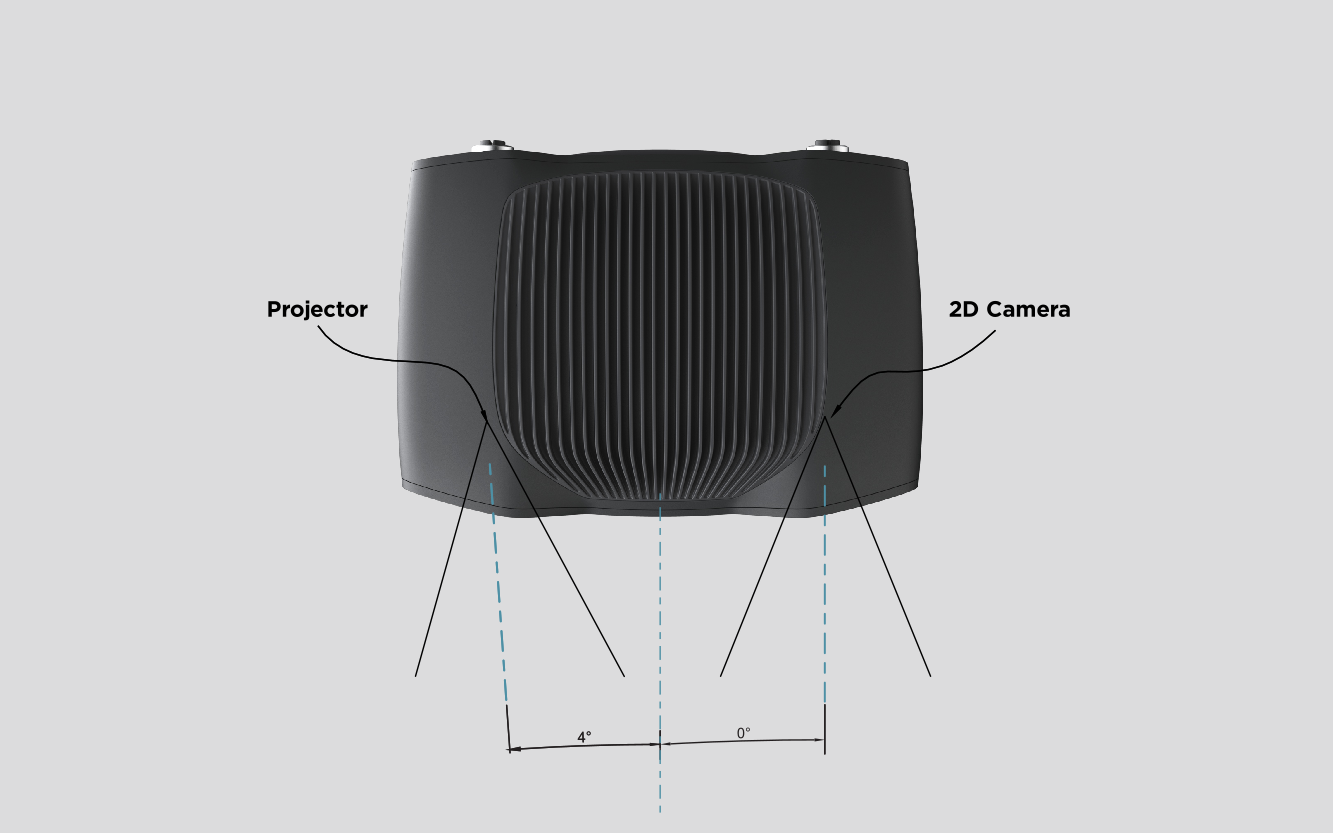
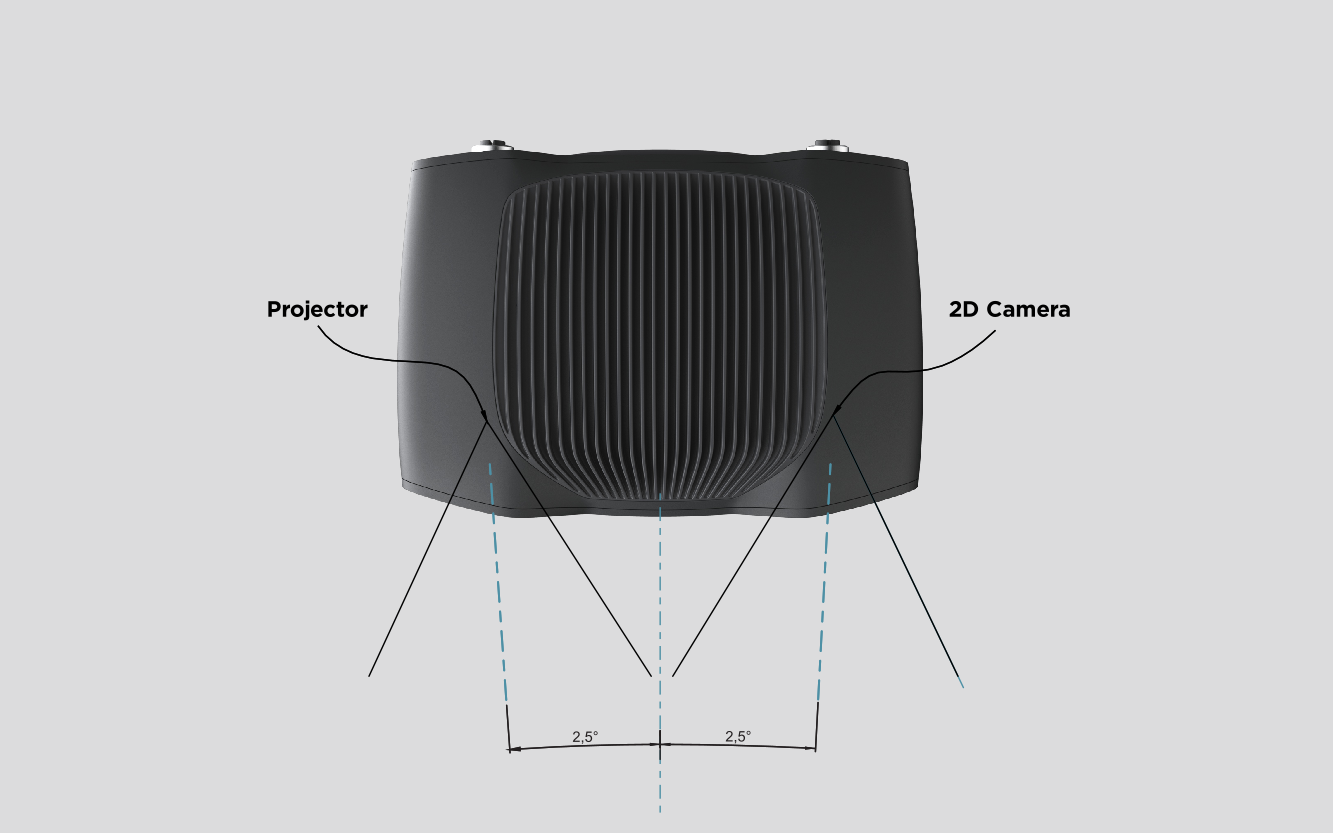
The 2D camera and the projector have an angle with respect to the center axis. This should be considered if it is desired to have the camera perpendicular to the scene.

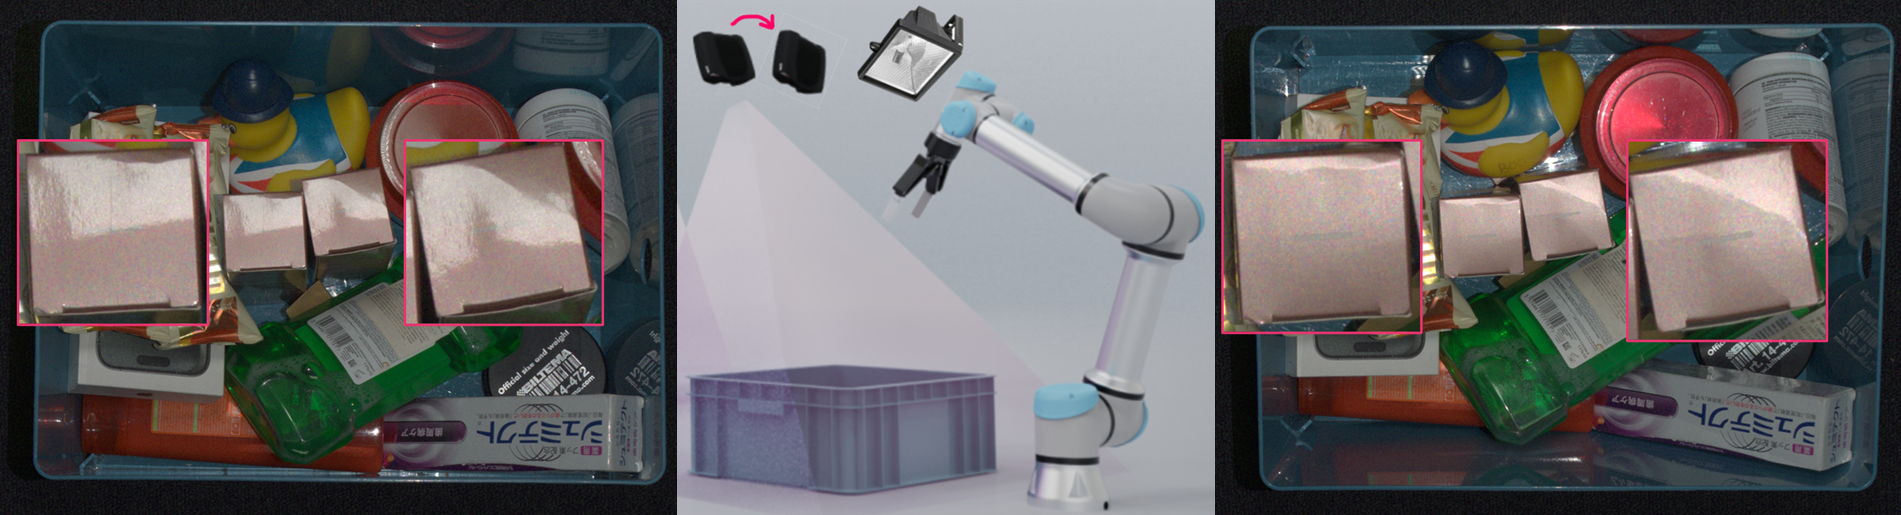
In bin-picking applications
In presence of strong interreflections from the bin walls, you can place the Zivid camera projector above the back edge or above the rear corner of the bin (see images below). Pan and tilt it so that the 2D camera is looking at the center of the bin. The projector rays should not fall on the inner surfaces of the two walls closest to the projector; they should almost be parallel to those two walls.
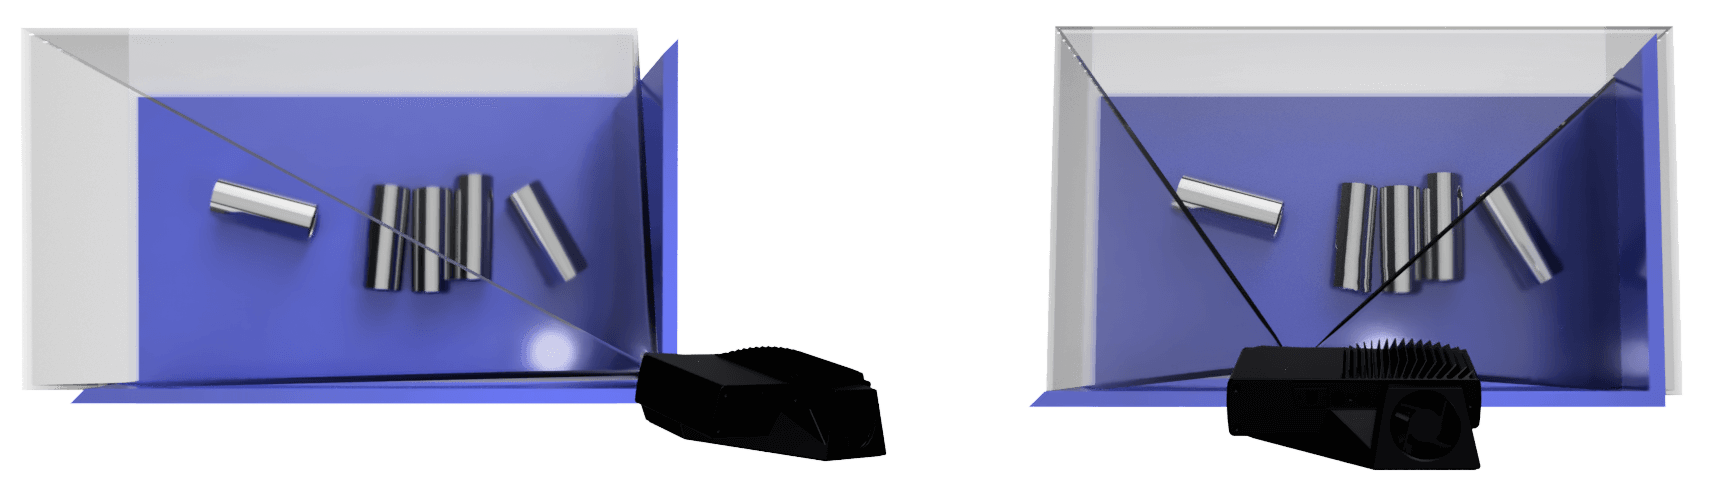
Mounting the camera this way minimizes interreflections from the bin walls, and also frees up space above the scene for easier access for tools and robots.
Zivid cameras do not need any additional light source; the projector provides all the illumination required for both 2D and 3D. A strong and focused light, such as a spotlight mounted right above the bin, can reflect directly into the camera, saturating the sensor and causing blooming in the 2D image. Avoid mounting the camera where it looks straight into such a reflection. To minimize this, remove the extra light if it is not needed, or try slightly moving or tilting the camera. For more on capturing in these conditions, see Dealing with Strong Ambient Light.
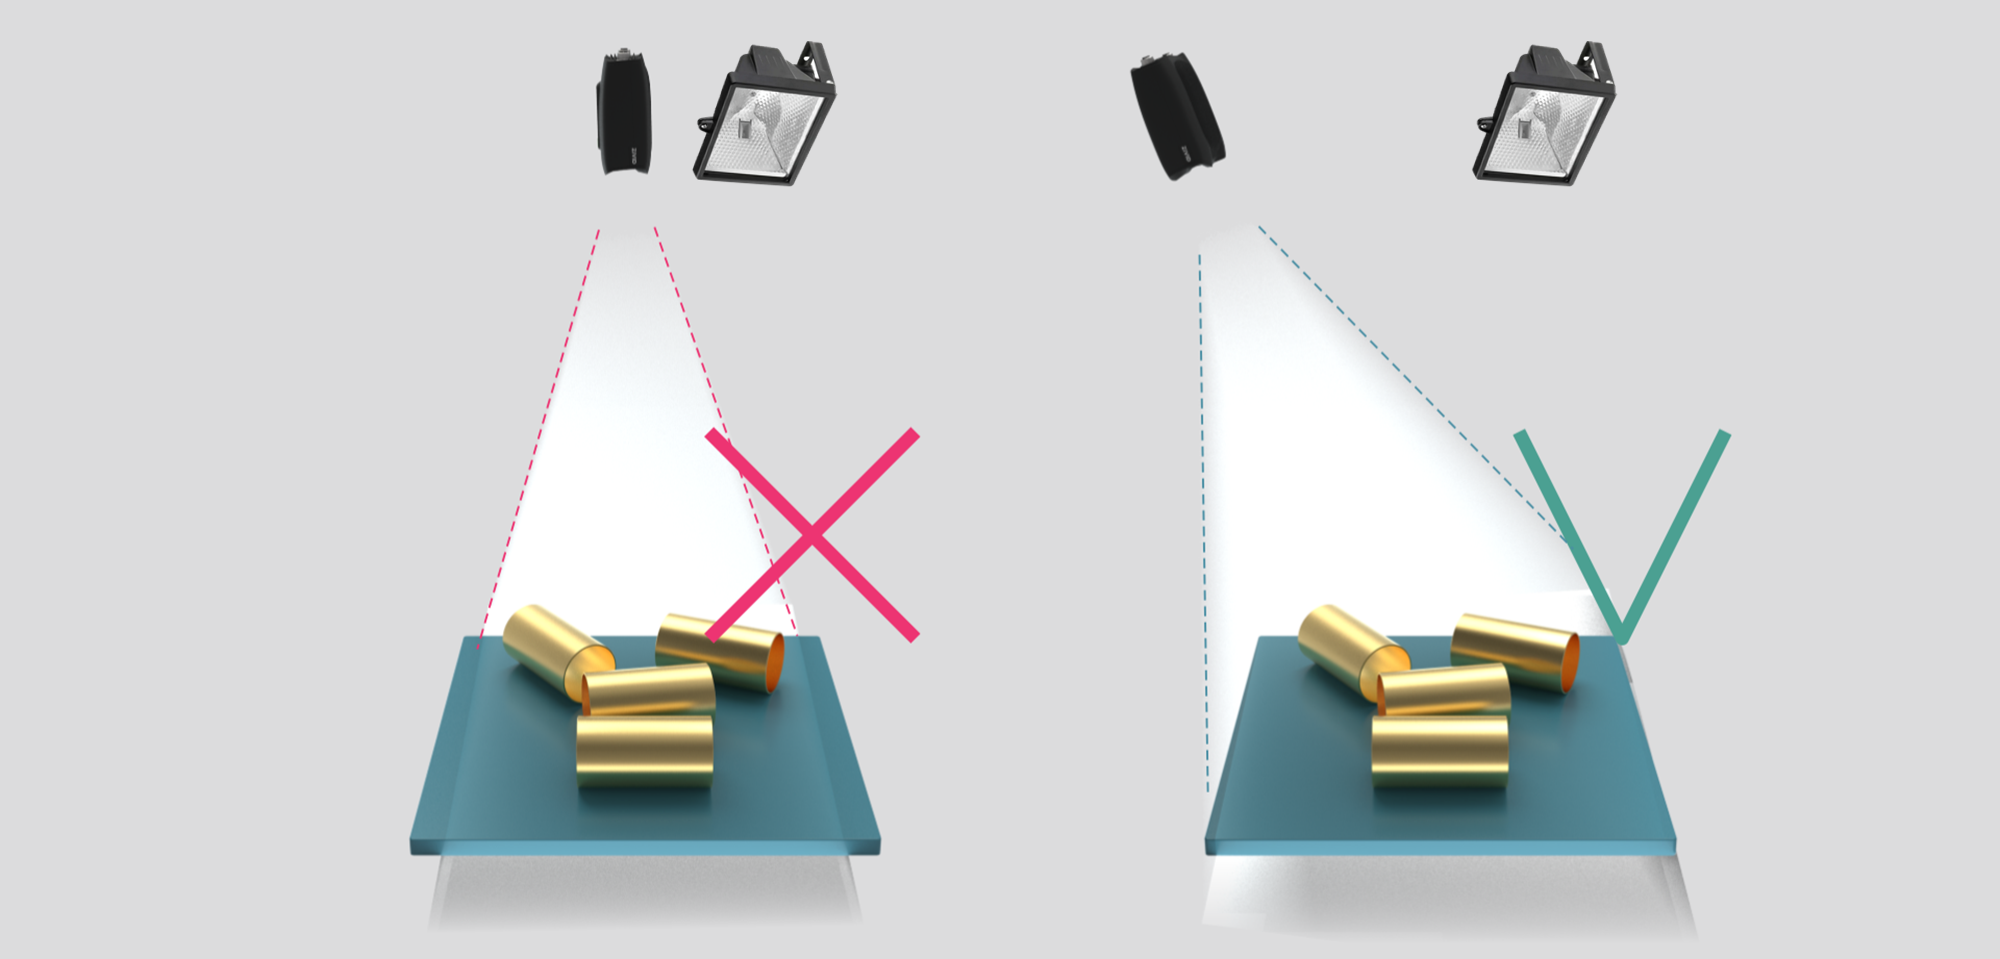
In surface imaging applications
For highly reflective surfaces, direct reflections from the light source, whether from the camera projector or an external light, can create unwanted highlights in the 2D image. To minimize these reflections, mount the camera at a slight tilt angle so that the reflected light is directed away from the camera’s field of view. Adjusting the position of the light source or using diffused lighting can also reduce glare.
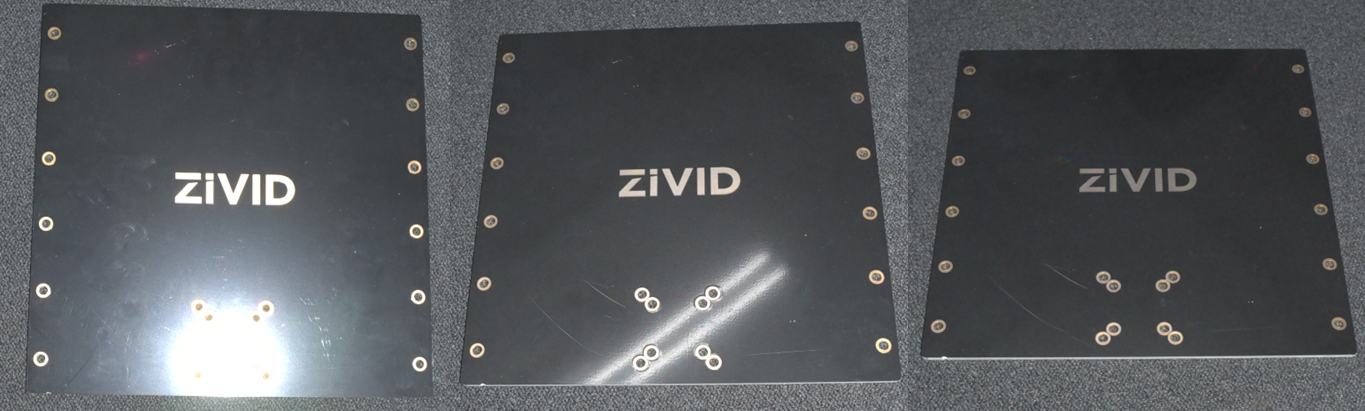
2D image with highlights from the projector (left), ambient light (center), and no highlights (right) depending on the camera position and angle.
Cooling clearance
Zivid cameras use active and passive cooling, allow some space around the device for airflow, and do not block the air opening on its front and rear sides. See the datasheets for the operating temperature range for your camera.
Signal protection
Do not install Zivid cameras and cables next to high voltage devices that can generate high levels of electromagnetic disturbance. Do not route camera cabling through the same trunks/conduits with AC power cables and cables emitting high levels of disturbance.
Continue reading about Connectivity and Power Supply.
Version History
SDK |
Changes |
|---|---|
2.17.0 |
Added support for Zivid 3 XL250. |
2.15.0 |
Added how to address highlights in 2D image for bin picking and surface imaging applications. |
2.14.0 |
Added support for Zivid 2+ MR130, LR110, and MR60. |
2.12.0 |
Zivid One+ has reached its End-of-Life and is no longer supported. |