Stationary Mounting
All Zivid 3D camera models can be stationary mounted. We recommend using the Zivid Stationary Mount.
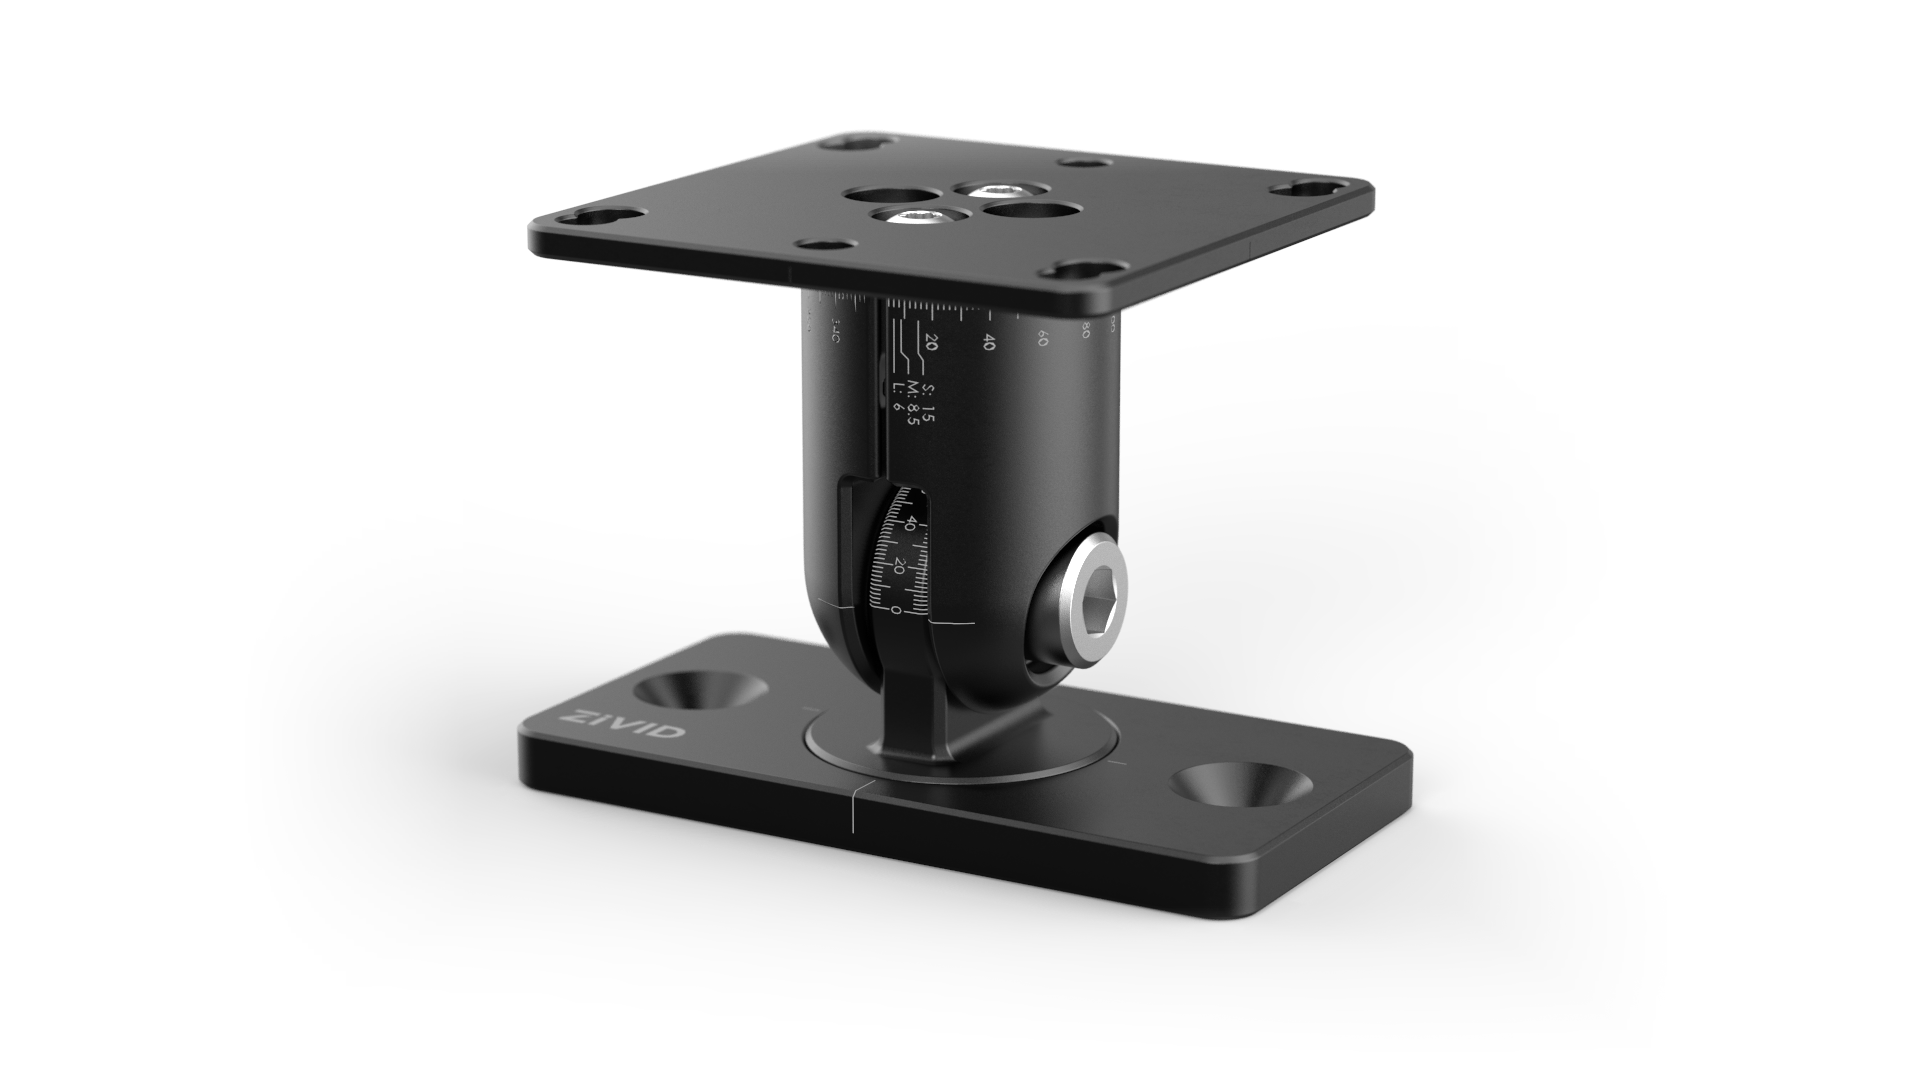
Zivid Stationary Mount
Zivid Stationary Mount is a low-profile, flexible camera mount with a unique, single screw tightening system which makes adjustments fast and precise. It is compatible with Zivid One+ and Zivid Two cameras.
The datasheet and user guide in PDF and CAD files can be found at Accessories Downloads.
Mounting Instructions
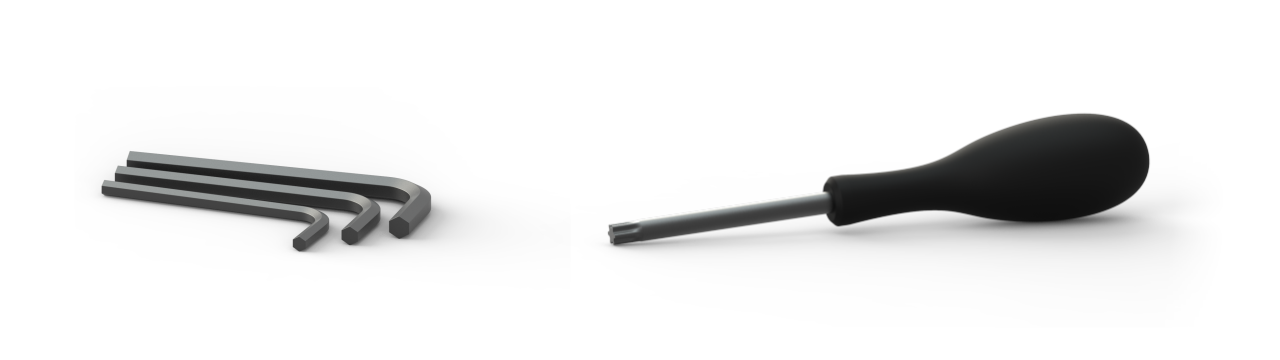
In the box, you will find the Zivid Stationary Mount and mounting screws. The following tools are required for installation:
Hex 4 and 6 mm
Torx 20, 25, and 30
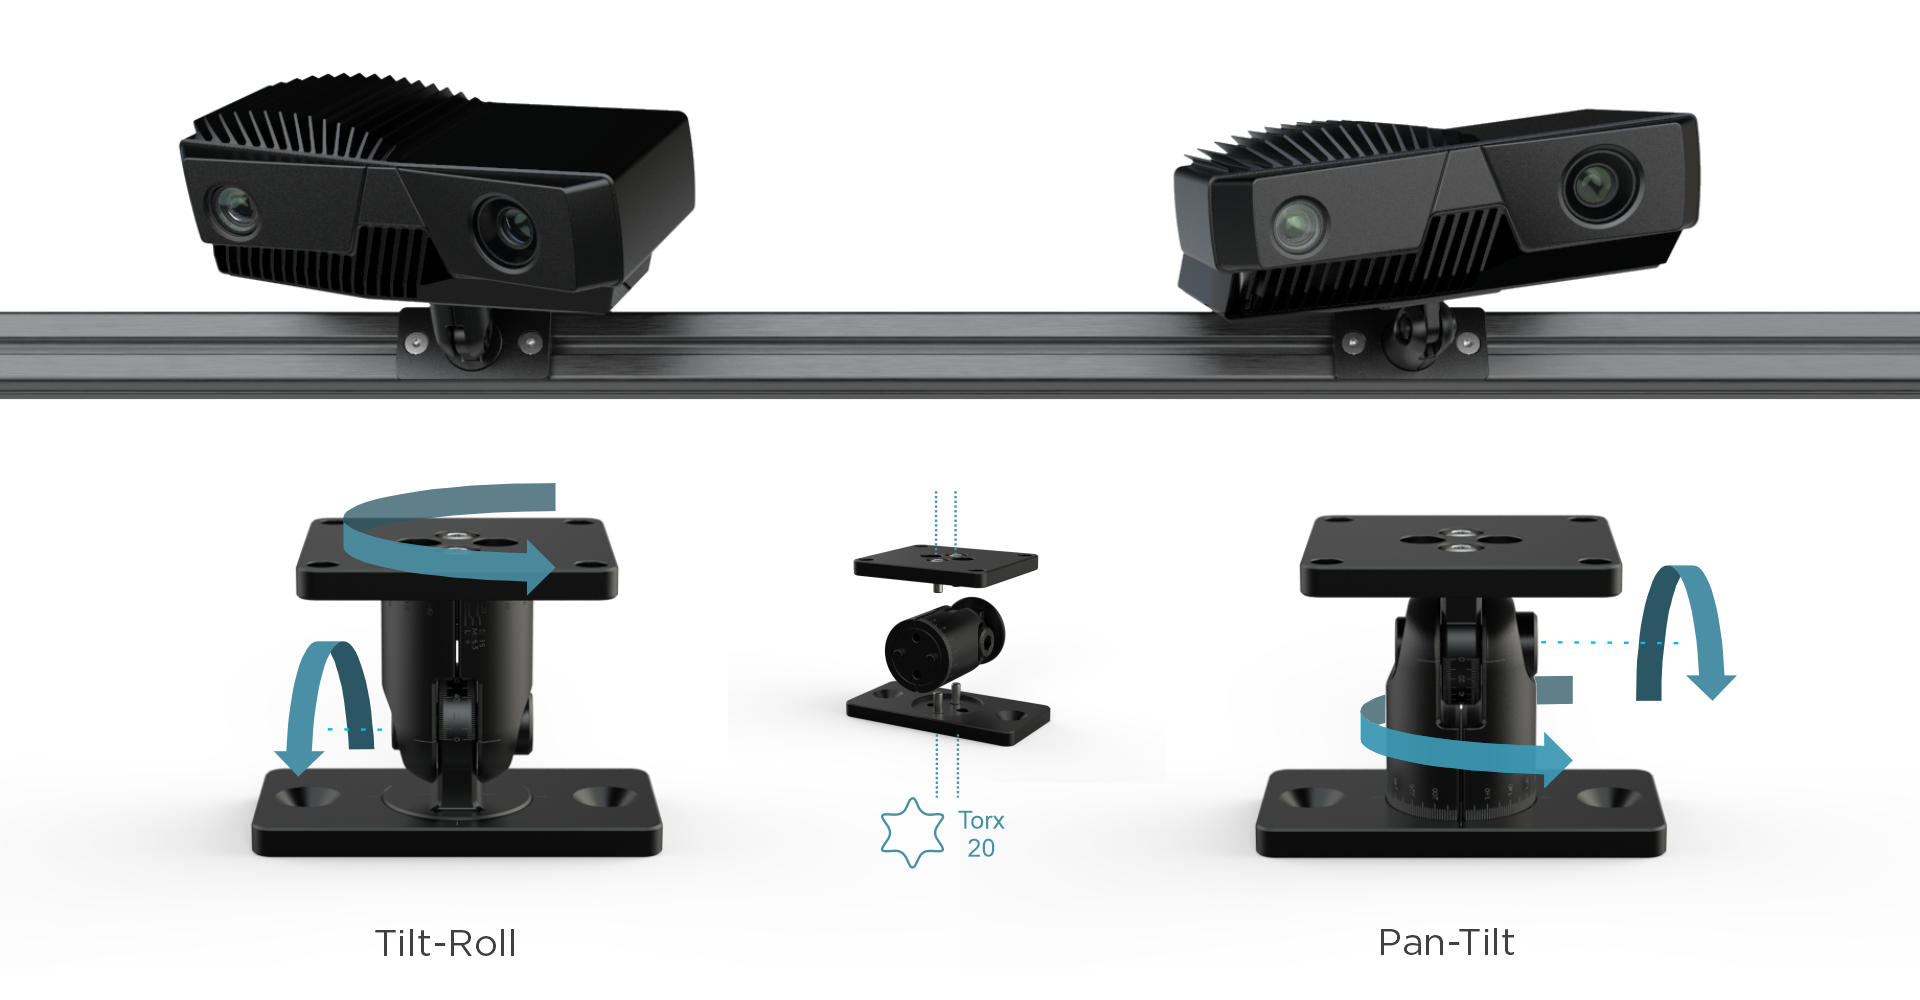
The mount can be re-configured to be either in pan-tilt or tilt-roll. Before you install the mount, evaluate which configuration best suits your application.
Tip
Installing the mount on the side of a horizontal profile in tilt-roll configuration provides two benefits. The roll joint allows aligning the camera perpendicular to the scene, while the roll joint enables tilting it to avoid reflections and interference from the background. For more info see Positioning Correctly
To re-configure the mount, loosen the four M4 screws top and bottom plate, and re-attach them in the new configuration with 4 Nm torque.
It is straightforward to install our stationary mount to a V-slot profile with M6 screws and T-nuts.
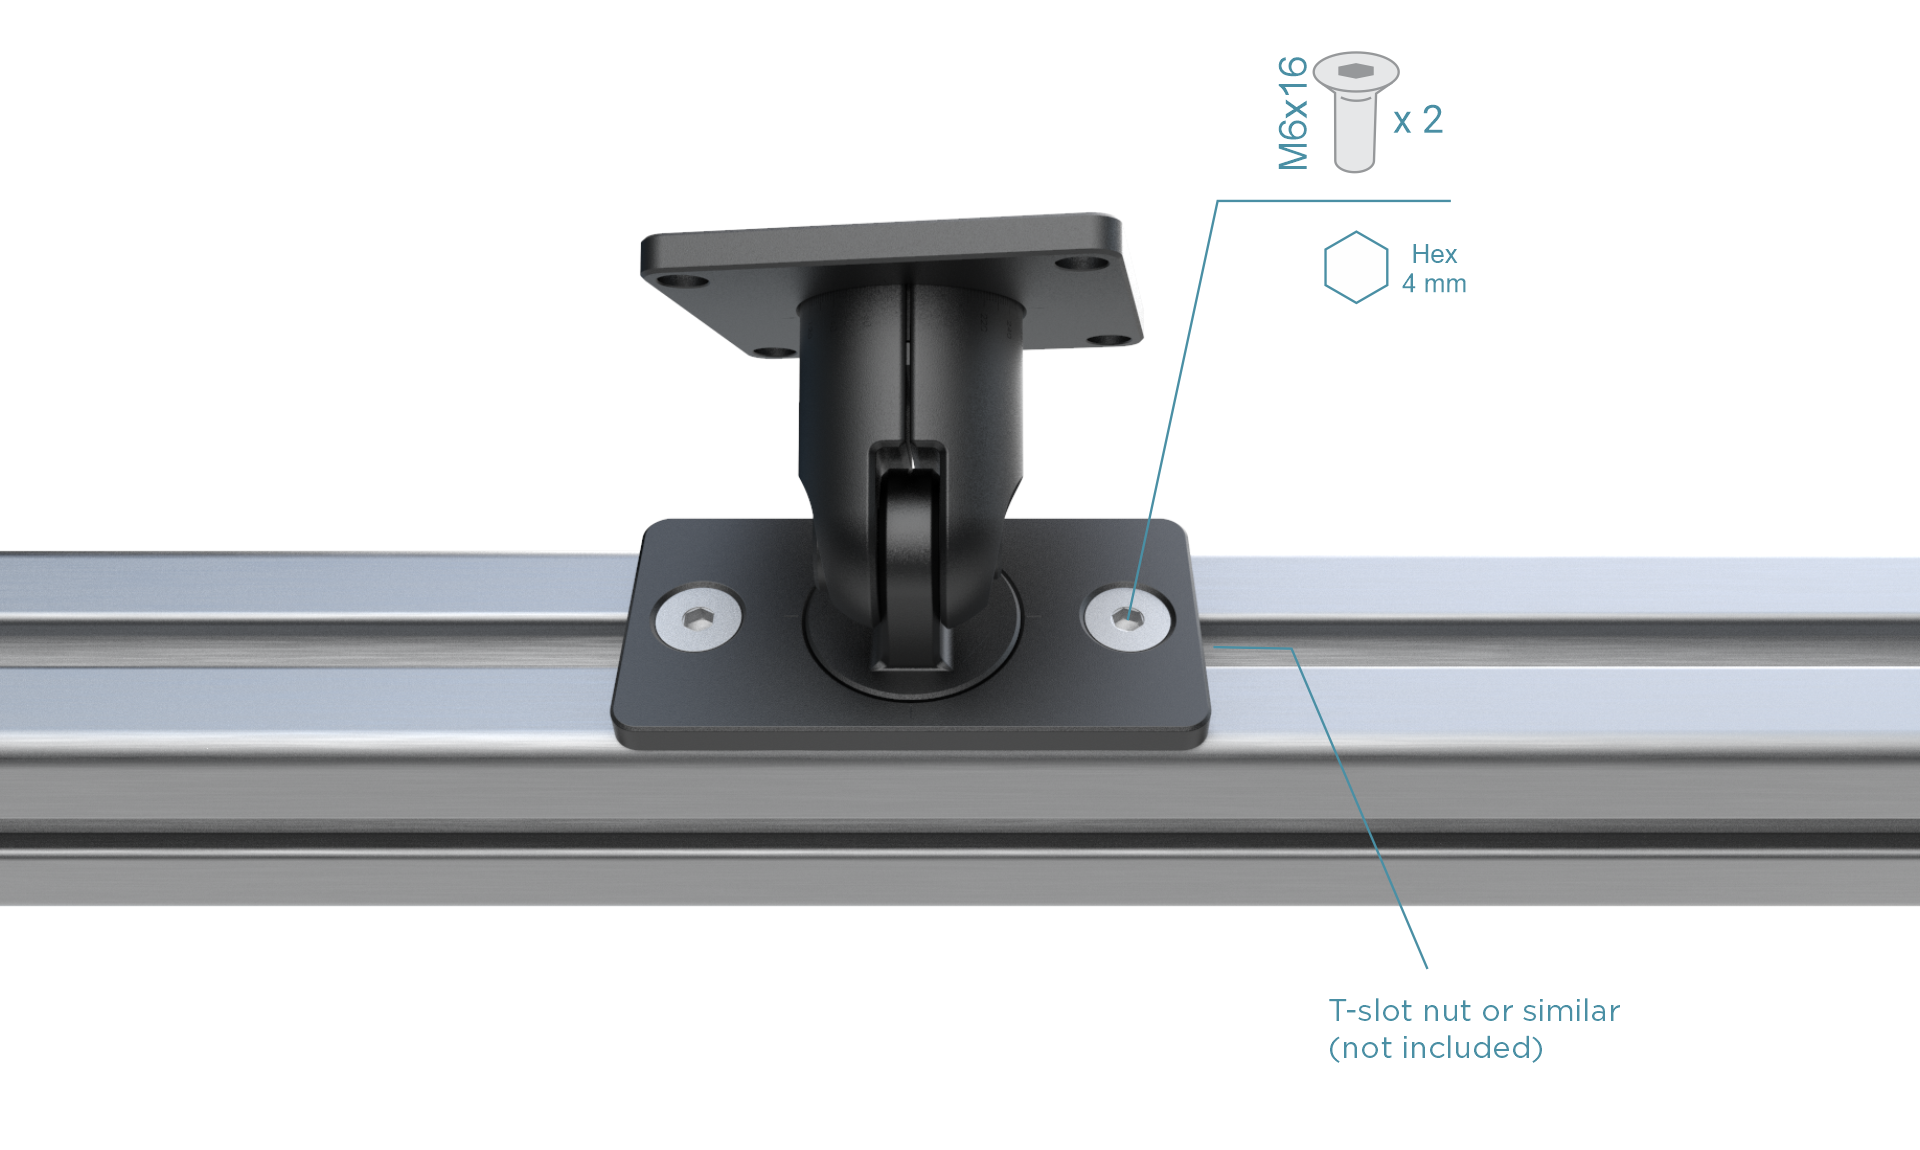
The mount can be installed on any surface of the profile with the camera oriented in any direction, horizontally or vertically, pointing up, down, or sideways.
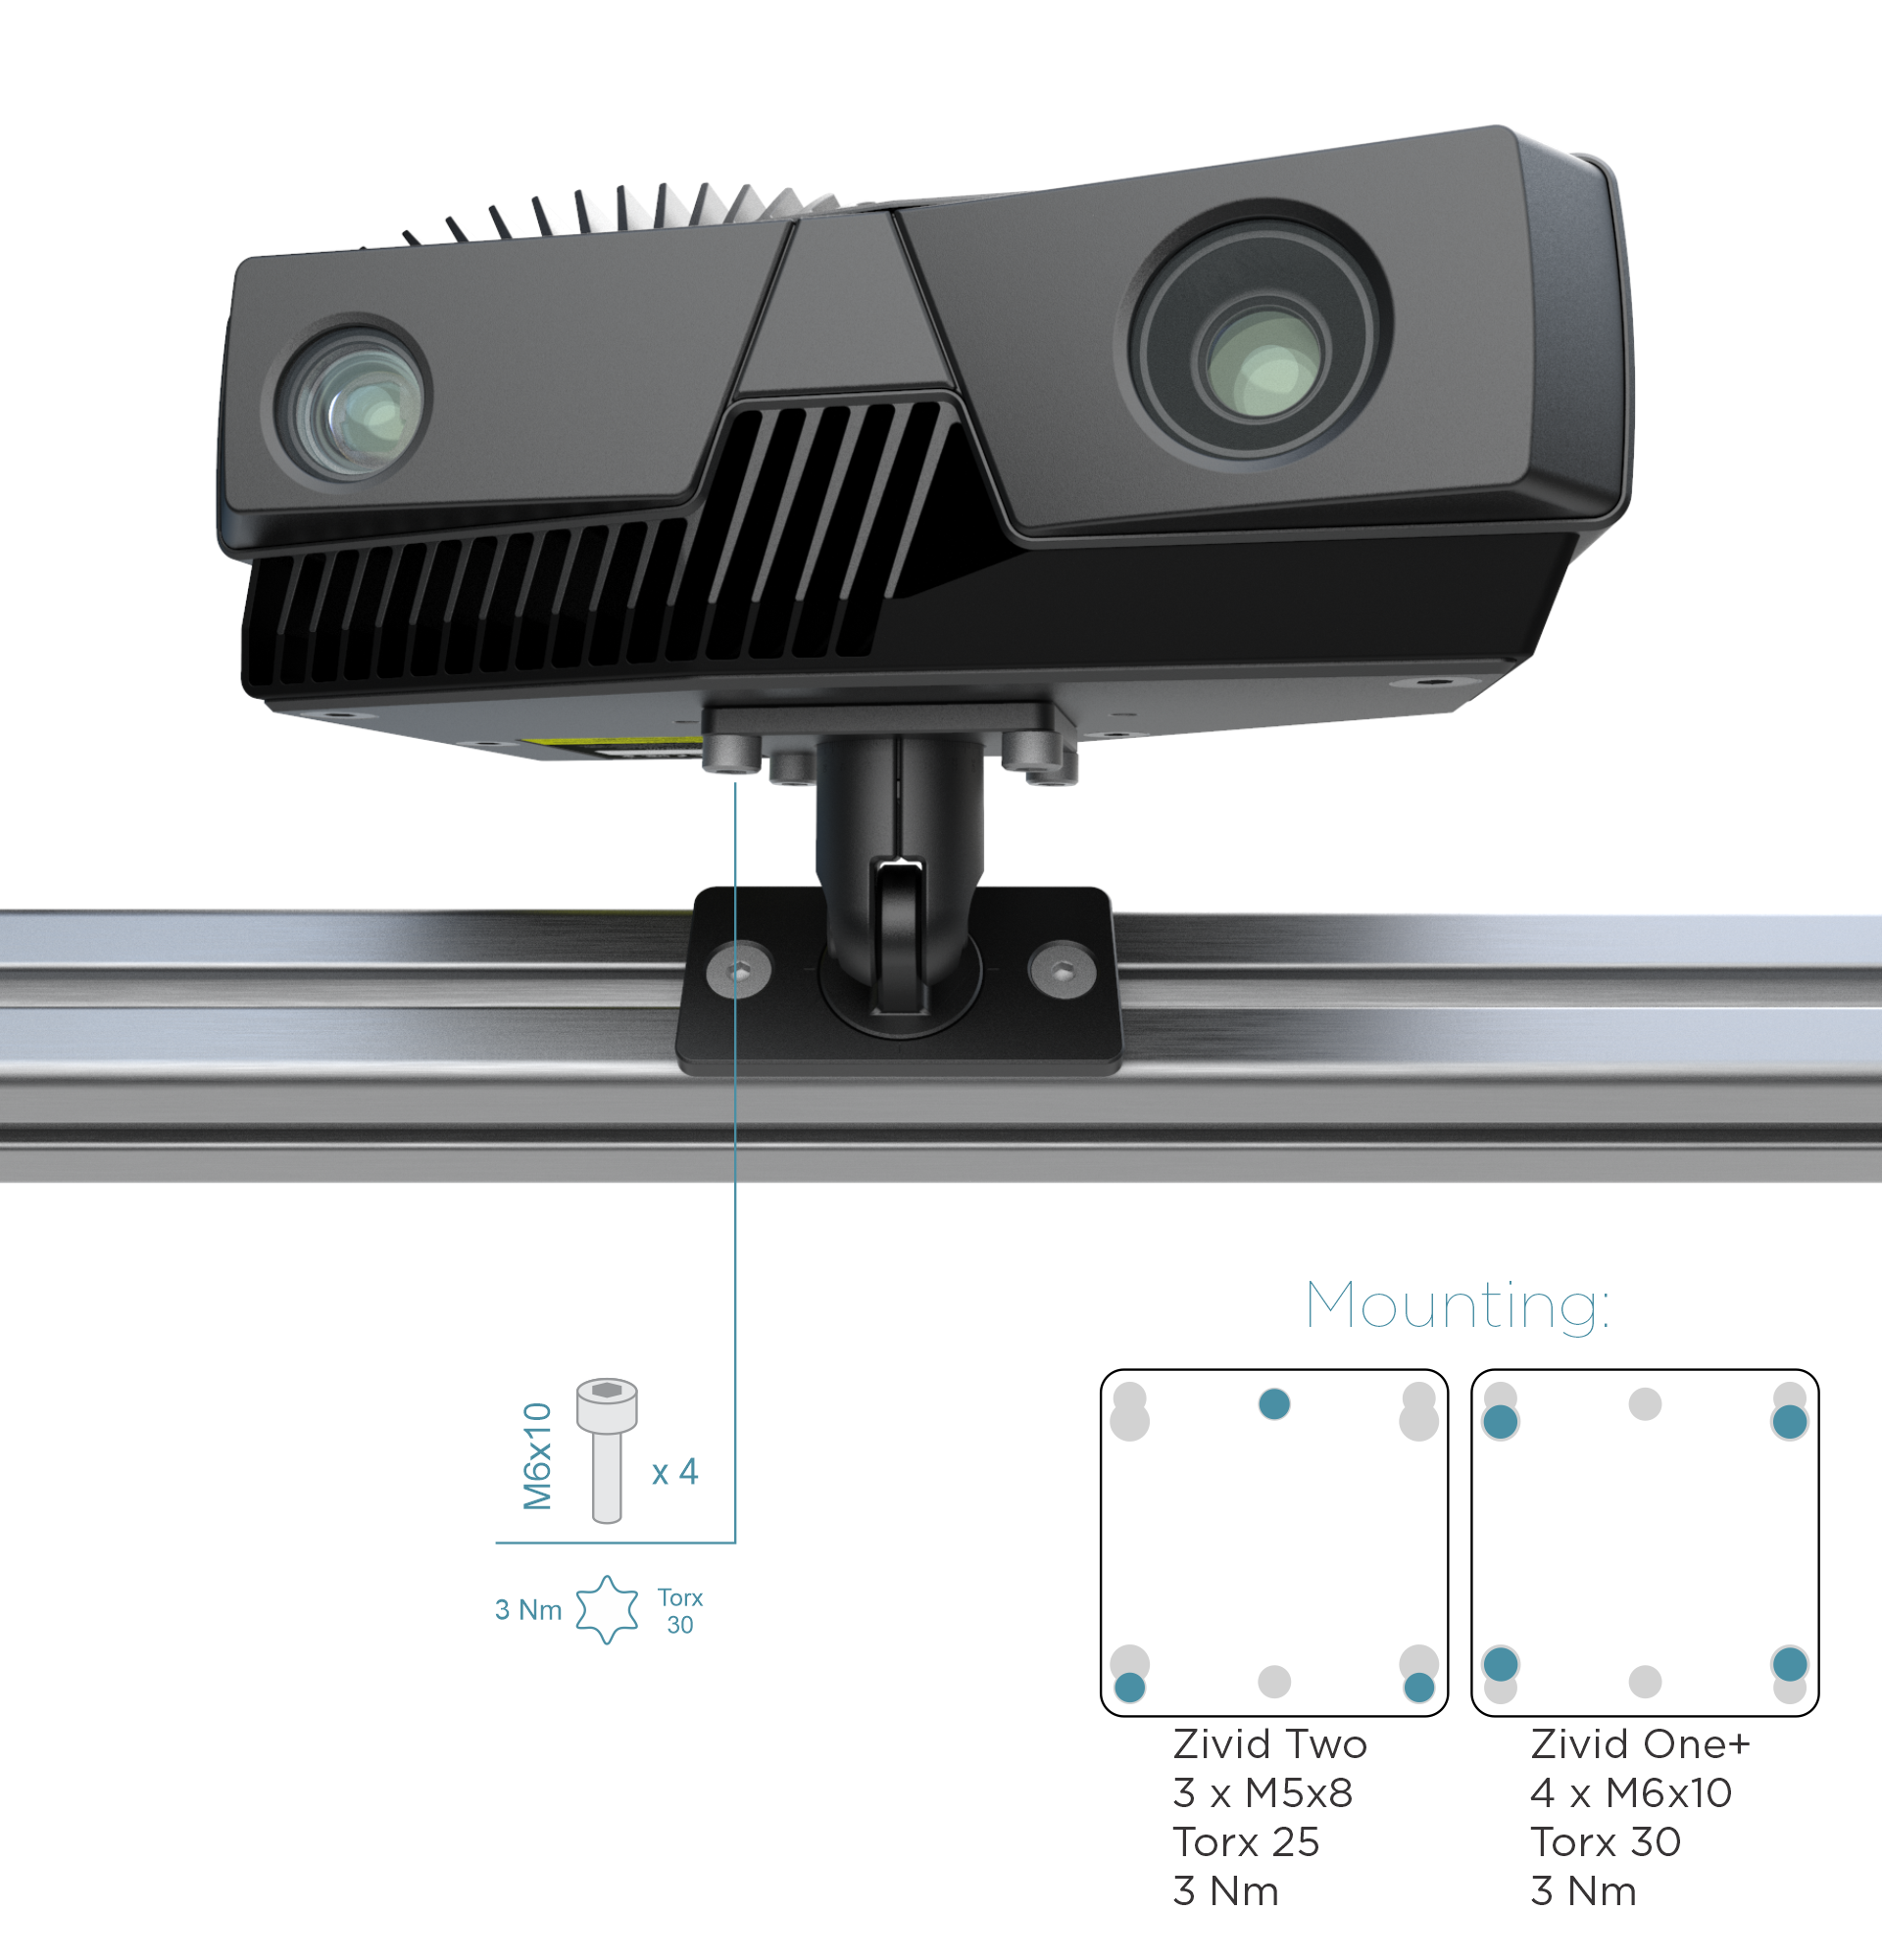
For more information on which screws to use for your Zivid camera check out Mounting Specifications.

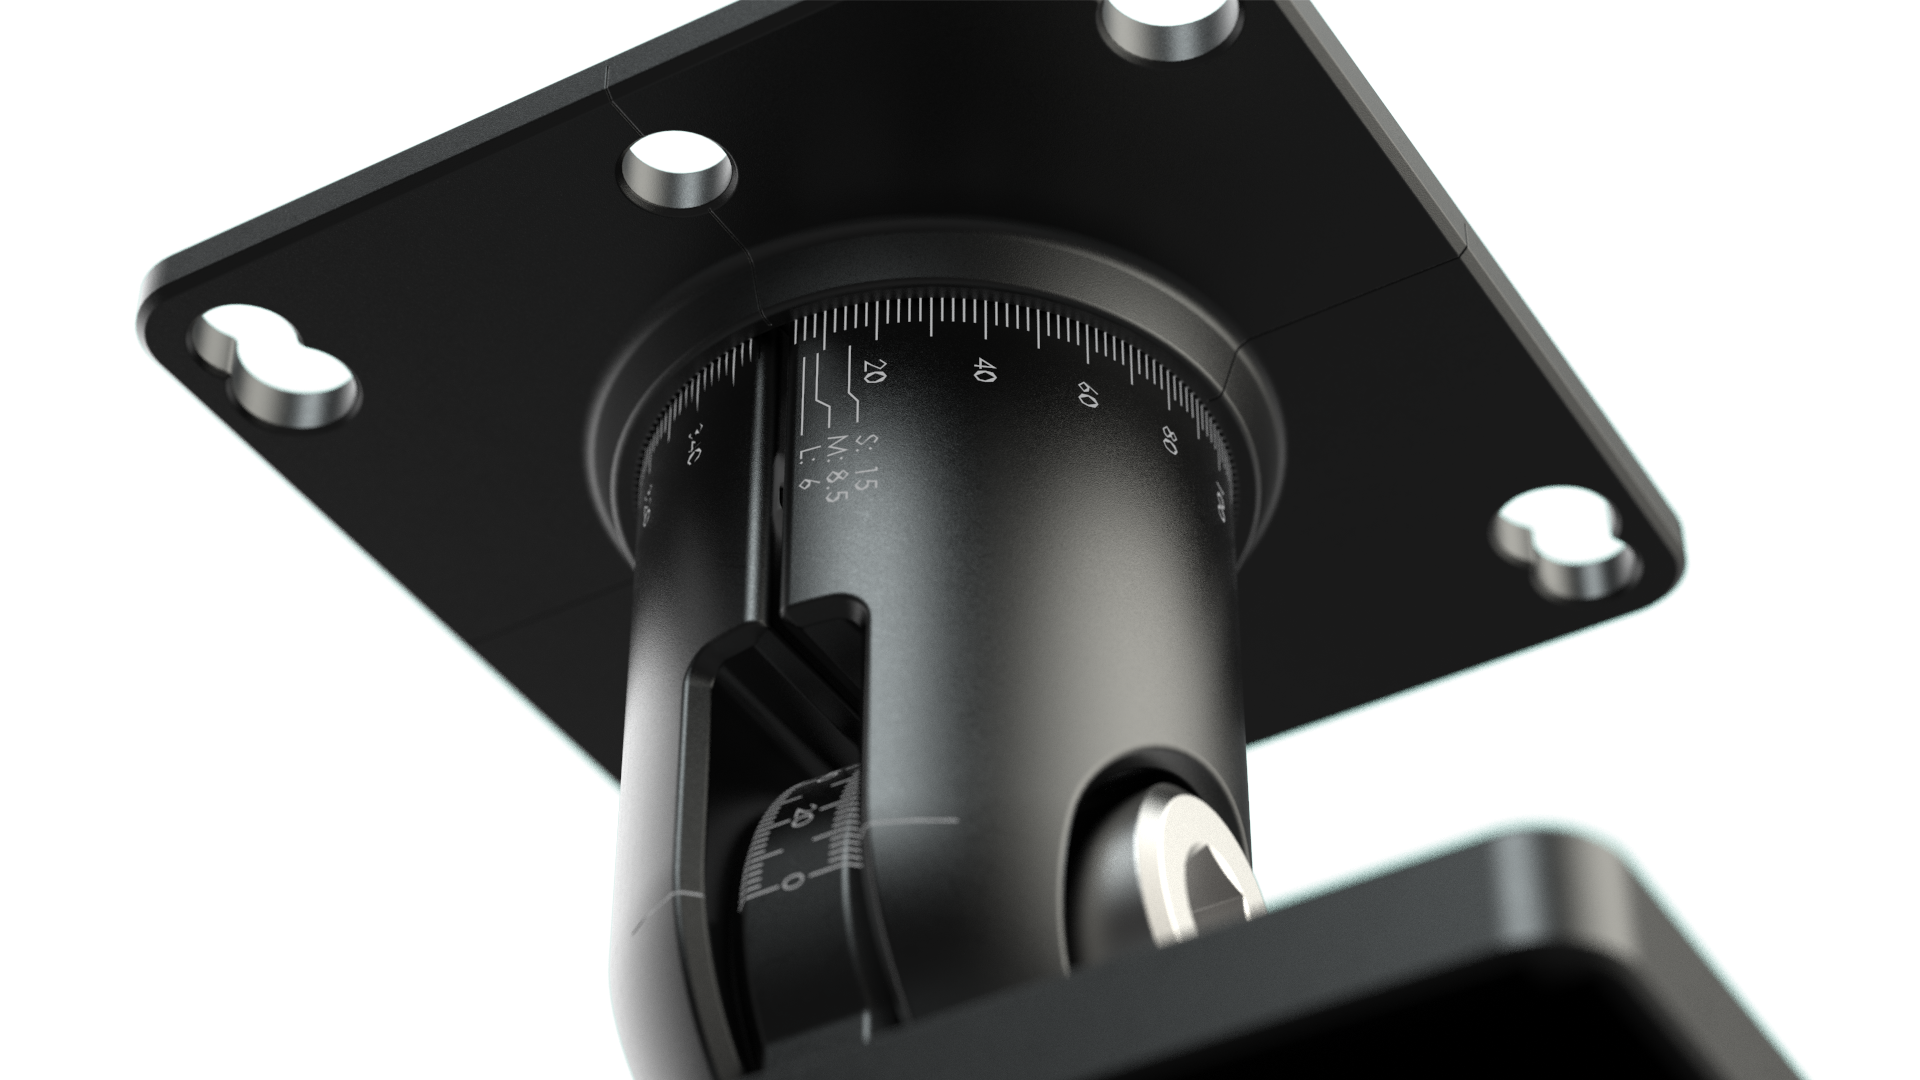
Loosen the center bolt to adjust the angle of the camera. Tighten the center bolt with a 6 mm hex key to a torque of 8-9 Nm for a good grip if exposed to vibrations. Torque of 5 Nm is sufficient for lab use on a stable surface.
Use the 360-degree laser engraved markings to precisely adjust the angles. The markings also allow remembering the camera orientation for your system if you need to dismount the camera and mount it back later.
Why use Zivid Stationary Mounting solution?
Modularity
One mount fits all our camera models, and dismounting the camera is possible without complete disassembly (only one screw). Utilizing the markings allows to precisely adjust the angles when reassembling the camera in the same orientation.
Flexibility
Two mounting configurations and two degrees of freedom enable multiple camera orientations.
Robustness
Rigid design ensures the mount does not move in the joints even when exposed to vibrations.
Continue reading about Robot Mounting.