Introduction to Stops
Introduction
In photography, the term “stops” (or “exposure stops”) is used to describe the amount of light that reaches the camera sensor and the brightness level of an image, relative to a reference point. This reference point is often called “0 stops”.
Moving one stop up doubles the brightness of the image.
Moving one stop down reduces the brightness by half.
The total number of stops a camera can handle depends on how many times the light intensity can be doubled or halved. This is related to the camera’s dynamic range, which measures how well the camera captures both very dark and very bright areas in a scene. For example, the Zivid camera has about 23 stops of dynamic range, allowing it to capture high-quality data even when imaging specular reflective (shiny) objects.
Stops in Practice
Let’s look at an example to understand stops in action.
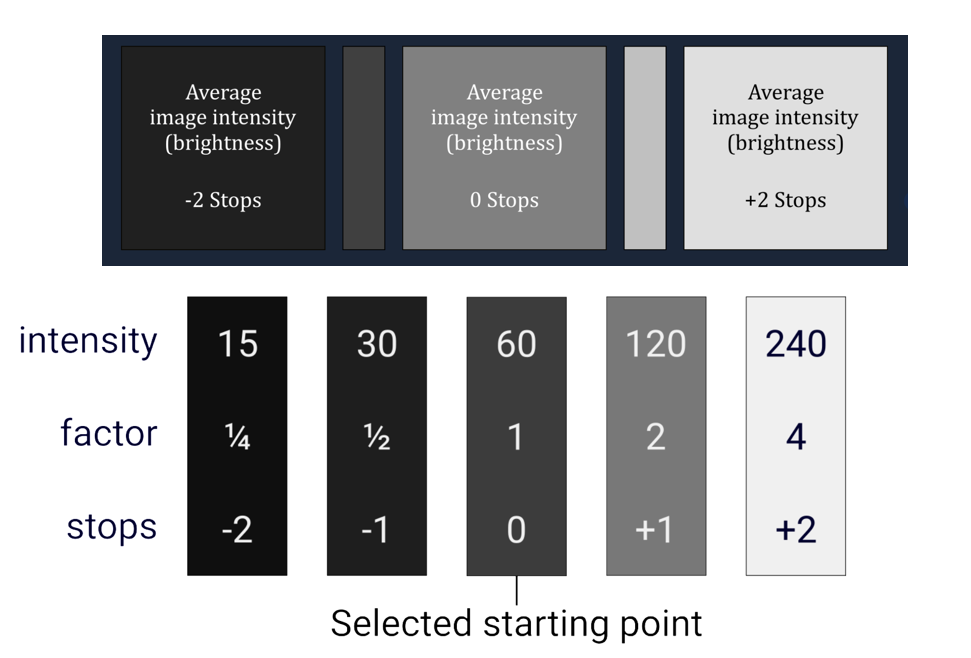
Imagine a camera sensor that measures brightness (or intensity) on a scale from 0 to 255. Suppose we are imaging a wall, and the average brightness of the image reads 60. Here’s how changing the exposure by stops affects the brightness:
Increase exposure by 1 stop: The brightness doubles to 120.
Increase exposure by 2 stops: The brightness doubles again to 240.
Decrease exposure by 1 stop: The brightness is halved to 30.
Decrease exposure by 2 stops: The brightness is halved again to 15.
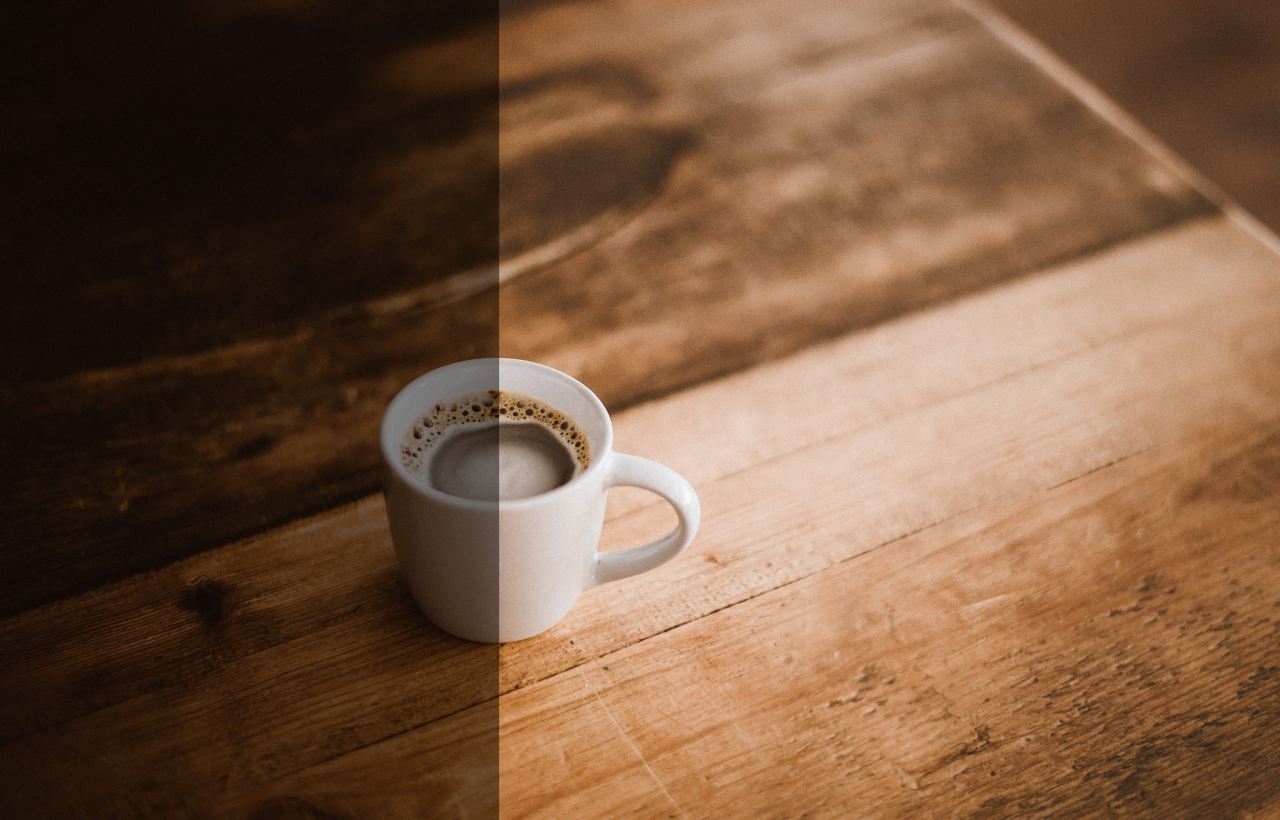
In the image below, you can see the effect of changing exposure. The left-hand side of the image is underexposed by -2 stops, while the right-hand side is properly exposed.
Tip
Try It Yourself
You can experiment with stops using a Zivid camera and Zivid Studio. Follow these steps:
Place a piece of paper in the camera’s field of view.
Open Zivid Studio and set the following 2D acquisition settings:
Exposure Time: 20000
Projector Brightness: 1.0
Gain: 1.0
Hover over the image with your mouse cursor. Check the RGB values of a specific pixel in the bottom left corner of the color image view.
Find an aperture that gives an average RGB value of 60-70.
Adjust the settings and observe how the values change:
Change the Exposure Time to 10000 and observe how the RGB value drops to 30-35 (halved, or 1 stop down).
Change the Exposure Time to 40000 and observe how the RGB value increases to 120-140 (doubled, or 1 stop up).
This exercise demonstrates how exposure stops affect image brightness in a measurable way.