Dealing with Strong Ambient Light
What is ambient light to Zivid cameras?
Zivid cameras don’t need any light source other than their projector to get 3D data. The signal Zivid cameras utilize to generate point clouds is the scene illuminance created by the projector. The scene illuminance created by external ambient light is noise. The point cloud quality significantly depends on the Signal-to-Noise ratio (SNR). Therefore, the weaker the ambient light, the lower the noise, the better the point cloud.
Note
Illuminance, measured in lux (lx), is the total luminous power incident on a surface per unit area. Luminous power, measured in lumen (lm), is a measure of the total quantity of visible light emitted by a source per unit of time.
Tip
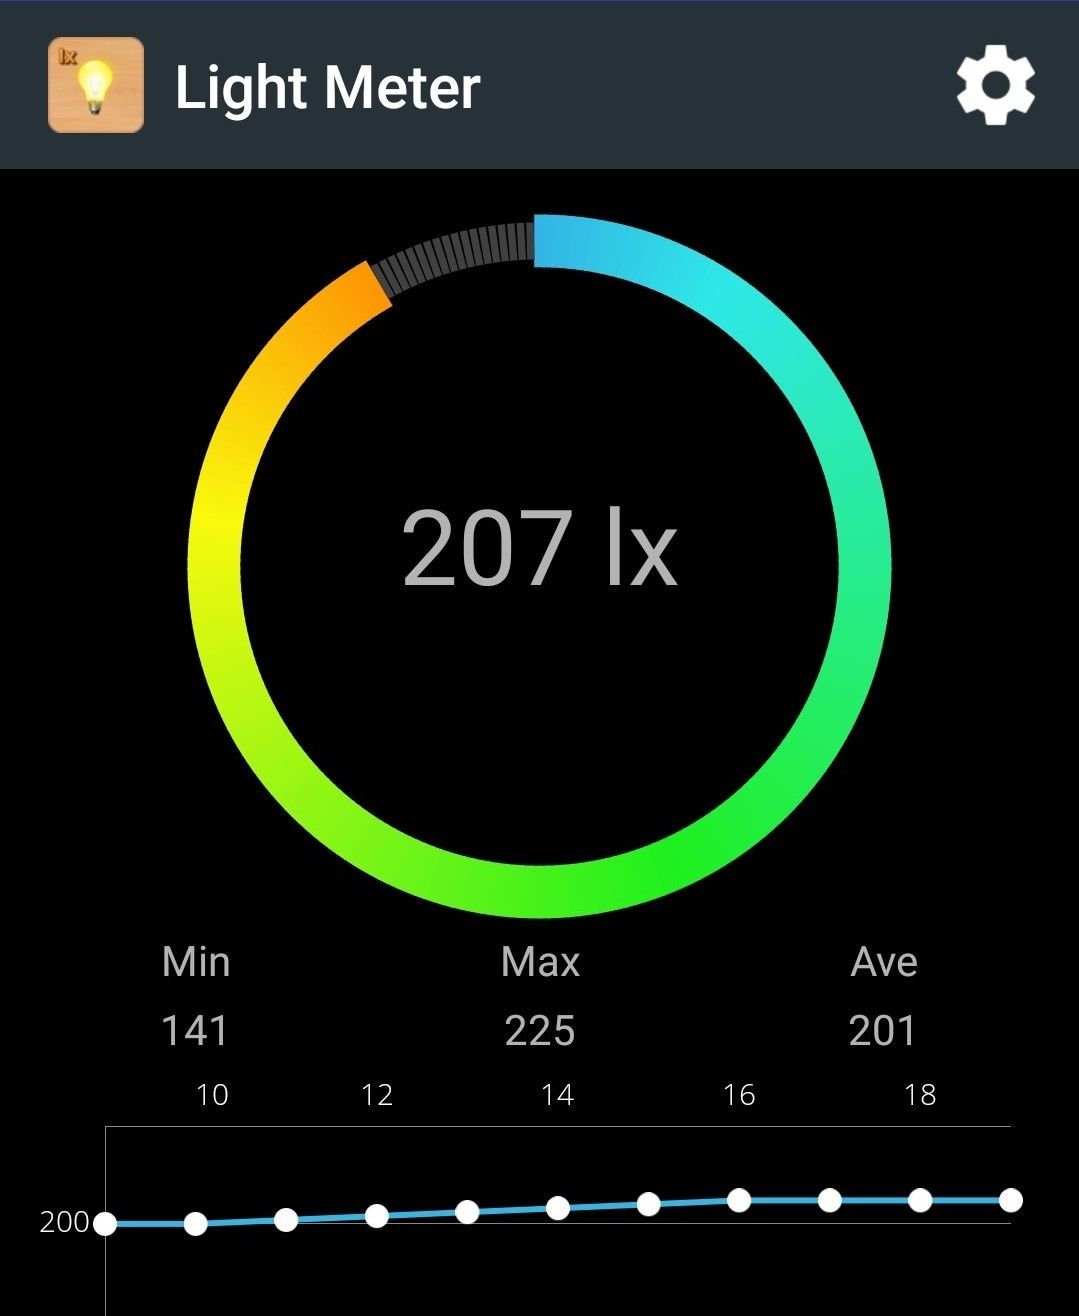
You can roughly measure the illuminance in the scene with a light meter app for Android or Apple; for an accurate measurement, you need a Light / Lux Meter.
Consult our datasheets to check what noise levels to expect based on the illuminance measurements of your scene.
How to prevent ambient light?
The best way to deal with ambient light is to eliminate it. Therefore, turn off any unnecessary light source in the vicinity of your Zivid camera. If removing the light source is difficult or impossible, prevent it from illuminating the scene by placing light barriers around the scene. You don’t need a steel wall, any dark curtains are sufficient.
How to mitigate the effect of ambient light?
In cases where it is not reasonable to prevent an external light source from illuminating the scene, follow the guidelines below to minimize its effect.
- Choose the right camera
Zivid 2+ is more robust to ambient light than Zivid 2 due to the 40% stronger projector.
- General recommendations
Get the right exposure for good point clouds
Deal with frequency interference from ambient light sources
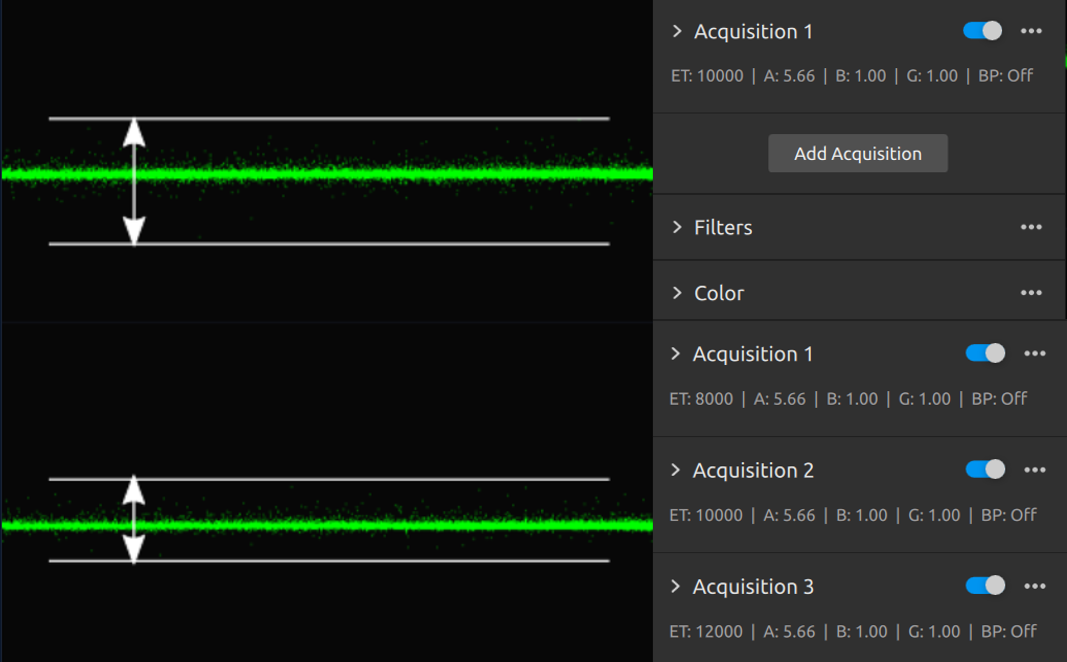
- Acquisition settings
- Projector Brightness
Increase signal intensity by boosting the projector brightness setting to its maximum. This increases the SNR.
- Gain
Minimize noise influence by reducing the gain setting to its minimum (1.0). The gain amplifies the noise together with the signal, which is undesirable.
- Aperture/f-number
Configure aperture/ f-number setting while being mindful of the depth of focus.
- Exposure Time
Compensate for the reduction of gain and aperture by increasing the exposure time.
- Sampling::Pixel
For 2 M70/L100 and 2+ M60/M130/L110, capturing with a single color improves ambient light resiliency due to narrow band; therefore, set
Sampling::PixeltoblueSubsample2x2.
If you don’t know how to manually configure the settings, learn to do so by following the tutorial on Getting the Right Exposure for Good Point Clouds.
- Filters
- Noise Filter
Fine-tune the Noise Removal threshold to the needs of your application. You can use high values to preserve only the high-confidence points. Enable the Noise Suppression filter to suppress the noise from ambient light, but be aware of smoothing effects. If you can’t get enough points, enable the Noise Repair filter. If that is not enough, you can set the Noise Removal threshold low to allow more points. This is necessary when the noise in the point cloud from ambient light is significant.
- Gaussian Smoothing
If your application does not demand highly accurate points but only smooth surfaces, use the Gaussian filter to suppress the noise and align points to a grid.
- Hole Repair Filter
If you have small regions of missing points due to ambient light, you can use the Hole Repair filter to fill in the points.
- HDR
Capture HDR acquisitions with the similar or same exposure to improve the SNR. Read more about this averaging technique.
- Physical setup
Move the camera closer to the scene. The luminous power of the projector is finite. However, the illuminance on the scene depends on how close the projector is to the scene. The closer it is, the stronger the signal, while the noise from the ambient light stays the same.
Going beyond
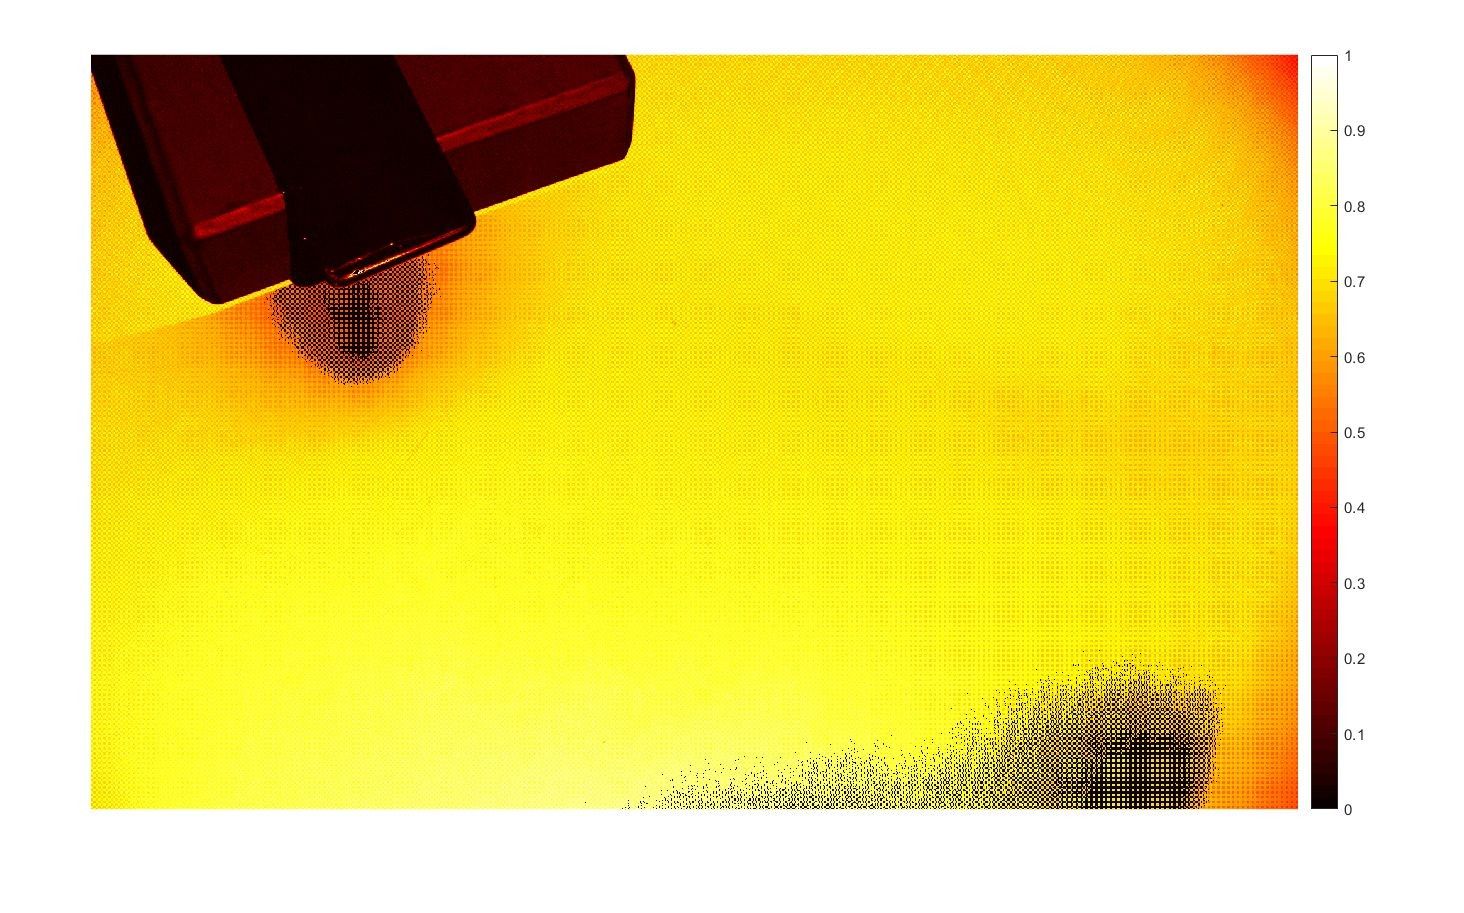
To show how you can use a 2D image to reveal how and to what extent the ambient light affects the scene, we will demonstrate an experiment.
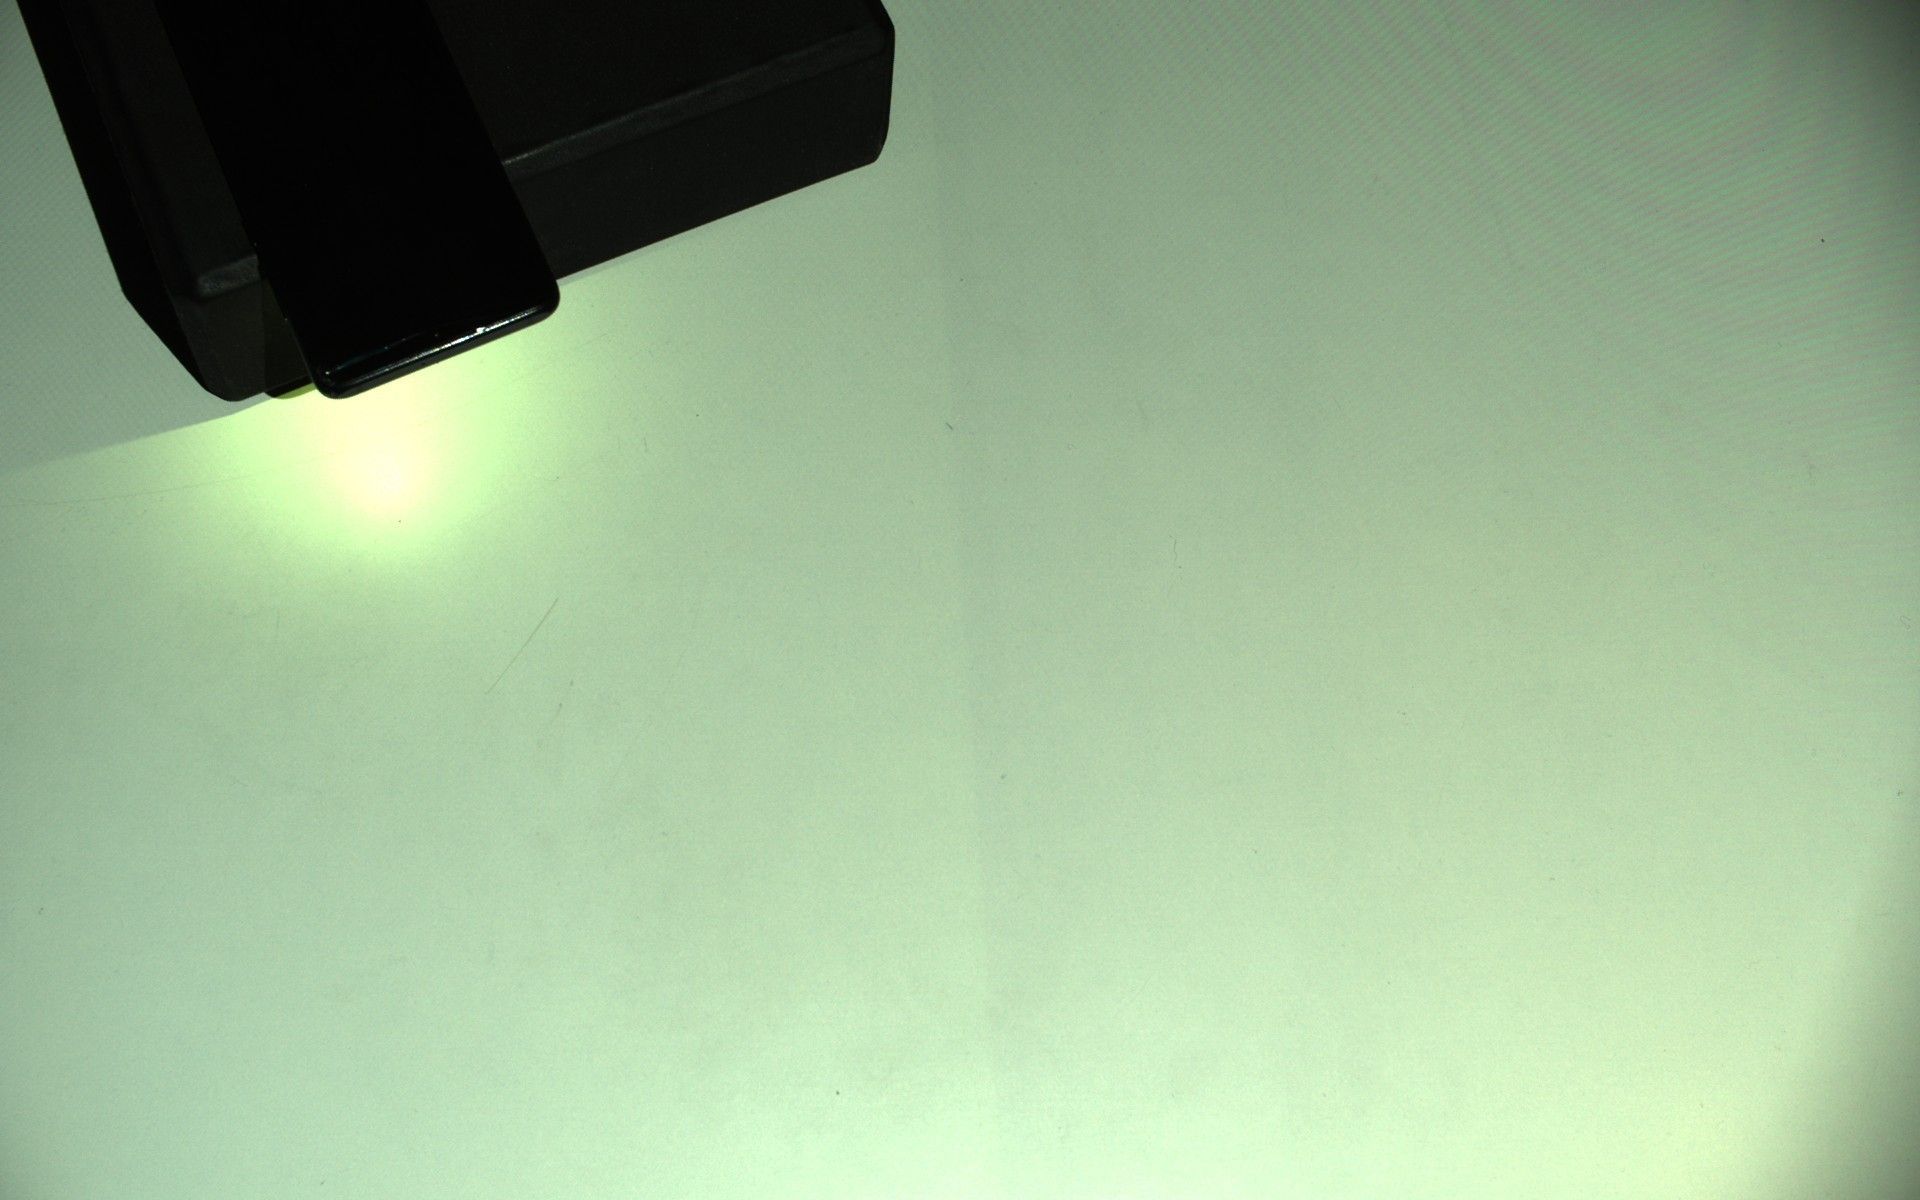
In front of the camera, we placed a smartphone with the flashlight turned on. Then, we captured an image with the projector on and set it to maximum (brightness = 2.5 for Zivid 2+ and 1.8 for Zivid 2). The remaining exposure settings we configured accordingly to get a high-intensity image while avoiding oversaturation as much as possible. The resulting image shows that the flashlight seems to be the only source of light in the scene other than the projector.
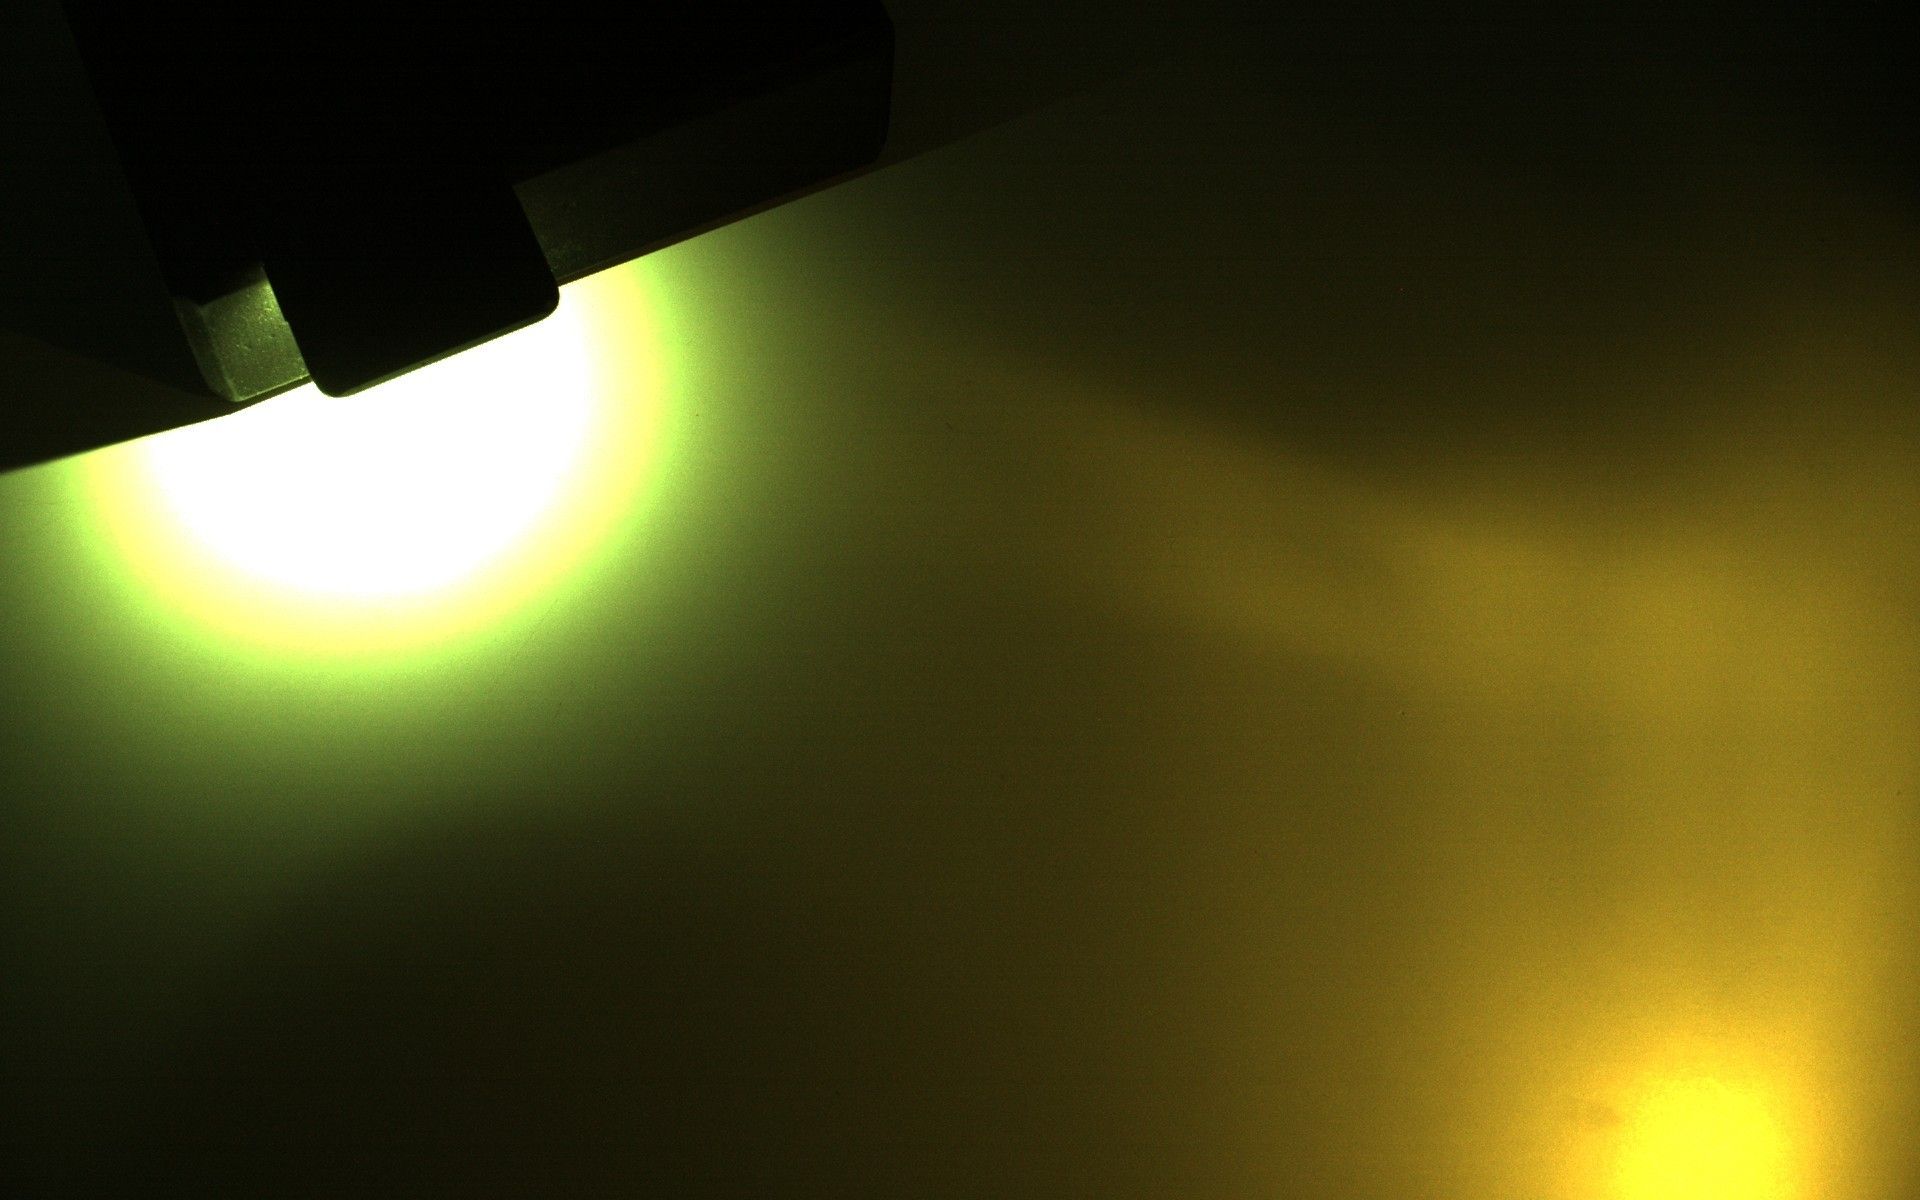
Then, we captured another image of the same scene, but this time with the projector off (brightness = 0). To compensate for the lost exposure we set the gain to maximum (16.0). If you scroll down, you will see that this image reveals another source of light! This other source is mostly affecting the bottom right corner of the image and also spreading towards the center.
This experiment shows how to utilize the 2D capture as a tool to reveal and measure the influence of ambient light on your scene. How you make use of this information is up to you.
You can also analyze the SNR image to get additional information about the ambient light and its influence on your scene. The image below is the normalized (0-1) SNR image. SNR is low in the areas on the image where the ambient light influence is high. However, it also depends on the optical properties of the material, which is why it is low on the dark smartphone.
Further reading
Continue to the next advanced topic: Depalletization - Imaging at Large Distance.