DHCP Network Configuration - PC
Caution
The correct instructions for network configuration will depend on your SDK version. Choose your SDK version in the top left drop-down.
Warning
Make sure you are familiar with DHCP before you configure this mode. It is easy to run into issues with DHCP. For example, running more than one DHCP server with overlapping address range on the same network.
This guides you through how to set up a DHCP server on the PC. Make sure you first have configured the camera to DHCP before going onward. Go to DHCP or Link Local IP Network Configuration - Camera in order to do this.
Install a DHCP server. If the network already has a DHCP server running you can skip this step.
Install from https://www.dhcpserver.de/cms/.
We want to use the latest DHCP server from ISC, Kea, and we will use their automatic setup script.
curl -1sLf 'https://dl.cloudsmith.io/public/isc/kea-2-5/setup.deb.sh' | sudo -E bash
Now that the repository is ready we can install the DHCPv4 server.
sudo apt -y install isc-kea-dhcp4-server
Configure the DHCP server. The example here is based on the DHCP server implementation referred to in the previous step. The concepts should apply to alternative DHCP servers. You can either list the IP addresses the DHCP can assign, or list the hostnames assigned to the connected camera(s).
Option: List IP addresses.
Configure the settings in the
dhcpsrv.inifile[Settings] IPBIND_1=172.28.60.2 IPPOOL_1=172.28.60.3-172.28.60.10 AssociateBindsToPools=1 [General] SUBNETMASK=255.255.255.0
Find interface name:
ip addr
1: lo: <LOOPBACK,UP,LOWER_UP> mtu 65536 qdisc noqueue state UNKNOWN group default qlen 1000
    link/loopback 00:00:00:00:00:00 brd 00:00:00:00:00:00
    inet 127.0.0.1/8 scope host lo
    valid_lft forever preferred_lft forever
    inet6 ::1/128 scope host
    valid_lft forever preferred_lft forever
8: eth0: <BROADCAST,MULTICAST,UP,LOWER_UP> mtu 1500 qdisc fq_codel state UP group default qlen 1000
    link/ether 48:65:ee:1c:12:ba brd ff:ff:ff:ff:ff:ff
    inet 172.21.96.50/24 brd 172.28.60.255 scope global noprefixroute eth0
    valid_lft forever preferred_lft forever
    inet6 fe80::4a65:eeff:fe1c:12ba/64 scope link
    valid_lft forever preferred_lft forever
Next we will use the most basic default configuration. Replace the default file
/etc/kea/kea-dhcp4.confwith. Create a backup if you want to keep it as a local reference.sudo nano /etc/kea/kea-dhcp4.conf
Add the following:
{
   "Dhcp4": {
      "interfaces-config": {
            "interfaces": [ "eth0" ],
            "dhcp-socket-type": "raw"
      },
      "valid-lifetime": 4000,
      "renew-timer": 1000,
      "rebind-timer": 2000,
      "subnet4": [{
         "pools": [ { "pool": "172.28.60.3-172.28.60.10" } ],
         "subnet": "172.28.60.0/24"
      }],
      "loggers": [{
            "name": "*",
            "severity": "WARNING"
      }]
   }
}
Option: List hostnames.
Configure the settings in the
dhcpsrv.inifile[Settings] IPBIND_1=172.28.60.2 [DNS-Settings] EnableDNS=1 [General] SUBNETMASK=255.255.255.0 DNS_1=$(IPBIND_1)
Find interface name:
ip addr
1: lo: <LOOPBACK,UP,LOWER_UP> mtu 65536 qdisc noqueue state UNKNOWN group default qlen 1000
    link/loopback 00:00:00:00:00:00 brd 00:00:00:00:00:00
    inet 127.0.0.1/8 scope host lo
    valid_lft forever preferred_lft forever
    inet6 ::1/128 scope host
    valid_lft forever preferred_lft forever
8: eth0: <BROADCAST,MULTICAST,UP,LOWER_UP> mtu 1500 qdisc fq_codel state UP group default qlen 1000
    link/ether 48:65:ee:1c:12:ba brd ff:ff:ff:ff:ff:ff
    inet 172.21.96.50/24 brd 172.28.60.255 scope global noprefixroute eth0
    valid_lft forever preferred_lft forever
    inet6 fe80::4a65:eeff:fe1c:12ba/64 scope link
    valid_lft forever preferred_lft forever
Next we will use the most basic default configuration. Replace the default file
/etc/kea/kea-dhcp4.confwith. Create a backup if you want to keep it as a local reference.sudo nano /etc/kea/kea-dhcp4.conf
Add the following:
{
   "Dhcp4": {
      "interfaces-config": {
            "interfaces": [ "eth0" ],
            "dhcp-socket-type": "raw"
      },
      "valid-lifetime": 4000,
      "renew-timer": 1000,
      "rebind-timer": 2000,
      "subnet4": [{
         "pools": [ { "pool": "172.28.60.3-172.28.60.10" } ],
         "subnet": "172.28.60.0/24"
      }],
      "loggers": [{
            "name": "*",
            "severity": "WARNING"
      }]
   }
}
From SDK 2.7, enabling NetBIOS Naming Service is no longer required. There is an additional step for earlier SDK versions to enable NetBIOS Naming Service. Change the Knowledge Base version in the top left corner to see instructions.
If you are using Cameras.yml
Update
Cameras.ymlaccording to the DHCP configuration, with examples for either IP addresses or hostnames shown below.Go to Cameras.yml and how to restrict discoverable cameras for more information about
Cameras.yml.Option: List IP addresses.
__version__: 1
Cameras:
   NetworkCameras:
         - NetworkCamera:
            Host: 172.28.60.3
         - NetworkCamera:
            Host: 172.28.60.4
         - NetworkCamera:
            Host: 172.28.60.5
         - NetworkCamera:
            Host: 172.28.60.6
         - NetworkCamera:
            Host: 172.28.60.7
         - NetworkCamera:
            Host: 172.28.60.8
         - NetworkCamera:
            Host: 172.28.60.9
         - NetworkCamera:
            Host: 172.28.60.10
Option: List hostnames.
__version__: 1
Cameras:
   NetworkCameras:
         - NetworkCamera:
            Host: zivid-2022C0DE.local
         - NetworkCamera:
            Host: zivid-two.local
         - NetworkCamera:
            Host: zivid-two-alt-1.local
         - NetworkCamera:
            Host: zivid-two-alt-2.local
(Re-)start the DHCP server.
Navigate to the folder where you extracted the executable, and double-click dhcpsrv.exe, or open Command Prompt and
dhcpsrv.exe -runapp
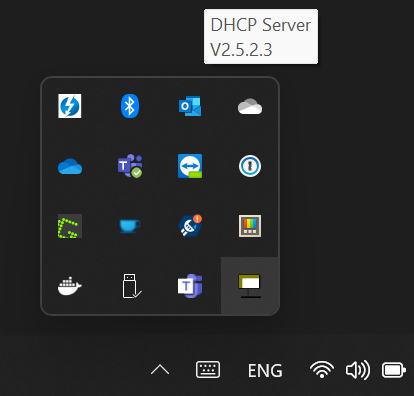
You can verify that the DHCP server is running by checking your tray:
sudo systemctl restart isc-kea-dhcp4-server
Once you have configured the camera to DHCP and started the DHCP server on the PC, go back to Connecting to the camera.