Build a C# “Zivid Hello World” Application in Visual Studio on Windows
This tutorial shows how to create and develop a C# application with Zivid in Visual Studio 2022. Note that the steps may vary slightly for other versions of Visual Studio.
Requirements
Note
Zivid uses .NET framework version 4.5.2. For more information, see .NET framework version.
Instructions
Create a new project
Run Visual Studio, then click Create new project, or File → New → Project…. Choose Console App for Visual C#.
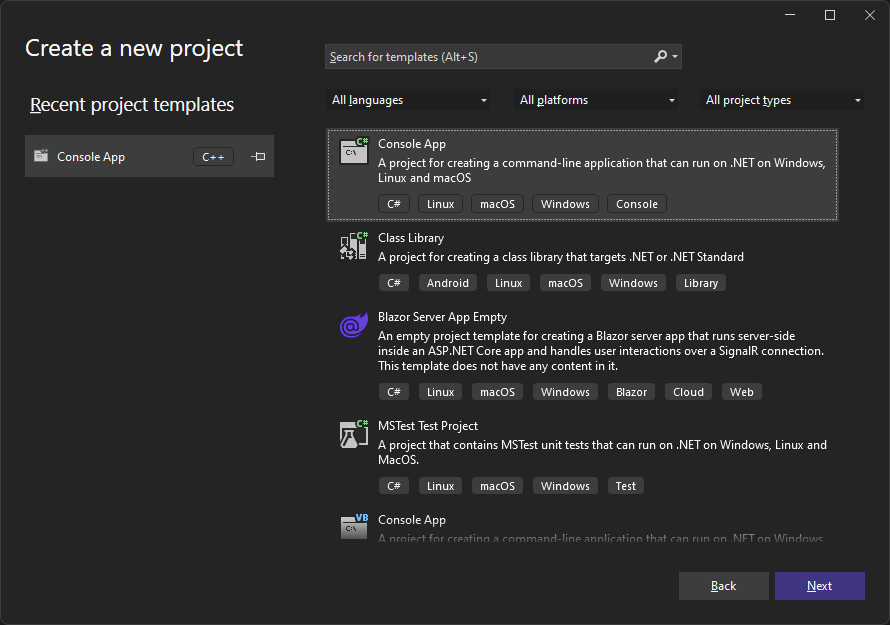
Then, add your project name, location, and .NET version. In this tutorial, we will use the following file name and location:
Location |
|
C# file name |
|
.NET version |
|

Add the main C# code
Replace the code in ZividHelloWorld.cs with the following code snippet:
using System;

namespace ZividHelloWorld
{
    class ZividHelloWorld
    {
        static int Main()
        {
            try
            {
                var zivid = new Zivid.NET.Application();
                Console.WriteLine("Hello World!");
            }
            catch (Exception ex)
            {
                Console.WriteLine("Error: " + ex.Message);
                return 1;
            }
            return 0;
        }
    }
}
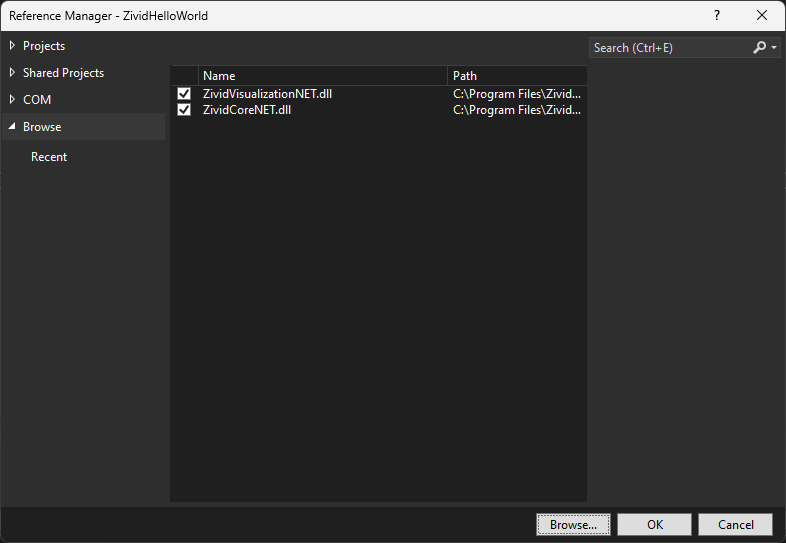
Add reference to Zivid .NET API
We must add a reference to the Zivid .NET API to run the code sample.
Right-click on your project in Solution Explorer, then click Add → Project Reference… → Browse.
Navigate to C:Program FilesZividbin and add ZividCoreNET.dll and ZividVisualizationNET.dll.
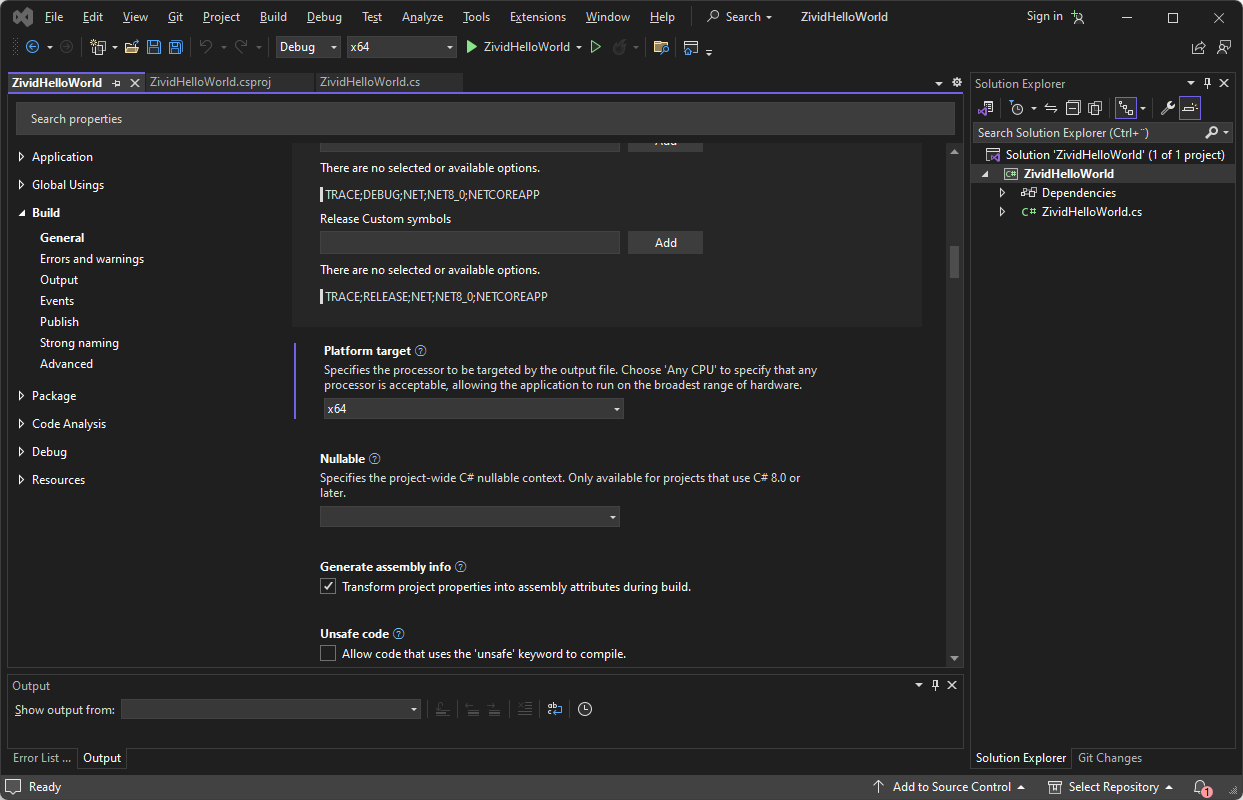
Select the correct platform target
Right click on your project again, then click Properties.
Under Build → General, change Platform target to x64.
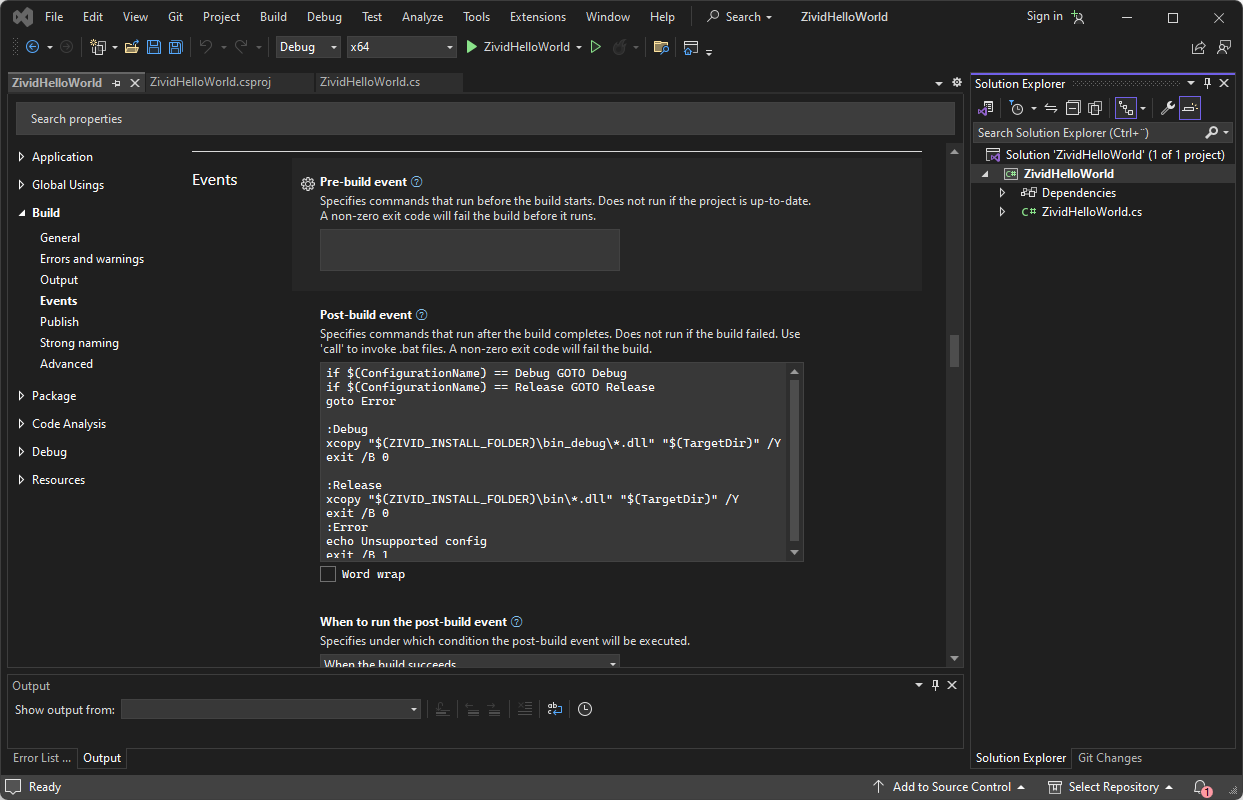
Add post-build event command line code
In the same Build page, under Events, add the following code block to the Post-build event event command line:
if $(ConfigurationName) == Debug GOTO Debug
if $(ConfigurationName) == Release GOTO Release
goto Error

:Debug
xcopy "$(ZIVID_INSTALL_FOLDER)\bin_debug\*.dll" "$(TargetDir)" /Y
exit /B 0

:Release
xcopy "$(ZIVID_INSTALL_FOLDER)\bin\*.dll" "$(TargetDir)" /Y
exit /B 0
:Error
echo Unsupported config
exit /B 1
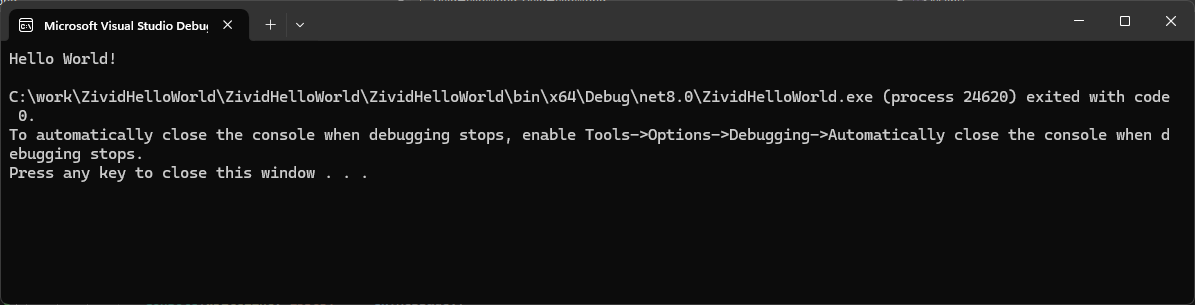
Run the program
Now we have set up and configured everything. Run the program by pressing F5 key.
To continue developing in Zivid and C#, check out Zivid .NET API reference and the tutorial to Build C# Samples using Visual Studio on the next page.
Version History
SDK |
Changes |
|---|---|
2.12.0 |
Remove support for Visual Studio 2017. |